
| Learn more about Studio Acoustics in Joe Albano's full course at AskVideo here. |
In the last installment of this series, I talked about mid-and high-frequency reflections, and how they can color the sound we hear in a room. Phase interference between direct and reflected sound causes Comb-Filtering—the balance of the various harmonics and overtones that make up a complex wave is altered, changing the tone, or timbre, or the sound. A little of this is normal—it's part of the natural ambience of any enclosed space, and it contributes positively to the “liveness” of the room. But too much of it can interfere with the ability to record and mix properly in that space.
Both short and longer reflections can cause potential problems. In a control room, too many strong, short reflections at the mix position—the “sweet spot”—can color the sound in the room so much that the mixer can't reliably make decisions about tone, balance, panning, and artificial ambience, and be sure whether he's reacting to the needs of the audio or the colorations of the room itself. Besides short reflections, and the resulting comb-filtering, longer reflections can also make their presence known. If a room has parallel reflective surfaces, and a mid or high frequency wave begins bouncing back and forth between those surfaces, this can set up a “ringing” tone, called a Flutter Echo, which can be problematic in both recording and mixing situations.

Fig 1: The path of a Flutter Echo between two parallel reflective surfaces.
Audio Example 1 A (somewhat exaggerated) Flutter Echo:
Foaming at the wall
To avoid this, most studios install absorptive foam panels on the walls (and ceiling). These will effectively absorb frequencies from about 1 kHz (1000 Hz or so) up, preventing both excessive timbre-altering comb-filtering from very short reflections, and problems from longer reflections, like Flutter Echo. You've seen these products—they're usually contoured cuts of dense foam, typically wedge-shaped (the wedges provide more square footage of absorption in a given area, increasing the effectiveness of the panels).
.")
Fig 2: Some typical absorptive foam panels (courtesy of Auralex.com).
As I alluded to, they're not effective at low frequencies—the lower frequency limit of absorption is based on the density and thickness of the panels, which typically range from about 2 inches (the most inexpensive options), to 3 or 4 inches. (By the way, that old-fashioned remedy—eggshell cartons—is really not effective for this purpose.)
A key consideration is where to place the panels. You don't (and probably couldn't even if you did) want to cover all surfaces with them, as that would deaden the room too much in the upper mids and highs. The best locations for these panels are at the spots where the strongest, most potentially problematic reflections would first develop—where the direct sound first hits a room surface, setting up the reflections to follow. These will likely be areas fairly close to the sound source—in a control room that would be the monitors. There's a trick to determining the best spots to mount absorptive foam.
Another day, another (Physics) law
Sound waves reflect off surfaces the same way way light waves do, and that can be used to our advantage. Both are subject to a law of Physics that describes reflective behavior—“The angle of incidence is equal to the angle of reflection”. What that means is that if a sound wave hits a reflective surface at a particular angle, it will reflect off that surface at the same angle, as shown in Fig 3.

Fig 3: The angle of incidence is equal to the angle of reflection.
We want to find the spot on the wall where a strong reflection from a monitor speaker bounces off and hits the sweet spot, and we can do that with a technique called the “mirror trick”. Since sound reflects the same way as light, the trick is to have one person (the “listener”) sit in the mix position—the sweet spot—and another hold a mirror up to the wall, usually in the front, between the monitors and the listener. When the listener can see a speaker in the mirror, then that spot is the source of a potentially problematic reflection coming back at him. Applying foam paneling there will absorb that reflection, without having to put it up everywhere. If you apply this technique to both walls (and ceiling), you can probably eliminate the worst of any problem reflections, with minimum effect on the room's overall “liveness”.

Fig 4: The “mirror trick” applied.
Reflect on This
When applying absorptive material, it's important to make sure that the room isn't deadened too much. Since the usual foam panels will affect the mids and highs, if it's overdone, you could end up with an overly-dry, overly-dark-sounding space—music recorded in such a space would be lacking in depth, and songs mixed in one would likely not travel very well. There are many different ways to go about getting the best balance between absorption and reflection, and different approaches may be used for live recording spaces and control rooms/mix rooms.
In the live, recording, area, many studios utilize a series of alternating panels on the walls. Often these are two-sided (or even three-sided), one side being reflective, and the other absorptive—depending on the job at hand, these panels may be rotated appropriately. So, for a voiceover session, the absorptive sides may be employed, while for tracking a string section, the live sides may be put to use. For recording an ensemble, one area of the live room might be made mostly absorptive, to avoid leakage from amps and the like (with the help of gobos, or baffles), while another area might be set up to be more reflective, like for a horn section, so the mics will capture some of the beneficial natural ambience.
Live / Dead
In a control room, this type of technique can also be used. But there's another common approach, which involves eliminating most of the short reflections which develop in the front of the room, and leaving the longer ones from the back of the room to contribute the necessary ambience, to insure a proper degree of “liveness”. The approach is called Live-End/Dead-End, or LEDE™(which is actually a trademarked term). Absorptive materials are placed around most of the front of the room, walls and ceiling (except for the control room window, of course), going back as far as the mixer's position. This insures a clean, direct path from the monitors to the sweet spot, free of excessive comb-filtering. Past that, the back of the room is left live, to provide the necessary ambience. The reflections from the rear are weaker, and they'll hit the engineer's ears from behind, making them less likely to interfere with the clarity of the direct sound.

Fig 5: A diagram of a control Room with a Live-End/Dead-End type treatment.
Scattershot
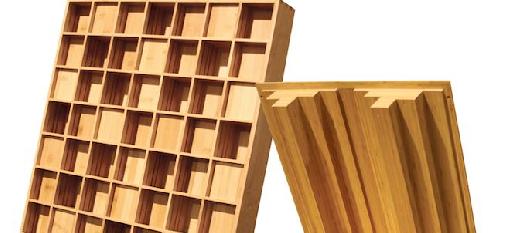
Often, the reflective rear walls are treated with special reflective surfaces, to enhance the evenness of the ambient sound. These devices are also commercially available—they're called diffusors. They consist of a series of uneven surfaces that scatter—diffuse—the reflected sound effectively, to avoid echoes, and insure a more even distribution of ambience through the room.
.")
Fig 6: Some commercial diffusor panels (courtesy of Auralex.com).
They're often designed with the aid of computer calculations, to optimize the evenness of the result, and they can be quite costly. But you can construct your own diffusor, even without resorting to math. A bookcase, with a lot of different sized books of different depths, may not be mathematically ideal, but it can provide some diffusion. A curved rear wall can also diffuse sound, but it must curve outward (convex), not inward (concave). A concave surface will act to focus sound (like a parabolic mic) to one spot, which would be very bad. A convex surface, on the other hand, will spread out the reflections, diffusing them nicely (Fig 7).
 A concave rear wall would focus reflective sound—highly undesirable, especially if it's focused at the engineer/mixer; Bottom) A convex rear wall will scatter reflections outward, providing welcome diffusion.")
Fig 7: Top) A concave rear wall would focus reflective sound—highly undesirable, especially if it's focused at the engineer/mixer; Bottom) A convex rear wall will scatter reflections outward, providing welcome diffusion.
Near & far
Besides room treatments, near-field monitoring can also help isolate the direct sound from the room's contribution. This where the mixer's sweet spot is no more than three feet from the monitors (which are the same distance apart). This helps the direct sound to arrive at the engineer's ears, and be processed subconsciously, before any room contributions arrive, and since the room reflections are coming from a greater distance, they'll be that much weaker, and less likely to color the sound significantly when they do arrive.
If you apply all of this to a room, chances are you'll make a significant improvement in the quality of sound within. And that brings us to the final topic of this series, keeping the sound inside the studio and the sound outside the studio separate! I'll cover soundproofing considerations in the next (and last) installment. See you then...
| Learn more about Studio Acoustics in Joe Albano's full course at AskVideo here. |

Discussion
Want to join the discussion?
Create an account or login to get started!