
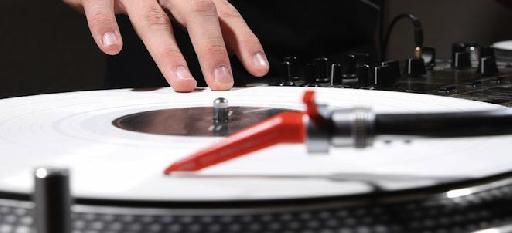
The art form of scratching has been around for several decades and first came to prominence shortly after the birth of turntablism in the mid 1970s. With the emergence of digital DJing however, it seemed like scratching would die a quick death. Luckily this wasn't the case as many jog wheels on today's DJ Controllers are more than capable of producing that vinyl scratch sound. So where do Ableton DJs fit in? Well if you have one of these aforementioned DJ controllers or indeed a turntable itself, then you can easily incorporate scratching into your Live sets. In fact for beginners, Ableton possesses a unique advantage over solely using a jogwheel or turntable type setup. Let's take a closer look.
Now we aren't going to get into the ins and outs of scratching, but if you are a relative novice who wants to add professional sounding scratches to your sets then you may very well find this trick useful.
Mastering scratching take a lot of practice, most notably the ability to coordinate your 'record' hand (which does the scratching) and your mixer hand (which uses the crossfader to cut the audio in and out to tighten up your sound. Using the crossfader creatively also adds more rhythmical patterns to your scratches. If mastering this seems too daunting to start with, there is a workaround in the form of Ableton's clip automation. By using a dummy clip in Live, you can draw volume envelopes beforehand to automatically act as the crossfader while you scratch live. Now before traditional turntablists shout insults at me, I'm not advocating this should replace the skill involved in using the crossfader. However it is a great way to achieve great sounding scratches by solely using your record hand, leaving your other hand free for adding FX, finger drumming or even waving at the crowd.
Setup
Firstly it is important to be set properly for scratching. On my controller I will have my hot cue set to the start of a clean isolated sound, usually a vocal accapella. It is also a good idea to set the other cue buttons on your controller to the start of other suitable sounds so you can switch between scratch sounds on the fly. (I use the Reloop Beatpad as its jogwheels excellently replicate the sound of vinyl manipulation when touched. Also its integration with DJay and Spotify means that I now have access to 20 million songs.)
In Ableton, along with my normal audio /MIDI tracks in my set, I like to create a separate track to host the live scratch sound. To route the audio from your scratching source to this track in Live you will need an audio interface with at least two inputs. Connect the outputs of your turntable/controller to these inputs and configure the I/O settings as shown below and record enable the track. You should now hear your scratch audio coming through to Live.

You will then need to route this audio to another track on which the 'crossfader' clip can be placed. Duplicate the track and set the new track to receive the audio from the original track. Set 'Monitor' to 'In' on the new track and 'Monitor to 'Off' on the original. Next place a clip with no audio on the new track and set the loop to four bars.

Launch the clip and start to scratch. The audio won't be affected as the clip's volume envelope hasn't been touched yet. We will soon change that. In the clip's Clip View click the envelope button. From the Envelope pane choose Mixer and Volume from the relevant drop-down menus. We will start off by drawing in a simple pattern. Use the pen tool (the keyboard shortcut is B) to cut out the volume every 1/8th note. Launch the clip again and scratch in time with the beat (a forward scratch every 1/4 note is a good starting point) The audio will now drop out every time you move the jogwheel back to the start position as it would if you were to use the crossfader to cut out the sound in this way.

Next duplicate the clip but on this version cut out the volume every 1/16 note on the clip. Launch the clip and start to scratch, this time with a forward scratch every 1/8 note. You should be left with a very quick, tight scratch sound.

Same scratch with 16th note automation:
You can hear from the above examples that the second clip is a lot tighter and cleaner sounding.
Experimentation
In order to get the best sounding scratches in your live set, you will need to do some experimentation beforehand to see which envelope patterns work best with which type of scratches. For example, you could leave just the attack of every scratch so you get that stab scratch sound or perhaps let the sound last a bit longer to get a chirp scratch. You could also draw in combinations of scratches until you find the perfect fit. The world is your oyster.
Have a listen to your scratches without the dummy clip and try to determine which parts of the sound would be best left in and which would be chopped out. When finished you should have a list of clips that you can launch on the fly while scratching. Your crossfader hand has nothing else to do after all.
This is what a more advanced scratch sounds like with no automation:

This is what the same scratch sounds like with the automation as shown in the pic:
The possibilities are of course endless and with bit of practice and preparation, you can really use these 'scratch' dummy clips to add an extra dimension to your Live sets. As mentioned, it shouldn't be used as replacement for the crossfader but could be thought of as a performance enhancement tool or learning aid to becoming a scratching master.
Discussion
Want to join the discussion?
Create an account or login to get started!