
Programs like Ableton Live have made it easier to take an idea, improvise with it and record it into an arrangement. The challenge can be reversing this process and taking a completed work and readying it for performance. With this in mind, I have begun searching for creative ways to optimize my layout and workflow.
Although there are a vast amount of possible scenarios for building a performance setup, my personal set of main priorities break down to the following:
- Preparing and arranging backing material for playback
- Building flexible, processor efficient instruments and effect racks
- Automating system tasks to handle things I do not manually control
If you are curious about how to get started brainstorming building a performance setup. I recommend reading Preparing a Custom Live Performance Setup which I wrote previously.
Backing Material
At times I have found it challenging to find my role in the music that I was performing in an inspired way. If I included too much of the ‘studio’ into my set, the sound was polished but predictable and not always exciting to interact with. On the other hand, if it lacked the right amount of prearranged material it could appear less produced and unrefined.
A simple solution was to create more space by stripping down parts and sections of the backing layers, making the arrangement more spontaneous and less dense. I came to think of the piece as ‘additional instrumentalists’ rather than material that I simply played over.
Below is a list of several techniques I deployed:
- Non-uniform placement of clips in the timeline
- Backing material with dynamic transitions (i.e. arrangement builds up and then drops to minimal backing tracks- prompts me to interact with the arrangement and insures I stay on my toes)
- Audio events and envelopes not locked to strict, predictable grid divisions (creates another level of spontaneity and breaks up monotonous sections)
- Preprogrammed automation tasks to modulate parameters irregularly (unsynchronized LFOs, asymmetric envelopes and loop lengths, randomized follow actions)
Instruments and Effects for Realtime Expression
The instrument portion of my setup pertains to live instruments that I physically play on stage.
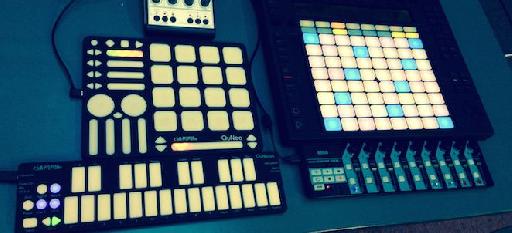
In an attempt to recreate my studio hardware setup, I mapped several MIDI controllers to software instruments in Ableton Live. Each controller corresponds to a specific instrument and is divided by the type of sound it produces. Much like having a discrete unit for each instrument, playing in this manner has helped me recreate my studio workflow without the need to drag all my hardware to every performance.
Limiting the functionality of each controller has helped me to make music-related movement correlate to intended sonic events whilst keeping the performance more intuitive and seemly less about browsing and banking through menus.
The breakdown of my controller relationship is as follows:


Sound Design Transformations
In an effort to make my sound design more performative, I often render short audio segments from my backing material to create multilayered sampler instruments. These in turn can be used to build custom sampler or drum racks to trigger both percussive and non-percussive sounds. I find this more flexible than triggering clips as I can create Macro mapped racks to control specific instrument and effect parameters that I play and manipulate live.


Ableton Live makes editing and loading audio into samplers an easy and straightforward process. Simply select the clip you wish to use in the session or arrangement view and drag it into a sampler or drum rack of choice. If the portion of the clip you want is part of a larger chuck of audio, split, crop or separate it and then consolidate the selection into its own audio file. If left unconsolidated, you will potentially be loading a larger segment than you intend to use and subsequently expend additional computer resources.
| Tip: Easily layer sounds in single drum rack cell by holding down command (Mac) or control (PC) while dragging in additional clips. This creates an instrument rack within a drum rack cell. Audio or midi effects can be added for additional control for each layer. |

System
The system portion of my setup denotes functions that control real-time automation and modulate device settings. Most of these processes run in the background and are not controlled by the performer on stage. They do, however, significantly contribute to shaping sound and managing configuration changes over time.
As an example, I use automation clips (dummy clips) to control auxiliary sends, mixer settings and interpolate between device parameters. Automating this process frees me to focus on playing live instruments.

To have the system launch automation clips, I experimented with using follow actions. Follow actions trigger clips automatically based on a probability ratio that controls two variables. Depending on how I set the ratio determines the level of predictability of the order that clips are launched. This can range from orderly to random. Based on tempo locked time base divisions, the time control dictates when the trigger action will happen. Follow actions assigned to automation clips can then be linked to mixer, instrument or device controls.


Whist this technique suffices for some tasks, it is not flexible or efficient enough for others. Writing or recording envelope automation data for each parameter can be tedious and time consuming across an entire performance. Without careful planning, parameter changes may jump from value to value rather than transitioning smoothly.
Upon further investigation, I uncovered a free midi remote script, Clyphx by NativeKontrol. Clyphx extends Ableton Live’s functionality by allowing the user to program actions or a sequence of actions. One of the most useful features is the ability to create and recall snapshots of device and mixer parameters. I was able to smoothly interpolate between snapshots and set interpolation times on a clip-by-clip basis.

To take this a step further, I incorporated follow actions to sequence and trigger clip launch by embedding the snapshot action script in automation clips. Launching the clip sets the action into motion; in this case, I applied it to recall Push’s scale and mode changes. My findings reveal Clyphx to be a powerful extension to Live’s functionality and a brilliant tool for managing automation tasks.
Wrap Up
It is not necessary for the above mentioned suggestions to be extremely radical or overtly dramatic. Sometimes a little goes a long way. The thought process behind such techniques is beneficial because it helps us to think about ways to make the overall setup seem less static while increasing the longevity and repeatability of a performance. Even after performing a set multiple times, I was pleased to find each instance unique and exciting.


Discussion
Want to join the discussion?
Create an account or login to get started!