
Cubase has supported video playback for quite a while, though it's only in the last few years that OS X and video format technology has really settled down to the point where it's now relatively bulletproof to run decent resolution movies alongside a weighty Cubase project. The increasing power of computers has helped too of course, with modern multicore machines with plenty of RAM making everything much smoother. There's more to it than just opening a movie in Cubase though, so let's look at some of the things you'll need to know to get the best out of your system for scoring and composing to picture.
Set the preferences
In Cubase's Preferences you'll find a video section. This is very straightforward and lets you specify whether the audio portion of a video file will be split off on import. This is often useful because it lets you mute the audio track or edit it. It doesn't actually affect the video file on your hard drive so if you want to include any edited soundtrack as part of that file, you will have to choose File > Replace Audio in Video File when you're done, or export the audio separately and reconnect it with the video in your video app like Final Cut or Premiere, which is probably the better solution.

In Cubase's Device Setup menu, there's a Video Player section where you can configure the way video is handled. You will notice that video is set by default to play back in a window on your computer screen, which is usually what you'll want it to do. There's also an option to send it out over FireWire if your computer has FireWire, so it could be connected to a video camera and subsequently to a TV monitor. This gives a more conventional kind of setup where the computer screen is for Cubase and the TV screen is for the video.
The playback section lets you boost video at the possible cost of reducing audio performance, but you may not want to do this. After all, it's more important that your plug-ins run well than that the video displays at the highest possible quality when it's inside Cubase. A variable video quality menu lets you choose 100% or 75% playback quality. Again if your system isn't supremely powerful, it's safe to set this a little lower because you'll still see the video just fine.

Import your video
You can drag and drop a video into the Project area or choose File > Import Video File. Any compatible format should be enabled (not greyed out) and any QuickTime-based format like .mov, .mp4 or .m4v should be fine. If you have video files you need to import that aren't available in this menu, you will need to convert them to a more compatible format using one of the many free video conversion apps available. Sometimes, digital camera raw files are in MPEG stream formats that can't be imported without conversion. The dialogue menu here will give you information on the format of the file.

There's a handy trick here to do with frame rates. If your imported video displays a red error message saying there's a frame rate mismatch, go into the Project Setup window and in the Frame Rate box, click the Get From Video button. This should automatically match the project frame rate to your video.

If your video doesn't display in a new window, choose Devices > Video player. The video window can be resized by dragging it in real time, and there's a useful quick menu available by right-clicking on it that lets you change its size, aspect ratio and playback quality settings easily. Note that although you can cut video using the scissors tool, there's only one video track allowed per project so it's not really meant for proper editing.

Write some music
How you proceed with writing will depend on what your aims are. If you are working to a strict brief as part of a larger project, you will probably need to make sure everything syncs up so that when it is exported it's easier to put back together. The musical timebase that you use will need to conform to bars and beats because you will be programming MIDI using a click track and making edits to audio, and these must usually stick to Cubase's musical grid. However you can switch to viewing a Timecode or alternative timebase by right-clicking on the ruler at the top. There's also a button on a video track to display frame numbers, which is helpful for linking up hits and beats with onscreen action.

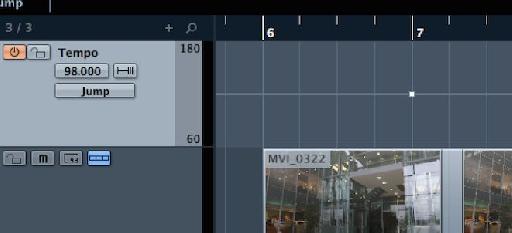
You can compose as normal over video by recording audio and programming MIDI or using loops just as you would write any music, only with reference to the video playback. One thing that's used a great deal here is the Tempo Track. When working on a movie or TV show, different scenes require different music at different speeds. Rather than having 30 or 40 Cubase projects, one for each scene, you can use tempo automation to have the project alter its speed between scenes. Go to the Project menu and choose Add Tack > Tempo.

The tempo track can be automated by using the Pen tool to set the speed at different points and obeys the snap settings. So to change from 120 BPM in one scene to 98 in another, create these two values at the relevant locations in the tempo track.

That technique is fine for snapping straight from one tempo to another, but you can also transition more gradually by clicking on the transition type menu and choosing Ramp instead of Jump. This allows you to slow down or speed up gradually which can be very useful for getting more organic results in a scene.

When you export at the end, your format choices depend on your target system. You could simply export an audio mixdown of all the tracks and give the editor stereo files to work with. Or export an OMF file and give them the raw data, though this can be fiddly to work with. A good technique is to group tracks into batches of stems'"say, drums, synths, strings and so on, inside Cubase's mixer. Then choose an Audio Export but select the Batch Export option, selecting the groups. This will give the editor a bunch of stems to work with so they can decide the relative balance of the groups of instruments in the track, but not have to mix every single track element.


Discussion
Want to join the discussion?
Create an account or login to get started!