Cubase comes with HALion Sonic SE, and Steinberg also makes the full version of HALion that you can buy separately. In this workshop we’ll be focusing on the bundled version and the orchestral sounds that come with it and that you can install using the Download and Library manager apps that come with your install of Cubase. Although there are many fine orchestral libraries out there, including some made by Steinberg, it’s quite possible to get lush, verdant string parts for your tracks using the sounds that come with Cubase. Let’s explore how.
Getting Started
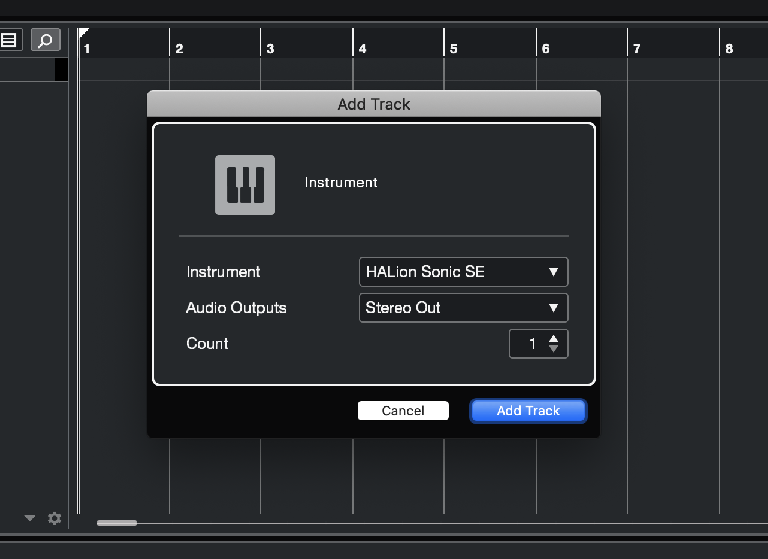
Begin with a blank or existing project depending on what stage you’re at, and add an Instrument track, choosing HALion Sonic SE from the list of available VST instruments. You’ll need to make sure the instrument’s content pack has been installed using the Download manager application beforehand.
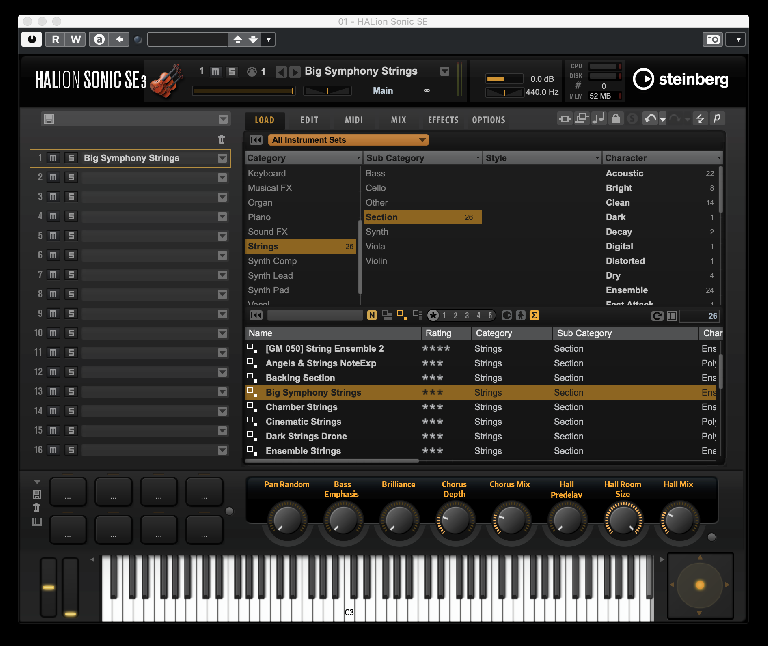
Your Select Content Set menu provides access to all available libraries and if in doubt, select “All”, which will show every sound that’s installed on your system. Use the columns to filter the categories of sound to find Strings then from the Strings menu, choose a patch. Here we have gone with Big Symphony Strings which will give us a good starting point to begin developing our sound. Record a part - preferably for this patch, a series of chords, which will help us to get the richness of sound we want to end up with. You can hear that straight out of the box, this patch is a little dry and lifeless.
Get Busy
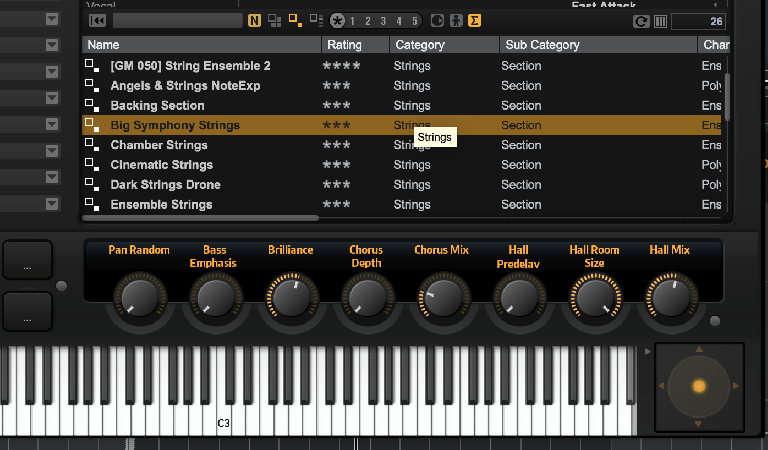
HALion Sonic SE has some built-in, pre-assigned effect controls that change based on the preset that you load. Here they can be useful, starting with a random pan amount which you can use to introduce some stereo variation to the strings. Used subtly this can be effective, though you might not want the strings panning around a lot, or indeed all the way through a track, so it can be best used for shorter passages of strings. Also we will do some manual panning shortly in conjunction with another string trick, so we’re going to leave this off for now.
The Brilliance and Hall reverb controls can be used here to dial a little more shine and depth into the strings, again probably used sparingly since the Brilliance knob introduces quite a lot of top end when pushed hard. It’s probably advisable to avoid the Chorus effect for this particular sound since it adds a slightly psychedelic character which isn’t particularly what we’re going for in this case. Here’s the passage with a little of each of the aforementioned effects applied. You can hear that it’s already somewhat richer and more refined, with some more stereo space introduced by the reverb with its Size set to the higher end of the scale.
Hearing Double
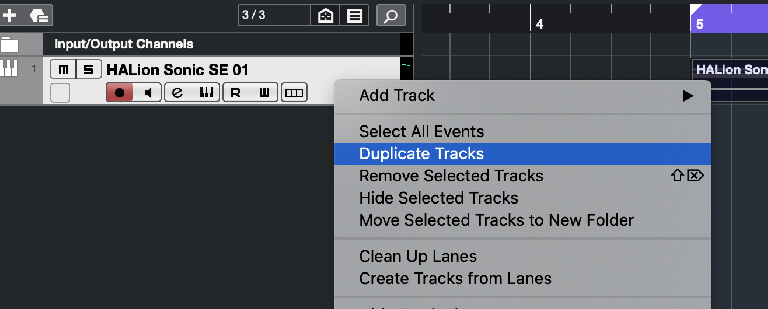
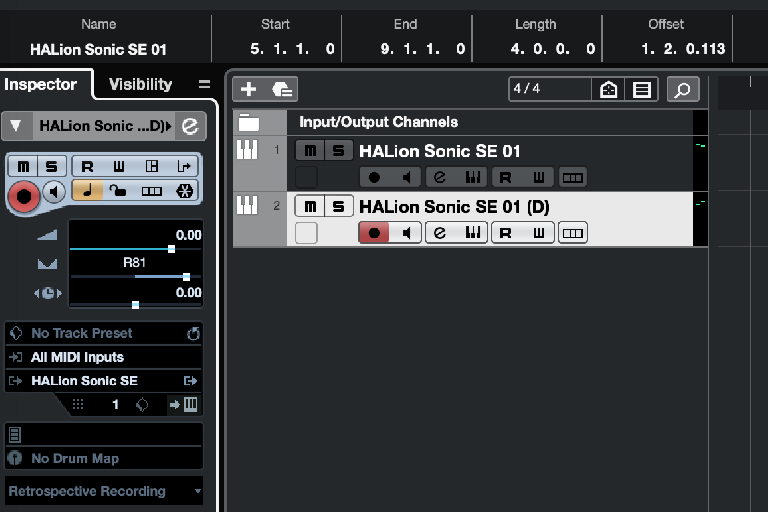
Now let’s employ the classic trick of duplicating our track to create a fuller sound. Right click on the Instrument track in its header area and from the menu, choose Duplicate Track. Cubase will create a new instance of the plug-in with identical settings.
Initially all this does is make things louder since you have two copies of the same thing playing at the same time, so we want to mitigate that. Rather than just changing volumes, let’s be more creative. Pan the first track quite hard to the left, and the new duplicated track the same amount to the right using their panners in the Inspector panel for each. You can hear that the stereo field is now more fully occupied by the strings though they’re still a little loud, so it’s worth turning the fader of each channel down a little and by the same amount.
Group Together
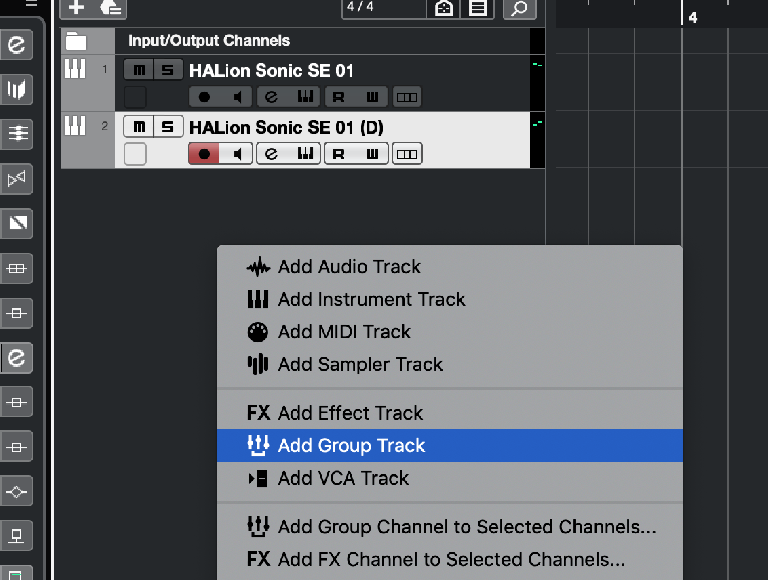
Now it’s time to add some dedicated effects. MixConsole allows you to easily create a bunch of inserts on one channel and then drag and drop them onto another to instantly duplicate all settings, and that’s one way to go. But a more elegant way is to create a group channel for the two sounds, or indeed for more than two channels if you are mixing something like backing vocals or drums with many component tracks. Right click in the Track area and from the menu select Add Group Track. In the resulting window, stick with the default stereo configuration. Add a custom name if desired.
Open the Edit Channel Settings for the two string tracks or go to their mixer channels and locate the Output Selection menu. For each one, select the String Group channel as its output. Now you can add inserts and perform other changes like automation or EQ on the group track and have it apply to both string parts at once.
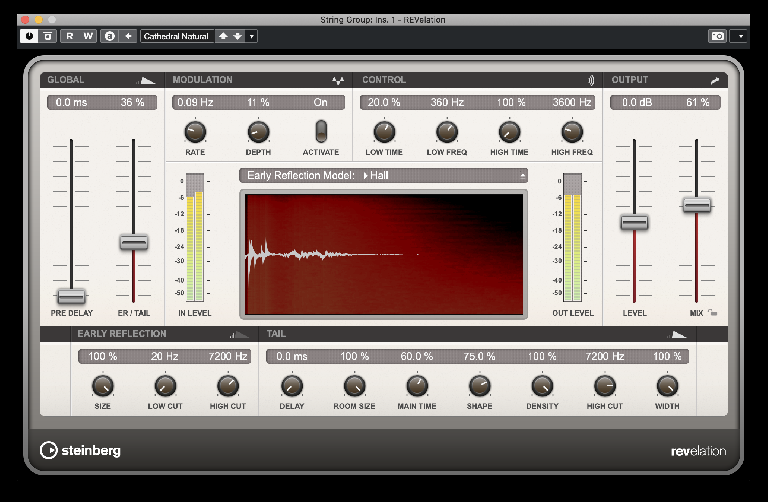
In the Group Track’s inserts area, click to add an effect. Here we have selected REVelation, Steinberg’s excellent reverb plug-in and chosen a preset called Cathedral Natural. This is quite large by default, so we can turn its Tail and Mix sliders down (plus make whatever other tweaks you want) to back it off a little. This gorgeous reverb immediately brings an air of class to our string sound.
Final Tweaks
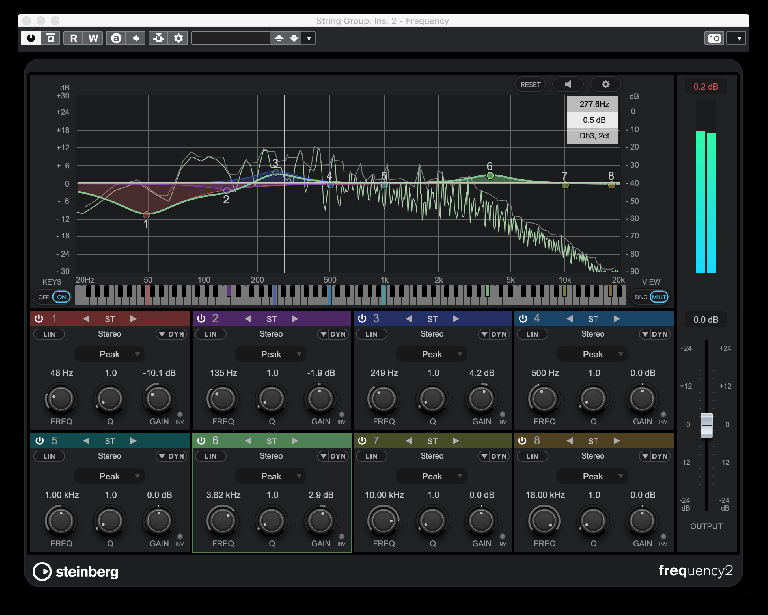
The only thing still grating slightly at this point is that our strings sound a little heavy in the low end, especially if they are going to have to sit as part of a larger mix later on. You could do this later but let’s try it now. Returning to the Group Channel’s Inserts area, load an EQ module. Again you could do this in its Channel Settings window as well. We add an instance of Frequency, Steinberg’s pro EQ processor.
You’ll have to do this to suit your ears, but we have tweaked the EQ so that we take out some of the bottom end but also slightly boost the lower and upper mids. This has the effect of taking out some of the threat of the sound and giving it a more stately and bright character. Combined with the reverb, it’s now sounding really good. Compare it to the original, raw patch from the start and you night be surprised! These techniques work with many other virtual orchestral instruments too so they’re worth keeping in mind.


 © 2024 Ask.Audio
A NonLinear Educating Company
Discussion
Want to join the discussion?
Create an account or login to get started!