1 - Initialize The Instrument
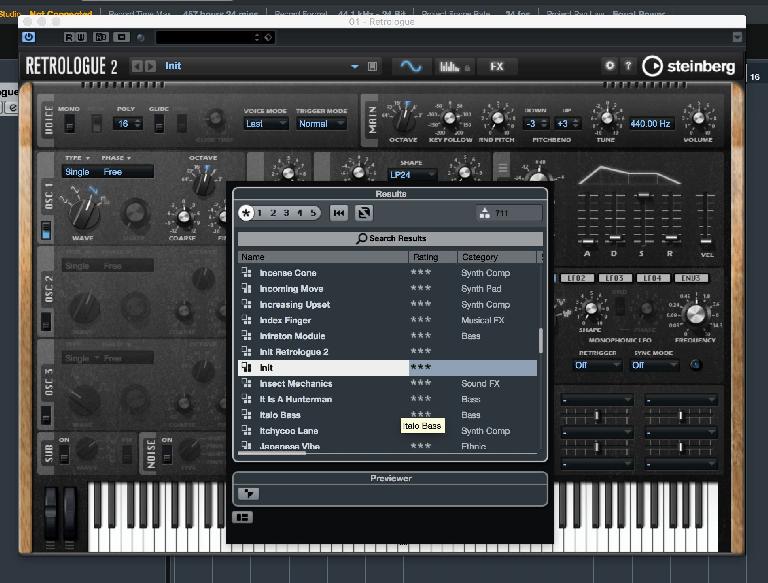
Load an instance of Retrologue 2, preferably on an Instrument track in Cubase. If it has loaded with anything other than a blank preset, click on the preset menu and navigate to the preset called “Init”. Load this and it will initialize the synth, clearing out all the settings and giving you a blank template. If you play the keyboard you will find you now just have a single waveform.
2 - Tweak Your Oscillator
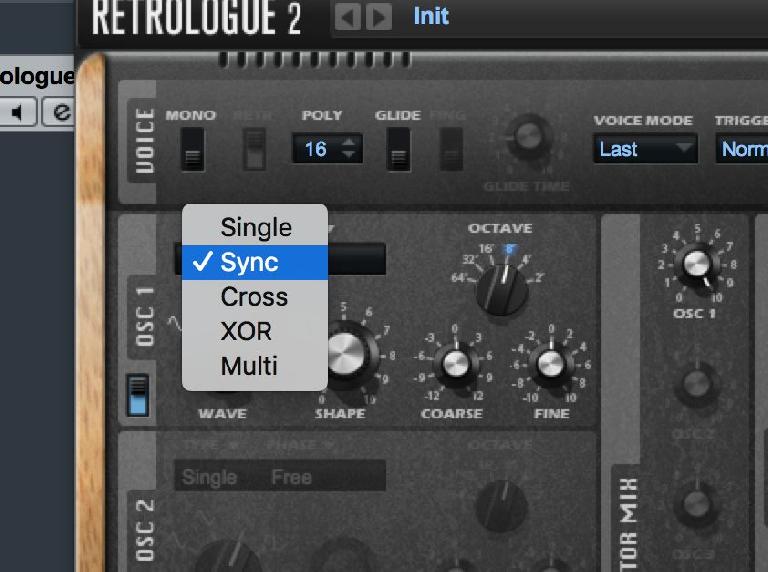
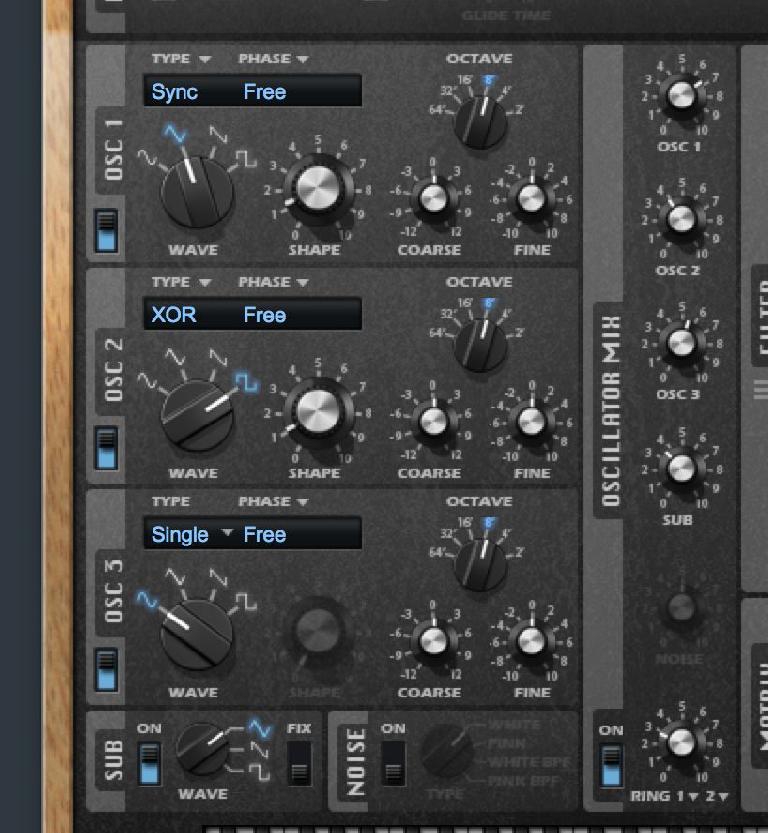
Along the left-hand side of the main screen you can see there are three oscillators plus a sub oscillator, but only the first one is currently active. Modify the waveform select dial for Osc 1 by selecting a different wave. You can also choose a new oscillator type from the Type drop-down menu, as shown here. Doing this may illuminate the Shape dial, which can then be used to fine tune the waveshape. The Octave and coarse tune dials can be used to change the pitch, and the fine tune dial to detune in smaller increments.
3 - Add More Oscillators
Taking the things you learned playing with Osc 1, now switch on Osc 2 and dial in some new settings. You will find that you can very quickly fatten up the sound by creatively changing the octave, tune and shape controls for up to three oscillators. To top it off, try switching on the Sub oscillator to add some weight at the bottom end. Using the oscillator mix section to the right, you can blend all four signals and also switch on a ring modulator at the base of this column. So far this is all quite straightforward stuff and should already sound pretty cool.
4 - Shape Your Sound
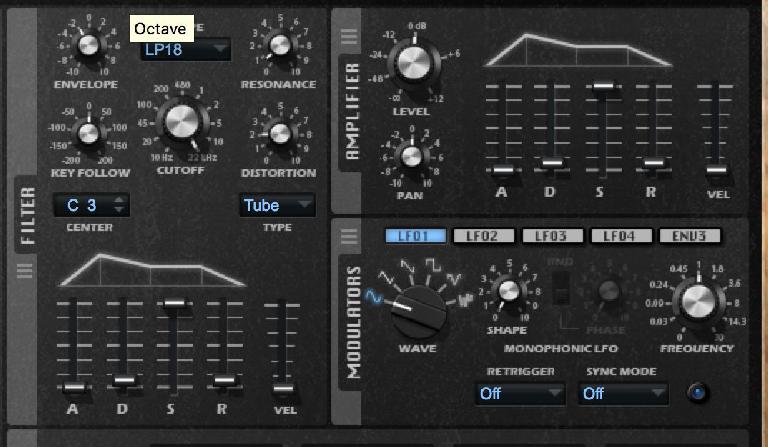
Moving to the right, you’ll find a filter section. Clicking on the filter type menu lets you select from a decent range of available filters and turning the envelope and cutoff dials will let you “round off” the signal if you like. The Resonance and Distortion knobs can be used to increase sharpness and harshness in the signal, which can sound good on lead sounds. To the right of this are the ADSR controls which can be used to modify the duration, attack and sustain of the sound. For a lead sound, keep it nice and punchy. For pad sounds, you might use this to slow the attack and increase the release times. Underneath the filter is a filter ADSR section.
5 - Try Some Modulation
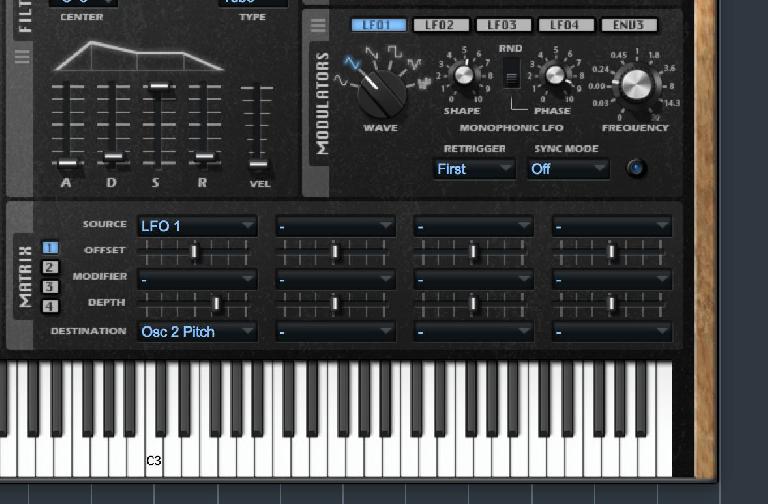
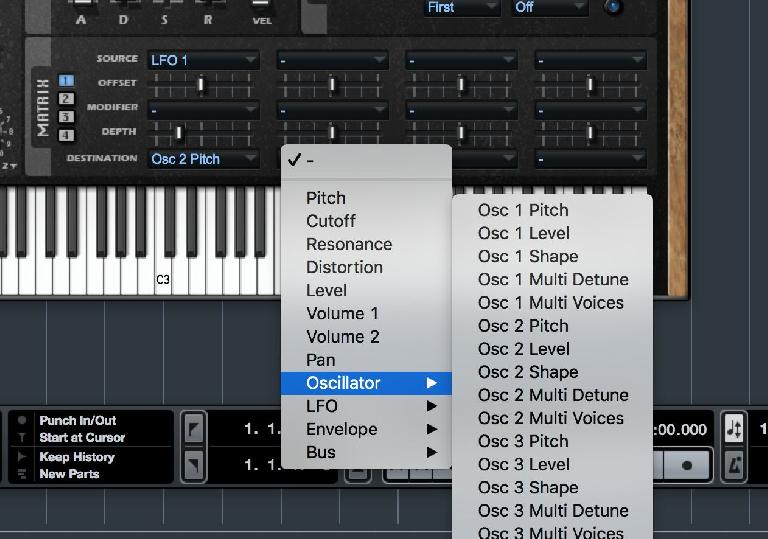
On the right are four LFOs plus an envelope section and these can each be set up individually. They are then assigned using the mod matrix underneath and the way this works is by choosing a source and a destination, then increasing the modulation send amount. Optionally you can also choose something to modify the modulation by clicking on the middle menu: this could be something like a mod or pitch wheel, or amp envelope. There are four banks of four mod slots for a total of 16 possible internal modulation routings.
6 - Here’s An Example
In this example I have chosen LFO 1 as my source and Osc 2 pitch as my destination. This means that whatever I program LFO 1 to do I can then send with variable amount to the pitch of Osc 2 using the Depth slider. Raised a little, this slider adds a small amount of modulation to the target parameter, in this case pitch. Raised more, it has more extreme results. You can assign almost anything as a destination, and this is the way to make patches more dynamic. By adding automatic movement to certain things like pitch or filter cutoff in some but not all oscillators, you can make parts of the sound move when a note is pressed. In the modulator control section you can change how an LFO retriggers and whether it syncs to tempo or not. Both of these can radically change the way the LFO affects the target parameter and thus the way the sound is produced. By moving the depth slider into negative values in this example, I have made the pitch descend on a note press rather than ascending, which sounds cool.
7 - Try Out The Arpeggiator
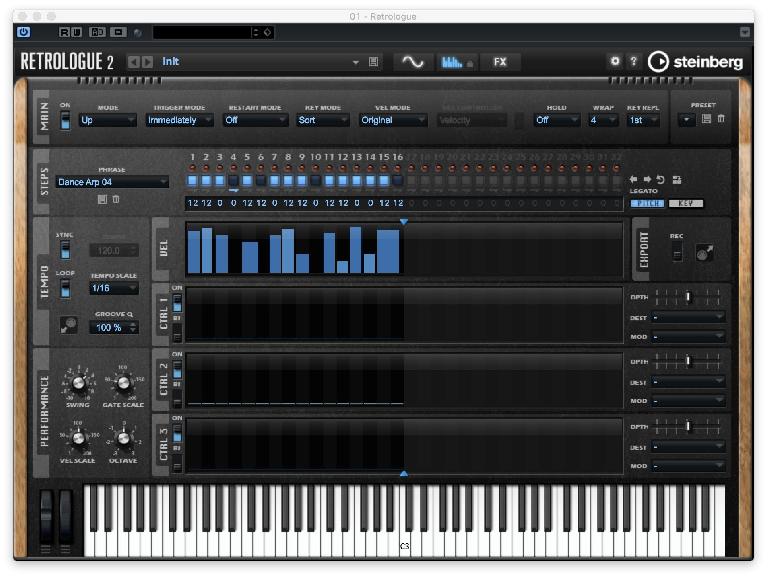
From the main toolbar at the top of the synth, click on the icon with little bars on it which will take you to the arpeggiator section. Switch it on from the top left and then choose some settings, or go to the Phrase menu and choose a preset which can be a good way to get started. The numbered blue lights represent the steps in the sequence and the bars underneath the velocity and duration of each step. Draw in new values freely with the mouse to change a sequence, and use the Performance section at the bottom left to introduce swing and control other aspects of the way the sequence plays back.
8 - Go Even Further
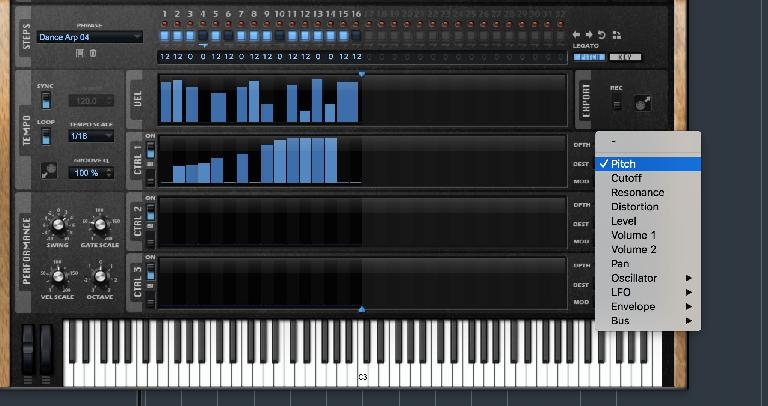
The arpeggiator also has three control patterns that can be used to send separate arp data to a number of modulation destinations. So if you turned one of these on and then from the right-hand side assigned it to a destination and set a depth or amount, you could easily make your sequence much more interesting. In this case, dancing up and down the octaves.
9 - Add Effects
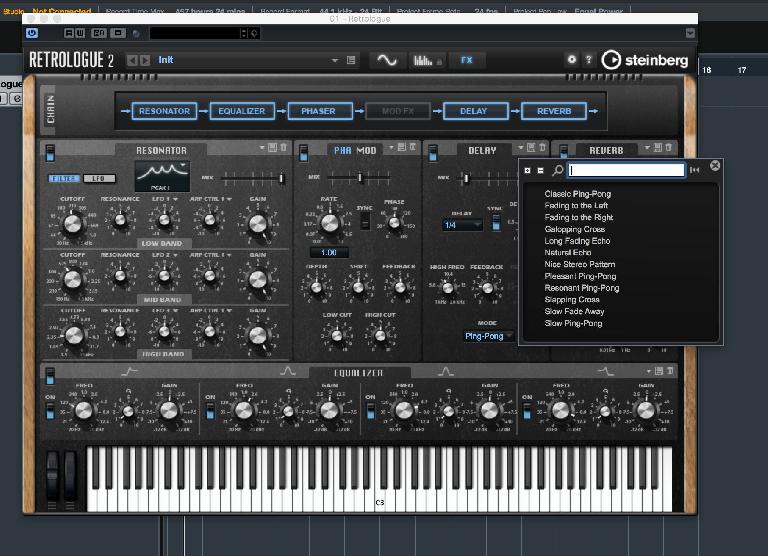
The final stage of the synth is a comprehensive effects section with five effects sections that can be used so try firing these up. Delay sounds particularly good on lead sounds and the Resonator can also be used for sculpting the sound even more. Helpfully, each individual effect stage has its own presets available so you can mix and match and save your own settings for each module, as well as saving the whole instrument setup of course.
Click here to download the sample preset made in this tutorial.
Learn more on Cubase and synthesis in The Ask.Audio Academy.


 © 2024 Ask.Audio
A NonLinear Educating Company
Discussion
Want to join the discussion?
Create an account or login to get started!