
Na ponta de hoje vamos explorar algumas das poderosas Logic, recursos de automação ainda subutilizados. Existem dois tipos de automação: Track-based e Região-based (HyperDraw - para não ser confundido com o Editor de Hyper). Logic possui um sistema de automação muito sofisticadas Track-base que lhe permite automatizar totalmente (ou alterar ao longo do tempo) configurações em praticamente todas as faixas de canal, efeitos e instrumentos. Isto pode trazer vida extra para suas mixagens. Vamos dar uma olhada em algumas dessas Automation Power User-dicas.
Passo 1 - Curvas ation Autom
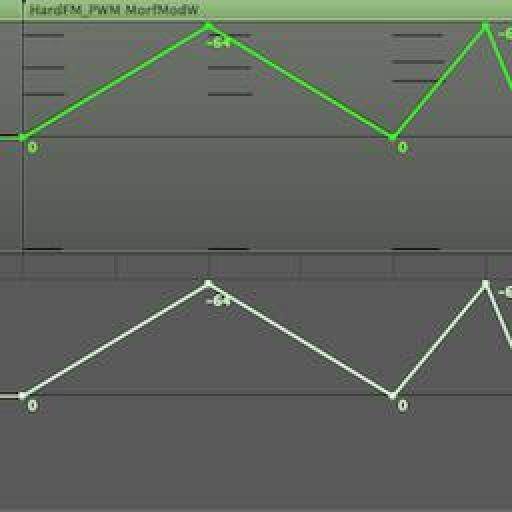
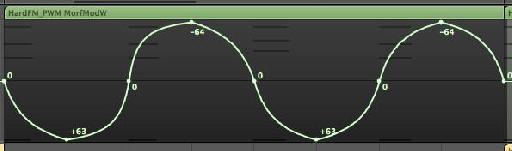
Logic has a dedicated Automation Curve Tool. In all honesty I never use it anymore. Once you master the key command to create your own curves, there really is no need to switch between the Pointer tool and the Automation Curve Tool!
1. Primeiro permitem a automação de menu local da área Arrange: Ver
2. Criar um par de nós. Eu estou trabalhando com a criação de um fade de volume suave nesta faixa.
3. Hold down the Shift and Control keys and position the Pointer tool over the line between the nodes.
4. Drag to the right or left to create an S-curve or up/down to create concave or convex curve.
Nota: Para redefinir a curva de volta para uma linha reta, basta segurar a tecla Control Shift e clique único na curva!
Passo 2 - Ajuste e inverter Dados Automação Pista
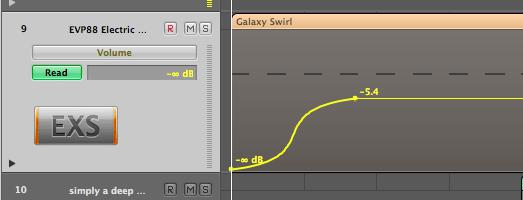
Então, você tomou muito tempo para desenhar meticulosamente em alguns complexos de automação de volume (por exemplo) e agora você quer ajustar rapidamente os níveis de parâmetros globais de vários nós ....
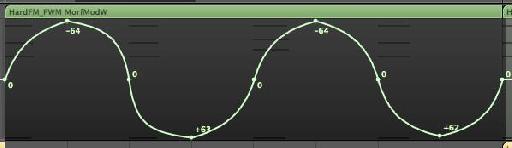
1. Mantenha pressionada a tecla Shift e arraste uma área de seleção sobre todos os nós que você deseja ajustar.
2. Arrastar um nó ou linha de mover todos os nós de cima, para baixo, esquerda ou direita .... ou
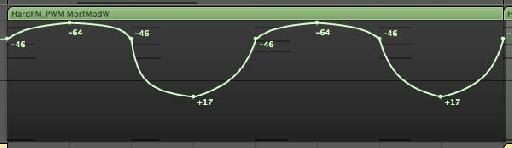
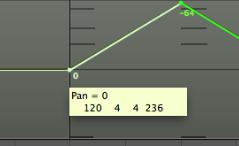
3. Arraste dentro da área de destaque (mas não em um nó ou linha) para inverter o valor de automação. Isso mantém todos os nós estáticos no zero e se move em nós mais extremo / - valores.
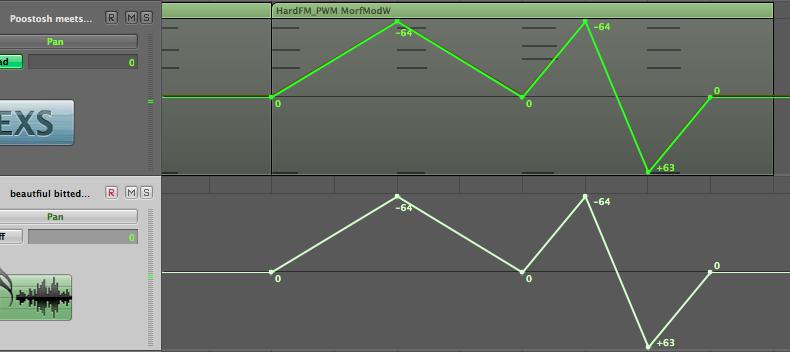
Experimentá-lo para ver a diferença! Na foto abaixo eu usei-o como uma maneira fácil de reverter as configurações do Pan na pista.
Passo 3 - Copiar dados para outro parâmetro de Automação
Muitas vezes você pode encontrar a automação para criar um parâmetro seria ou soar melhor quando aplicada a um outro parâmetro ou você gostaria de copiá-lo para outro parâmetro ... Neste exemplo, eu desenhei automação de volume nesta pista, mas eu gostaria de copiá-lo para automação pan na mesma pista.
1. Selecione a automação.
2. Mantendo o comando ou opção fundamental (alt), clique no menu de parâmetros de automação no cabeçalho pista.
3. Escolha Pan (ou o parâmetro que você deseja copiar dados de automação existentes) e solte a tecla Option.
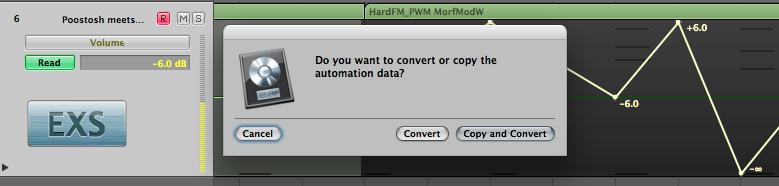
Uma caixa de diálogo oferece duas opções. Se você deseja manter os dados de automação existentes, bem como copiá-lo para o parâmetro selecionado, escolha copiar e converter.
Passo 4 - Copiando Automação trilha entre as faixas
É fácil copiar dados de automação faixa para outra seção da mesma faixa. Basta selecionar os nós e Option-arrastar a seleção para a posição desejada.
Muitos usuários acreditam que ele seja muito difícil de copiar dados de automação faixa entre duas faixas. Embora existam muitas técnicas para fazer isso, aqui é o mais simples (e possivelmente o mais negligenciado) maneira de conseguir isso.
1. Selecione a faixa de Automação e escolha Editar
2. Escolha a faixa que você deseja copiar o Track para Automação.
3. Escolha Editar
Passo 5 - Snap to Grid e Automação Compensação
Desenho em automação para posições específicas relativas à rede lógica pode ser complicado se você não usar as opções de snap automação.
A partir do menu Snap na área Organizar, escolha snap automação.
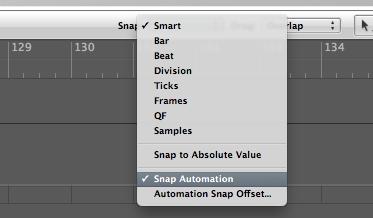
Criar, mover ou copiar os nós ficou muito mais fácil de ajustar à grade!
No entanto, você pode notar que a posição dos nós é compensado por alguns carrapatos. Clique e segure em um nó. No meu caso a posição do nó é compensada por -5 carrapatos.
Para alterar o deslocamento para outro valor ou removê-lo completamente para sua automação acontece exatamente sobre o valor da grade desejada, vá para o Logic Pro
Aqui você pode alterar o valor snap Offset para 0 ou outro valor tick based.

Interessado em saber mais sobre automação? Confira o

Discussion
I wonder why there is an automation "snap offset" and why it isn't 0 by default? Seems a bit weird to me.
The offset is there in case of latency caused by audio hardware or plug-in delays. There's also the case that if the project uses a lot of CPU power then it may have an affect upon Logic reading the automation in time.
Thanks for the kind words! If you have any topics you'd like covered in these blog posts do let me know :)
Rounik
Thanks for the useful tips.
Just wanted to precise that the inverting automation work only with the pan. I tried with plug-ins where there's a 0 value at the centre and still it brings all the nodes up/down but doesn't invert them like it works with the pan.
Also for some reasons, I often get inverted converted automation data depending what and where I'm copying. But that must be an issue on my side. :)
Cheers.
That is another great automation tip - and one of my faves. Thanks for sharing it!
There's even a way to edit, copy, move, stretch, etc track based automation without converting it to Region based automation, while treating it like a region!
Steve H has done a very cool TNT video (videos 29-31) on this here:
http://www.macprovideo.com/tutorial/logic9303tnt2
Thanks!
I've just tried to replicate this and it doesn't work with Mute or Solo (which are essentially either On or OFF only.
In fact, I only use it for Pan settings or parameter values where 0 is common...
I wonder if you convert the Track Automation data to Region Automation data (Hyper Draw) you should have more control over the Mute data in the Event List... it'll make it easier to edit...
Can you pop by the Logic forums here and post a new thread with this question? I'll be able to help out there more easily with pictures etc.
http://www.macprovideo.com/forum/
Thanks!
Want to join the discussion?
Create an account or login to get started!