
In today's tip we'll explore some of Logic's powerful, yet underused Automation features. There are two types of Automation: Track-based and Region-based (HyperDraw - not to be confused with the Hyper Editor). Logic features a very sophisticated Track-Based Automation system that allows you to fully automate (or change over time) settings on virtually all channel strips, effects and instruments. This can bring extra life to your mixes. Let's take a look at some of these Automation Power-User tips.
Step 1 - Automation Curves
Logic has a dedicated Automation Curve Tool. In all honesty I never use it anymore. Once you master the key command to create your own curves, there really is no need to switch between the Pointer tool and the Automation Curve Tool!
1. First Enable Automation from the Arrange area's local menu: View > Track Automation
2. Create a couple of nodes. I'm working with creating a smooth volume fade on this track.
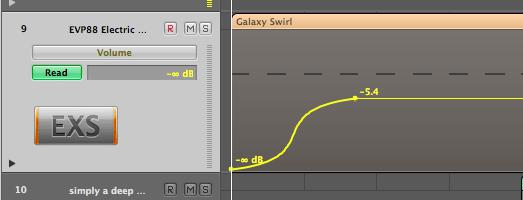
3. Hold down the Shift and Control keys and position the Pointer tool over the line between the nodes.
4. Drag to the right or left to create an S-curve or up/down to create concave or convex curve.
Note: To reset the curve back to a straight line, simply hold down Shift + Control and single click on the curve!
Step 2 - Adjust and invert Track Automation Data
So, you've taken a long time to painstakingly draw in some complex volume automation (for example) and now you want to quickly adjust the overall parameter levels of multiple nodes....
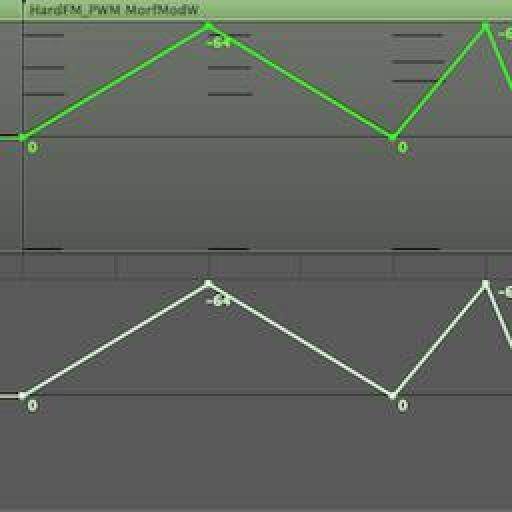
1. Hold down the Shift key and drag a selection area over all the nodes you wish to adjust.
2. Drag on a node or line to move all the nodes up, down, left or right.... or
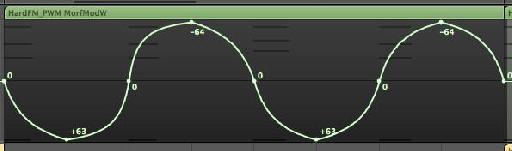
3. Drag within the highlighted area (but not on a node or line) to invert the automation value. This keeps any nodes on zero static and moves nodes on more extreme +/- values.
Try it out to see the difference! In the picture below I used it as an easy way to reverse the Pan settings on the track.
Step 3 - Copy Automation data to another Parameter
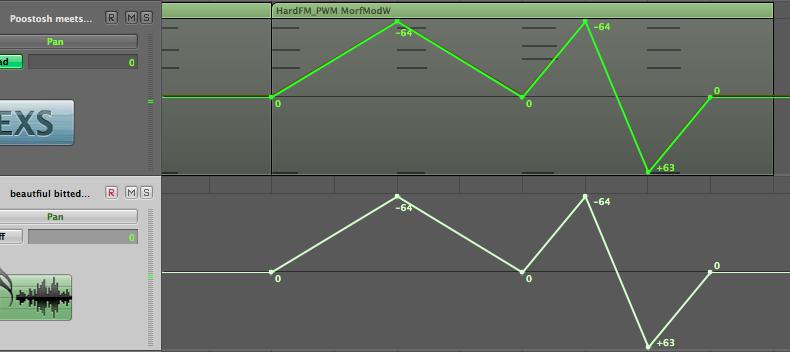
Often you may find the automation you create for one parameter would either sound better when applied to another parameter or you'd like to copy it to another parameter... In this example, I've drawn volume automation on this track, but I'd like to copy it to pan automation on the same track.
1. Select the Automation.
2. Holding down the Command or Option (alt) key, click on the Automation Parameter Menu in the track Header.
3. Choose Pan (or the parameter you wish to copy existing automation data to) and then release the Option Key.
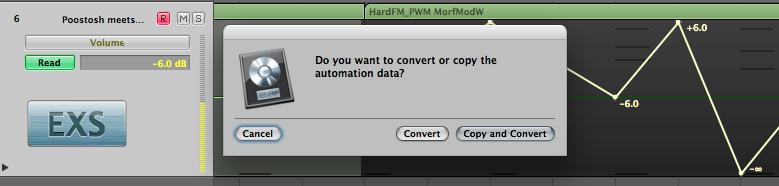
A Dialogue Box gives you two options. If you wish to keep the existing automation data as well as copy it to your selected parameter, choose Copy and Convert.
Step 4 - Copying Track Automation between tracks
It's easy to copy track automation data to another section of the same track. Simply select the nodes and Option-drag the selection to the desired position.
Many users believe it to be very difficult to copy track automation data between two tracks. While there are many techniques to do this, here is the simplest (and possibly the most overlooked) way to achieve this.
1. Select the Track Automation and choose Edit > Copy (from the Arrange area's local menu)
2. Choose the Track you wish to copy the Track Automation to.
3. Choose Edit > Paste (from the Arrange area's local menu)
Step 5 - Snap to the Grid and Offsetting Automation
Drawing in automation to specific positions relating to Logic's grid can be tricky if you don't use the Automation snap options.
From the Snap Menu in the Arrange area, choose Snap Automation.
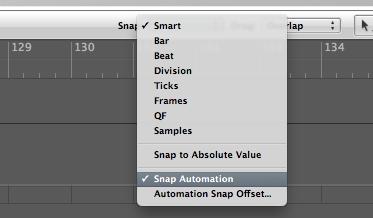
Creating, moving or copying nodes just got a whole lot easier to snap to the grid!
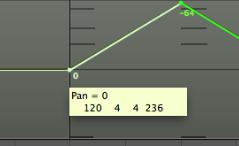
However, you may notice that the position of the nodes is offset by a few ticks. Click and hold on a node. In my case the position of the node is offset by -5 ticks.
To change the offset to another value or remove it completely so your automation happens exactly on the desired grid value, go to Logic Pro > Preferences > Automation
Here you can change the Snap Offset value to 0 or another tick based value.

Interested to learn more about Automation? Check out the Logic 9 101 and Logic TNT2.

Discussion
I wonder why there is an automation "snap offset" and why it isn't 0 by default? Seems a bit weird to me.
The offset is there in case of latency caused by audio hardware or plug-in delays. There's also the case that if the project uses a lot of CPU power then it may have an affect upon Logic reading the automation in time.
Thanks for the kind words! If you have any topics you'd like covered in these blog posts do let me know :)
Rounik
Thanks for the useful tips.
Just wanted to precise that the inverting automation work only with the pan. I tried with plug-ins where there's a 0 value at the centre and still it brings all the nodes up/down but doesn't invert them like it works with the pan.
Also for some reasons, I often get inverted converted automation data depending what and where I'm copying. But that must be an issue on my side. :)
Cheers.
That is another great automation tip - and one of my faves. Thanks for sharing it!
There's even a way to edit, copy, move, stretch, etc track based automation without converting it to Region based automation, while treating it like a region!
Steve H has done a very cool TNT video (videos 29-31) on this here:
http://www.macprovideo.com/tutorial/logic9303tnt2
Thanks!
I've just tried to replicate this and it doesn't work with Mute or Solo (which are essentially either On or OFF only.
In fact, I only use it for Pan settings or parameter values where 0 is common...
I wonder if you convert the Track Automation data to Region Automation data (Hyper Draw) you should have more control over the Mute data in the Event List... it'll make it easier to edit...
Can you pop by the Logic forums here and post a new thread with this question? I'll be able to help out there more easily with pictures etc.
http://www.macprovideo.com/forum/
Thanks!
Want to join the discussion?
Create an account or login to get started!