
Groove is a sense of rhythmic feel or swing and is an essential part of modern music. Knowing how to best make use of it can make a huge difference in your music. Read on to find out more.
Groove is in the heart
Without any groove, music can sound robotic and rigid. When a musician plays an instrument, they naturally play with a groove and will often be led by a band's drummer or rhythm section who will dictate the groove for a particular song.
In the world of electronic music, groove is equally as important but it requires a little more thought and planning to pull off. Luckily, most modern DAWs are packed with features to help out and Ableton Live is no exception.
Get into the groove
Applying a groove in Live is done on a clip basis. Select any number of clips in either Session or Arrangement view, go to the Clip View and click the Groove hotswap button.

The groove hotswap button will open up Live's groove library.
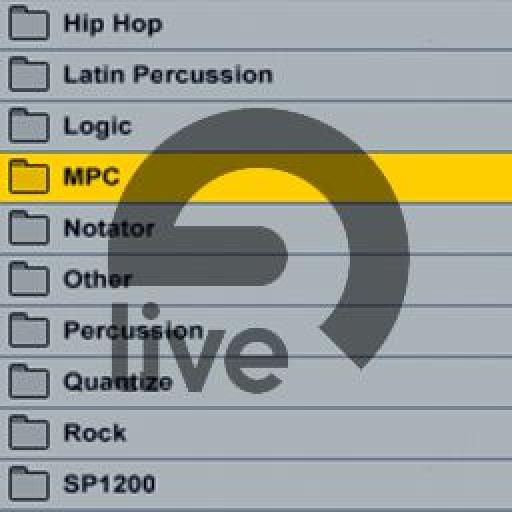
In the Live browser, you'll be presented with Live's groove library which contains categorized groove files. There are a lot to choose from, including grooves taken from famous drum machines such as the Akai MPC and Emu SP1200. Auditioning grooves is easy, just double-click on any .agr file to apply that groove to your selected clips. You can also drag and drop groove files to clips.

Live ships with a generous amount of grooves from different sources,
but you can also make your own.
Shake your groove thing
Once a groove is applied, there are several useful ways of modifying it. The Groove Pool Selector Button at the bottom of the browser will open the Groove Pool.

The Groove Pool allows detailed tweaking of all grooves used in the current Live project. Open it using the Groove Pool Selector Button at the bottom of the browser.
The Groove Pool lists all grooves currently being used in the project and has some useful parameters which can be tweaked.
- Base: This decides the timing resolution at which the groove will be applied. Generally this should be left at the groove's default value.
- Quantize: Applies a straight pre-quantize to the clip. For most purposes, a value of 100% will mean that the groove can be heard as intended.
- Timing: Allows you adjust just how much of the groove is applied. Can be thought of as a strength value, allowing the groove to be dialed back at values of less than 100%.
- Random: At low levels, this can be used to add a certain amount of random humanization to the timing of the groove. At high values, it becomes a very useful “drunk drummer” simulator.
- Velocity: Groove files can not only adjust the timing of your clips, but also the velocity. This is often a bit hit and miss but worth experimenting with. Mostly, I find myself leaving it at 0%.
- Amount: This is a global value which can be used to adjust the amount of groove applied to all the clips in your project.
Groove Holmes
Of course, Live also allows you to create your own grooves from existing audio or MIDI clips. It's very easy to do. Simply right-click on any clip and select “Extract Groove(s)”. Alternatively you can simply drag and drop a clip to the Groove Pool.
")
Creating your own grooves is a simple one-click affair.
When using an audio clip to create a groove, Live uses the warp markers to dictate timing so spending a little time making sure that all warp markers are perfect will make a big difference.
One nation under a groove
Here are are some tips for getting the best out of grooves:
1. Clips should be quantized 100%. Groove files work by shifting notes away from the theoretical perfect grid. If the notes aren't on that perfect grid to begin with, the groove will not sound as intended. This can be done either in the clip itself or by using the Quantize parameter in the Groove Pool.
2. When applying grooves to audio clips, the groove works by modifying the clip's warping, therefore grooves will only work on audio clips which have warping enabled.
3. Unless you are going for a specific special effect, it's often best to stick to one groove for all the clips in your song. Hip hop music is built on the solidity of the MPC drum machine's groove. It's not that the MPC has any magic in it's groove feature, but the fact that exactly the same groove setting gets used for an entire beat or song. If you are going to mix different groove types, do so carefully and with intent.
4. Live's grooves can be used to apply real-time randomization to any clip without applying a groove. Simply set the groove Timing parameter to 0% and the Random parameter to taste. This can be very useful for creating humanizing or doubling effects. When using this trick, it doesn't matter which groove you use as the groove itself isn't applied.
5. You can also use the grooves as an alternative to Live's quantize feature. By setting Quantize to 100% and Timing, Random and Velocity to 0% the groove will apply a non-destructive quantize. This has the advantage of keeping your original timing in the clip so you can revert if necessary.
Let's groove
With careful attention to how you use Live's groove features, your songs should feel more solid and instruments should blend together more easily in the mix. Ultimately, a good groove can impart something almost magical to a song. Get groovy man!

Discussion
It can transfer average sounding beats into beats with such swing and character.
Want to join the discussion?
Create an account or login to get started!