
The title begs the question, why would I want to do that? There are two philosophies about this that go back to the hardware world.
If you are recording singers and instrumentalists through compressors or reverbs, at that point it is a non-removable part of your audio files. Is that a good thing or a bad thing? Depends on the circumstances and your point of view. Obviously, if you are recording multiple parts and simply do not have enough of the desired hardware, you may have to do this. Back in their early days, The Beatles recording consoles and tape machines were limited and so they recorded virtually everything through a compressor, usually an Altec or a Fairchild, and I think it is fair to say that history has already decided that the result was pretty good.
That said, I used to work with two engineers with very different philosophies. Engineer number one used to say to me, “I know very well what the sound is like recording through my specific compressor and I not only am willing to live with the resulting sound, I WANT that sound.”
Engineer number two used to say to me, “it is simply wrong to do that. Just record the signal cleanly with a good performance and do all the processing after the fact.”
When I pointed out the examples like The Beatles not doing that and how good it sounded, he still maintained the approach was flawed. If I said what about if the singer's levels are inconsistent and the mic technique is lacking he would respond, “work with better singers.”
Horses for courses, different strokes for different folks, etc. But we are talking about software here so why would I want to “print” the FX? CPU savings, time savings, and the fact that sometimes you know that you just want the sound you are monitoring through to be the end result.
So, how do we do this? After all, if we insert the FX on an audio Channel Strip, we will hear the recording through them but it will not be part of the recording. The answer is the Input Channel Strip. We need to create some.
Simple right? We all know it is possible to create channel strips without going into the Environment in Logic Pro 9 by simply clicking the new tracks + sign at the top of the track list, as I am doing. You can see the result in Pic 1.

Pic 1. Create new tracks.
Hmmm, I do not see the option there for creating an Input Channel Strip nor do I see a way to do so in the Mixer. Uh-oh, I must go into the dreaded Environment after all.
Step 1 – Creating an Environment Layer
Press Command-8 to open the Environment window. In a new project, it will open to the Mixer layer, as you see in Pic 2. In a template of your own creation it may open to a different layer. Either way I am going to recommend that you create an Environment layer specifically for these channel strips, as it will be importable from project to project.

Pic 2. Create an Environment layer for these channel strips.
In the rectangle where you see the layer's name, hold the mouse down and navigate to Create Layer and it creates a layer named (unnamed). See Pics 3 and 4.

Pic 3. Select Create Layer.

Pic 4. Unamed Layer.
Rename it something that seems appropriate to you. In a dazzling display of my wildly creative mind, I have named it Inputs in Pic 5.

Pic 5. Layer is named "Inputs".
Step 2 – Creating Input Channel Strips
Under the New menu, navigate to Channel Strip > Input (see Pic 6) and it creates one….but in the Mixer layer! Son of a gun! Oh well, not to worry, we can always move them later. See Pic 7.

Pic 6. Channel Strip > Input

Pic 7. Moving channel strips around.
Let's assume you want to create three more. Obviously, you can simply repeat the process three times and here they are in Pic 8.

Pic 8. Three extra channel strips.
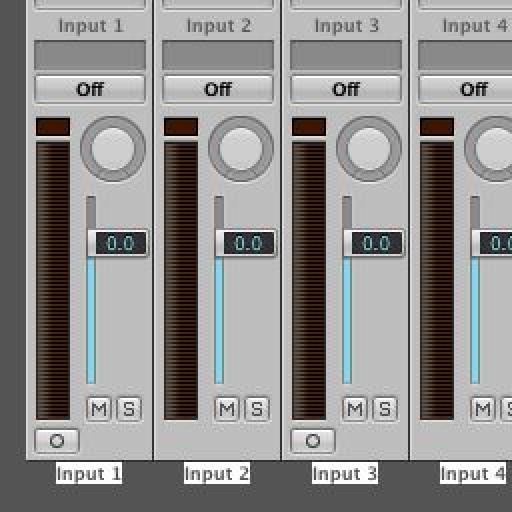
They are all set to negative infinity dB. With all four still selected, simply Option-click on any one of them and they all go to 0.0 dB. See Pic 9.

Pic 9. The levels have been reset.
Step 3 – Moving the Input Channel Strips to the Desired Layer
This is easy-peasy. With all four still selected, hold the Option key and in the layer rectangle, navigate to the layer we created for these and bingo, as you can see in Pic 10, they will be moved to the desired layer.

Pic 10. The channel strips have been moved to a new layer.
Step 4 – Adding the FX Plug-ins and Creating Audio Tracks with the Desired Input Assignments
Now it is simply a matter of assigning the plug-ins you wish to record with as part of the sound of the tracks to the Input Channel Strips. In Pic 11, you can see I have made choices I like for a male vocal, female vocal, acoustic guitar, and electric bass.

Pic 11. Plug-ins inserted on the channel strips.
Assuming that you may well want these settings available in future projects, it is a great idea to save them as Input Channel Strip Settings. Simply hold the mouse down on Setting at the top of the Input Channel Strip and navigate to Save Channel Strip Setting As, as you see in Pic 12, and give the setting a name, as you can see I am doing in Pic 13.

Pic 12. Saving Channel Strip Settings.

Pic 13. Naming the Channel Strip Settings.
Now all that remains is to create audio tracks assigned to the appropriate input assignments. Bear in mind however, that you will be able to assign only as many inputs as your audio interface physically has, so if you have an Apogee Duet, for example, two will be the max you can record into simultaneously. I have an eight input audio interface so recording into these four simultaneously is fine.
In Pic 14, I click the + sign at the top of the Track List and in the dialog box that opens, I tell Logic Pro to create four audio tracks with ascending inputs from Input 1 on, with Input Monitoring enabled to set my levels.

Pic 14. Creating audio tracks with ascending inputs.
As you can see in Pic 15, all I now need to do is arm the tracks for recording, go into record, and I will be “printing” my performances with all my plug-in FX choices as part of the sound, allowing me to then bypass or even remove them, knowing that I can always call upon them simply by adding a Channel Strip Setting.

Pic 15. Tracks are armed and ready to go.

Discussion
I don't know if I will ever use it, but I learned something more about Logic I didn't know before.
Thank you!
I almost went this route months ago, but then I read MPV's aux track/bussing technique in this article "Tracking with Dynamics Processors in Logic Pro" and have been using it every since.
It's much simpler and I don't have to enter, as Jay puts it, "the dreaded Environment". I will, however, follow Jay's instructions to give this a try.
Want to join the discussion?
Create an account or login to get started!