Not long ago, I had the chance of not only writing a review of, but also the pleasure of getting to teach a course on Liquid Rhythm—An amazing, MIDI, drum editing application from WaveDNA that can act in standalone, and as a VST/AU plug-in. When working through a unique Max to Live Integration, it makes Ableton, suddenly AI based and freakishly awesome at putting out sick beats.
Recently, WaveDNA added an optional upgrade to a new, MIDI editing, best friend to work along side of Liquid Rhythm: Liquid Music. This logical next step, or optional upgrade, for the WaveDNA family allows one to manipulate basic MIDI clips in a similar fashion to the way Liquid Rhythm works with drum clips, made with the Ableton Drum Racks. But now, along with sick beats, Liquid Music can spit out amazing arpeggios, huge chord progressions, and complex melodies that would normally take a while to put together. Let’s take a look at this exciting new direction for WaveDNA, and see just how successful it really is.
So, What Is Liquid Music, Again?
If you stop reading this article, for a minute, and imagine, in your mind, the most intuitive arpeggiator ever, that actually contains a little robot within, and assists you in intelligently coming up with amazing, original melodies, you’ll have a firm idea of Liquid Music.

By using a unique system known as Chord Tracks, along with the already famous Rhythm Editor of Liquid Rhythm, it becomes extremely easy to paint, or draw in crazy melodies that sound amazing, without spending all night in a hunched position, dropping in notes, while you listen to the same melody over and over again.
You can, of course, import your own melodies directly over into your host DAW, but with Ableton, there’s some very special, extra integration, thanks to Max for Live. When Max for Live Integration is in effect, you need merely select a clip within Ableton, and when using Liquid Rhythm, the drum pattern will automatically appear within Liquid Rhythm/Music and you can begin editing.
When you start adding in preset Harmonies from the Harmony Builder, you can quickly build up some sick chord progressions playing parts that are not humanly possible.
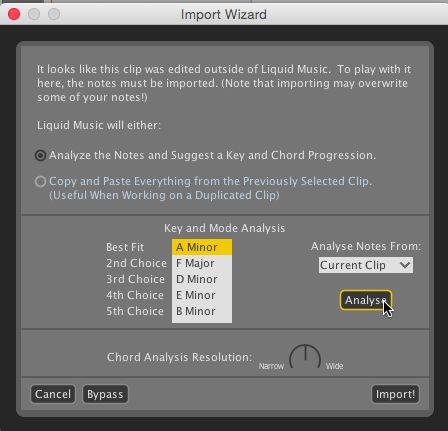
With the new Liquid Music layer added, there’s an additional component. The Import Wizard analyzes a regular MIDI clip/melodic clip and then attempts to import what’s being analyzed over into Liquid Music, from Ableton Live. This is odd, considering that drums don’t require this, and slightly annoying, considering that the Import Wizard is not always spot on. If you’re tie-ing a note from one chord to another, the Wizard does not seem to be able to read the chord changes, from measure to measure. It just assumes that it’s the same chord, carrying on for several measures. Thankfully, the editing is really sweet with Liquid Harmony, and when you start adding in preset Harmonies from the Harmony Builder, you can quickly build up some sick chord progressions playing parts that are not humanly possible.
Skeletons in the Harmony Builder
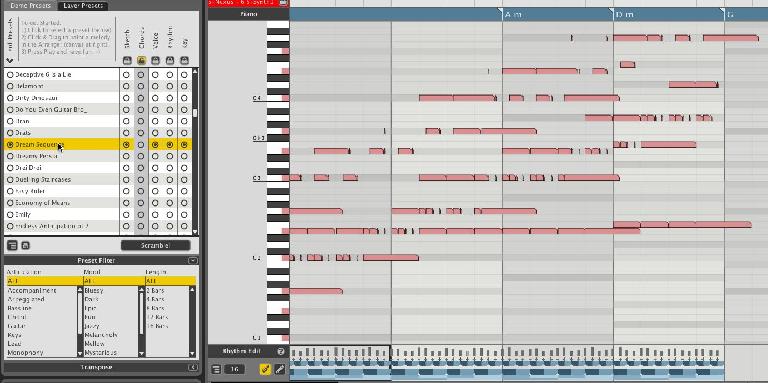
Within the Harmony Builder, as I mentioned, there is a massive list of presets that are, in fact, full MIDI performances/MIDI files. However, you can deselect the Key, the Chords played, and even Rhythm, if you want. Once you drop this performance, minus Key, Chords, over yours, Liquid Harmony converts between differences.
For example: If I was playing a progression that is C to Am to D#, to G, Liquid Music does not change the chords, it just changes the Rhythm, if the Rhythm Lock is unselected. If the Key layer is locked, none of the chords are changed, period. So, I can build up a progression, and then bring it into Liquid Music, and have my robot help me build that progression up with sick, melodic rhythms and octaves. I can draw around in the paint brush without thinking about it, and the notes never change. It’s like being a kid again!

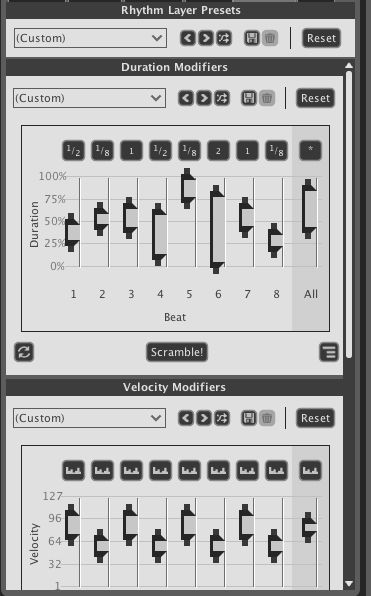
Of course, the Harmony Builder is more than just a bunch of presets. It is composed of the Preset Page, Sketch Page, Chords, Voice, Rhythm and Key. It’s within these pages that you are able tweak both existing presets, and build your own. The Rhythm page, for example allows you to come up with quick, rhythmic patterns that you can then, through use of the Paint tool, draw in to the existing clip. There are also tons of preset rhythms, and a Scramble button, so if you just want it to make something up for you, it can!
Or, another example: The Chord page helps you build and refine your progression, within the clip, and even gives you suggestions, based on what’s being played. It’s an extremely neat way of not only seeing music, but also being able to lay a foundation. It also has a Scramble button.
The Voice Page, aside from allowing you to control the different voices of your clip along with clip and direction, also features an active arpeggiator. This is where things get extremely cool, as the melodies, harmonies and plain MIDI you build up can, to some extent, feature ongoing randomness that arpeggiators excel at. And, keep you melodies sounding big!
BeatBuilder
You also get to use the BeatBuilder to dream up some even more advanced rhythms, exactly in the same fashion as you would in Liquid Rhythm. Once your progression is in, and you’ve got some chords that sound right, you can start dropping in music molecules (as they are known in the WaveDNA world) that both visually, and audibly illustrate rhythm in a very unique way.
There’s no difference, as far as I was able to tell, within this department of Liquid Music.
Conclusion
Thankfully, and like Ableton, there are plenty of tips to point you in the right direction on how to use Liquid Music. But, I will say that I was disappointed in the lack of video tutorials, upon shipping. Liquid Rhythm had a ton of material to ensure that you really understood how to use it. Liquid Music has one. And, while it gives you a good, general idea, there’s a lot more to this. The manual, does go into a good bit of depth, however. So, you won’t be out there in the dark, on your own. And, WaveDNA have always been good about supporting their products. So, I’m sure we’ll see some videos soon.
In closing, I’d like to say that this is one of the first programs that I’ve worked with that you can really just drop in, and draw in amazing melodies that really do go beyond what most of us can come up with, without spending hours. It’s also extremely gratifying to be able to use the BeatBuilder for creating bass lines, big trance chord progressions, and other forms of synthesized madness. I would love to see more love in the MIDI editing department. Currently, it appears that you are unable to deselect the Paintbrush, so it’s always active. If you want to edit an individual note, it’s easier to do it in Ableton.
All in all, I kind of felt like this release was rushed out without some of the polish I would have expected. But, what it does, at its core, is astounding. I am excited to see the updates, and hope that this will cement a really powerful music application.
Price: $129 includes Liquid Rhythm ($59 upgrade for existing Liquid Rhythm owners). Free 30-day trial available.
Pros: An amazing app for quickly and easily building up complex melodic parts in less time than it takes you to make a sandwich.
Cons: Could use more tutorial videos. Would love some more polish in the MIDI editing department.
Web: https://www.wavedna.com/liquid-music/ableton-live-plugin-max-for-live/


 © 2024 Ask.Audio
A NonLinear Educating Company
Discussion
Want to join the discussion?
Create an account or login to get started!