
Einer meiner Lieblings-Methoden, um spezielle Effekte zu erzeugen, ist Reverse Delays und Reverbs verwenden. Dies ist eine großartige Möglichkeit, etwas ein wenig ungewöhnlich, zu produzieren und ist ein guter Weg, um die Welt des Sound-Design geben. Auch Anfänger können sich an der Aktion hier.
Im mit Propellerheads Record für dieses Tutorial, aber im wesentlichen könnte man jede DAW mit der Fähigkeit zur Wiedergabe Audio verwenden, die Funktionen Delay und Reverb-Effekt-Plug-ins. Also das ist gut ... fast jede DAW auf dem Planeten!
01 - Die Wahl Einige Audio to Process
First up you’ll need to focus on a specific audio part to process. Here I am using a vocal clip as I find that these effects work very well with vocals. My part is in total isolation so everything is nice and clear but of course if you are working on a project you can complete this process on one part amongst many.
With your audio selected make sure it’s solo’d and playing in total isolation. Now is a good time to check your audio for any faults, clicks, pops or overs. The last thing you need here are any imperfections being amplified by the processing... So make sure your audio is super clean.

Die Audio-, dass auch sein Behandlung ist isoliert
The vocal we are going to process is isolated:
[Audio-id = "6187"]
02 - Die Umkehrung der Audio
Next open your audio file in your DAW’s audio editor. Record now features a more fully featured editor and has quite a few options for processing, one of which is the reverse function and this is exactly what we are after here!

Der Ton wird rückgängig gemacht
Once the audio is reversed play it back to check everything is present and correct. Also double check your levels at this point and ensure that you are working with plenty of headroom, you’re going to need it when the processing is applied.

Unsere umgekehrt Audio ist fertig
The vocal is reversed:
[Audio-id = "6185"]
03 - Die Anwendung des Reverb oder Delay
For the purpose of this tutorial I have decided to show the effect with both delay and reverb, so I have set up two send / returns in Record’s mixer. I have used Record’s excellent RV7000 Advanced Reverb to produce a very large reverb and a dedicated delay based Combinator to pump out a tape Echo pre-set in the other.

Der Return-Effekte hinzugefügt werden

Die Auswirkungen sendet in Records Mischer
The reversed audio with reverb added:
[Audio-id = "6186"]
... Und mit Stereo-Delay:
[Audio-id = "6188"]
Mit diesen beiden Effekt einrichten konnte ich unsere rückgängig Gesang für beide von ihnen zu schicken. Der Effekt, den wir bekommen ist schon etwas ganz Besonderes, wie Sie in den Clips unten hören können. So weit sind wir etwa auf halbem Weg durch den Prozess und haben ein paar Schritte zu gehen, bevor wir fertig sind.
04 - Exportieren Effect nur
We need to export the results of our processing, and there are really two ways to go about this. You can export the whole thing, in other words the audio and effect, or you can export just the effects.
In this case I exported just the effects stream as I’m a firm believer that this method gives you much more control over the finished product and a more balanced sound in general.
Record offers some really great features for exporting very specific parts of your mix (an area from which other DAWs could learn a thing or two!). Once you have accessed the ‘Bounce mixer channels’ area you can actually home right in on the specific effects devices and just render their outputs.

Aufzeichnungen mit vollem Funktionsumfang Export-Fenster
With the isolated effects exported they are ready to be brought back into the project and mixed with the original dry parts to create the final effect.
The reverb effect in isolation:
[Audio-id = "6190"]
[Audio-id = "6189"]
05 - Re-Import der Ergebnisse, Bearbeiten, Sync-und Mix
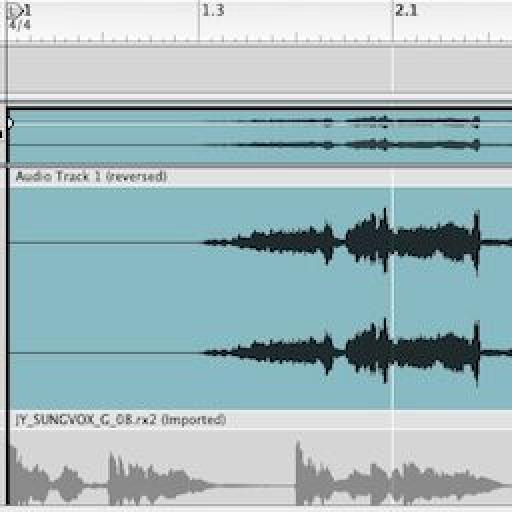
The bounced fx streams can now be imported into a couple of new audio tracks. Once this is complete you can go ahead and reverse all of the audio so everything is technically playing in it’s original state.

Umkehren und Ausrichten der Schienen
The newly imported (and reversed) effects audio will now need to be moved around so that it works nicely with the original dry parts. To do this I would strongly advise you to switch off any snap mode. This will allow you to be extremely accurate with the placement and give you a better chance of getting things right.
I generally use any obvious transients to get things in line. Although the effects have often masked much of the dynamic signature you should find this pretty straight forward and the effect files are usually pretty forgiving, so you don’t have to be mathematically correct here!

Alle Tracks sind jetzt ausgerichtet
Once the files are all in place you can mix their levels to strike a good balance between the dry and effected files. What you should be left with is a great reverse reverb (or delay) effect. As you have all the files you also have complete control over levels, pan and any further processing you might want to apply.

Alle Klänge sind nun gemischt, um eine gute Gesamtbilanz erstellen
The reverse reverb effect is mixed with the original vocal:
[Audio-id = "6191"]
Und die Delay-Effekt ist auch gemischt:
[Audio-id = "6192"]
06 - die weitere Bearbeitung und Recycling
Although the effects already sound great you can always take things a step further if you like. You can cut your effected files up, reverse sections, add automation and even more effects processing if you like. All this can be done without effecting the original files.

Einige Automatisierung ist die Verzögerung Audio hinzugefügt
In this case I’ve automated the pan on the delay channel and added some modulation effects to the reverb. The result is a trippy collage of sound that really enhances the vocal phrase. Now go and create your own reverse effects and see what you can create!

Zusätzliche Effekte sind auch für unsere Reverse Reverb hinzugefügt
The final result with the extra effects and automation:
[Audio-id = "6193"]

Discussion
Want to join the discussion?
Create an account or login to get started!