
Une de mes méthodes favorites pour créer des effets spéciaux est d'utiliser des retards inverse et réverbérations. Ceci est une excellente façon de produire quelque chose d'un peu inhabituel et est un excellent moyen d'entrer dans le monde du design sonore. Même les débutants peuvent prendre sur l'action ici.
Im en utilisant record Propellerheads pour ce tutoriel, mais essentiellement, vous pouvez utiliser n'importe quel DAW avec la possibilité de lire des fichiers audio qui offre des effets delay et reverb plug-ins. Ainsi des thats bien ... DAW à peu près tous sur la planète!
01 - Choisir Certains audio au processus
First up you’ll need to focus on a specific audio part to process. Here I am using a vocal clip as I find that these effects work very well with vocals. My part is in total isolation so everything is nice and clear but of course if you are working on a project you can complete this process on one part amongst many.
With your audio selected make sure it’s solo’d and playing in total isolation. Now is a good time to check your audio for any faults, clicks, pops or overs. The last thing you need here are any imperfections being amplified by the processing... So make sure your audio is super clean.

L'audio-être traiter est isolé
The vocal we are going to process is isolated:
[Audio id = "6187"]
02 - Inverser l'Audio
Next open your audio file in your DAW’s audio editor. Record now features a more fully featured editor and has quite a few options for processing, one of which is the reverse function and this is exactly what we are after here!

L'audio est inversé
Once the audio is reversed play it back to check everything is present and correct. Also double check your levels at this point and ensure that you are working with plenty of headroom, you’re going to need it when the processing is applied.

Notre audio inversé est prêt
The vocal is reversed:
[Audio id = "6185"]
03 - Application de la réverbération ou un délai
For the purpose of this tutorial I have decided to show the effect with both delay and reverb, so I have set up two send / returns in Record’s mixer. I have used Record’s excellent RV7000 Advanced Reverb to produce a very large reverb and a dedicated delay based Combinator to pump out a tape Echo pre-set in the other.

Les effets de retour sont ajoutés

Les effets envoie dans les enregistrements mélangeur
The reversed audio with reverb added:
[Audio id = "6186"]
... Et avec un retard stéréo:
[Audio id = "6188"]
Avec ces deux effets mis en place, j'ai pu envoyer nos vocale inversée pour deux d'entre eux. L'effet que nous obtenons est déjà assez spécial que vous pouvez entendre dans les clips ci-dessous. Jusqu'ici nous nous apprêtons à mi-chemin à travers le processus et ont quelques étapes à parcourir avant que nous nous sommes fait.
04 - Effet Exportation Seule
We need to export the results of our processing, and there are really two ways to go about this. You can export the whole thing, in other words the audio and effect, or you can export just the effects.
In this case I exported just the effects stream as I’m a firm believer that this method gives you much more control over the finished product and a more balanced sound in general.
Record offers some really great features for exporting very specific parts of your mix (an area from which other DAWs could learn a thing or two!). Once you have accessed the ‘Bounce mixer channels’ area you can actually home right in on the specific effects devices and just render their outputs.

Dossiers toutes les fonctionnalités fenêtre d'exportation
With the isolated effects exported they are ready to be brought back into the project and mixed with the original dry parts to create the final effect.
The reverb effect in isolation:
[Audio id = "6190"]
[Audio id = "6189"]
05 - Re-importer les résultats, Edition, Sync et Mix
The bounced fx streams can now be imported into a couple of new audio tracks. Once this is complete you can go ahead and reverse all of the audio so everything is technically playing in it’s original state.

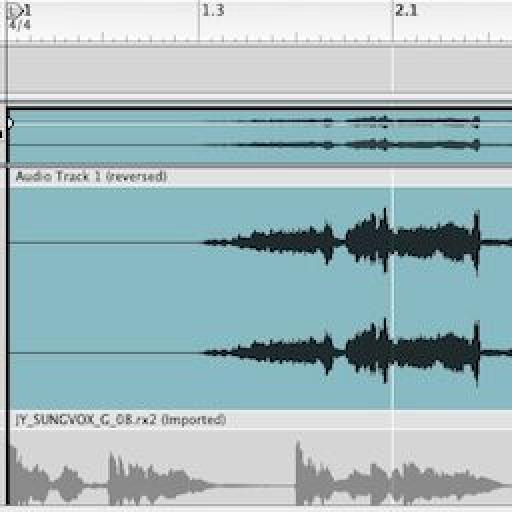
Inverser et en alignant les pistes
The newly imported (and reversed) effects audio will now need to be moved around so that it works nicely with the original dry parts. To do this I would strongly advise you to switch off any snap mode. This will allow you to be extremely accurate with the placement and give you a better chance of getting things right.
I generally use any obvious transients to get things in line. Although the effects have often masked much of the dynamic signature you should find this pretty straight forward and the effect files are usually pretty forgiving, so you don’t have to be mathematically correct here!

Toutes les pistes sont maintenant alignés
Once the files are all in place you can mix their levels to strike a good balance between the dry and effected files. What you should be left with is a great reverse reverb (or delay) effect. As you have all the files you also have complete control over levels, pan and any further processing you might want to apply.

Tous les sons sont maintenant mélangés pour créer un bon équilibre général
The reverse reverb effect is mixed with the original vocal:
[Audio id = "6191"]
Et l'effet retard est également mitigée:
[Audio id = "6192"]
06 - Modification complémentaires et recyclage
Although the effects already sound great you can always take things a step further if you like. You can cut your effected files up, reverse sections, add automation and even more effects processing if you like. All this can be done without effecting the original files.

Certains d'automatisation est ajouté à l'audio de retard
In this case I’ve automated the pan on the delay channel and added some modulation effects to the reverb. The result is a trippy collage of sound that really enhances the vocal phrase. Now go and create your own reverse effects and see what you can create!

Effets supplémentaires sont également ajoutés à notre reverb inversée
The final result with the extra effects and automation:
[Audio id = "6193"]

Discussion
Want to join the discussion?
Create an account or login to get started!