1. What is the Channel Strip?
Hardware mixing consoles invariably have channel strips: sets of identical controls on each channel that make it easier to achieve uniform mixing across all the elements of a track. Sometimes they have processors built into the desk and other times the processor work as sends. In software, we have the flexibility to process every section separately so the sky is the limit. It’s important to remember that the channel strip sections in Cubase work separately from the inserts section, so you can use other plug-ins on any channel as well.
2. Open it up
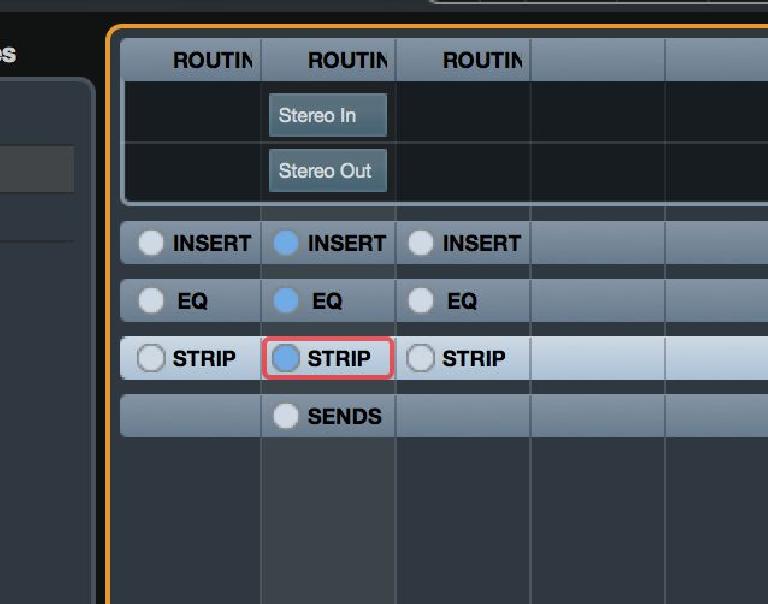
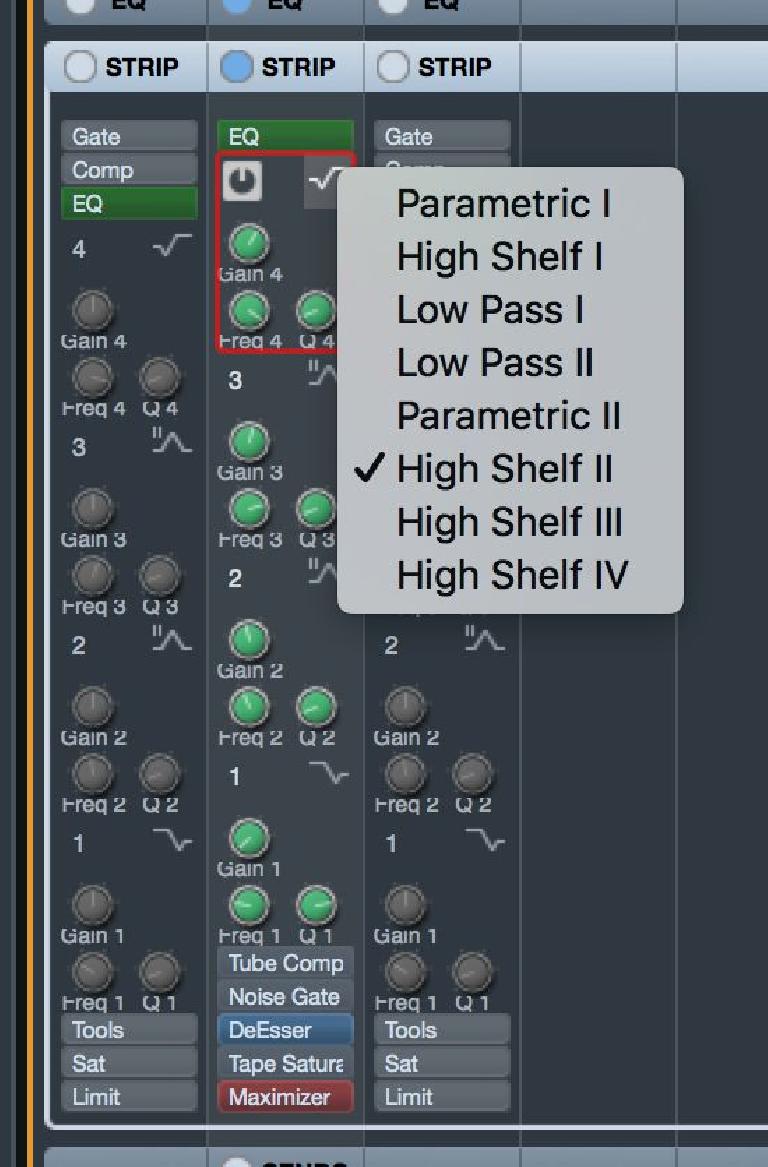
Click on the Strip section of any channel in MixConsole and you will see the channel strip, even if the controls are a little small. Clicking the name header of any of the six strip sections will expand out the controls for that strip. So, for example, clicking on EQ will reveal a hardware-modelled EQ section. Mousing over any of the four EQ band sections lets you switch each one on or off, and clicking the Type icon at the right corner of each section lets you choose between different EQ types for each of the four. Again, these controls can be a little fiddly as they are quite small.
3. Hands-on EQ
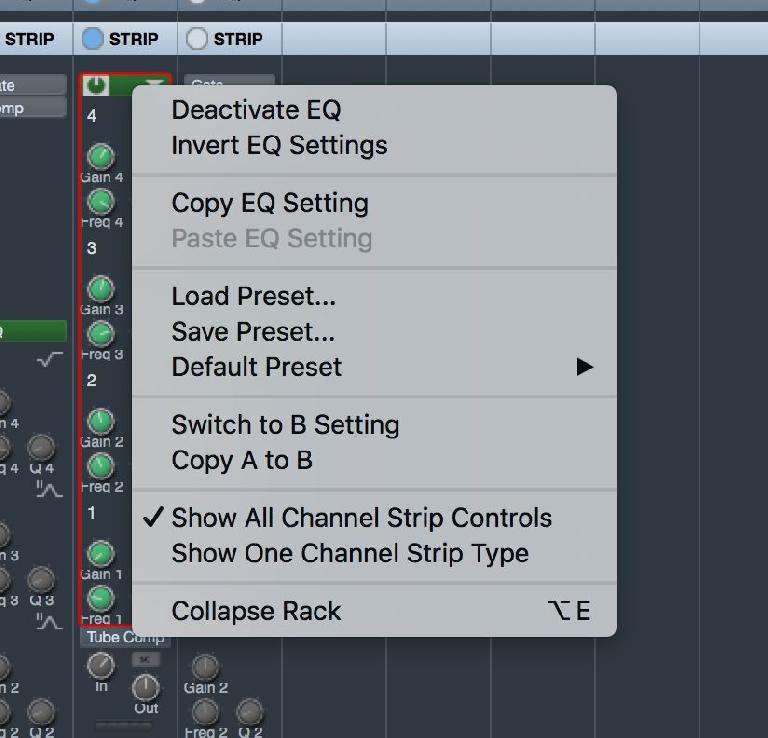
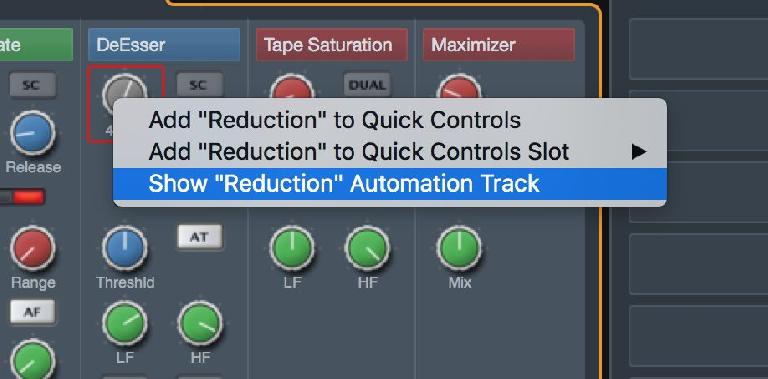
In this example, you can use the knobs to tweak the four EQ bands for the channel. Right-clicking on the EQ header area brings up a menu where you can copy and paste settings, loads presets and perform other actions. Right-clicking on any of the actual knobs lets you assign that control to a Quick Controls slot or create an automation lane for it.
4. A different view
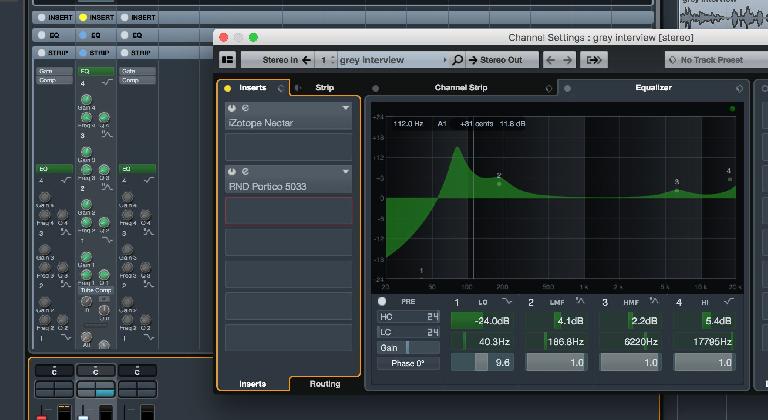
If you find the EQ controls too small you can always open the Channel window for a track by pressing its “e” button, which will give you a much bigger and clearer view of the EQ settings. Changing the EQ in either area will also cause it to change by the same amount in the other.
5. Putting the squeeze on
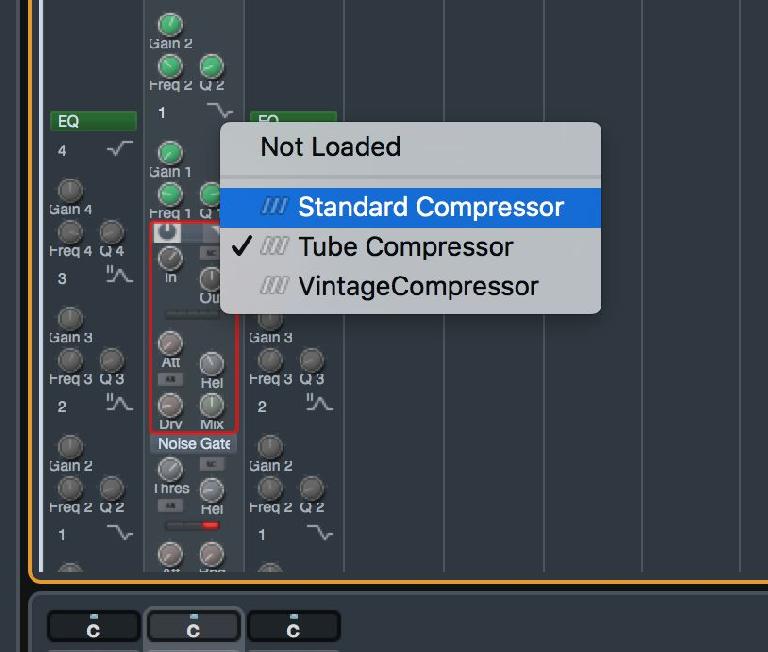
If you click on the next section in the channel strip you get a similar effect control area, this time showing a compressor. Compression is something you’ll probably use on almost every track in a project, and by clicking on the header area here, as in some other sections, you can choose between several available models and types of compressor. Of course, you can also right-click to load a preset into the channel strip from the main library.
6. The Strip view
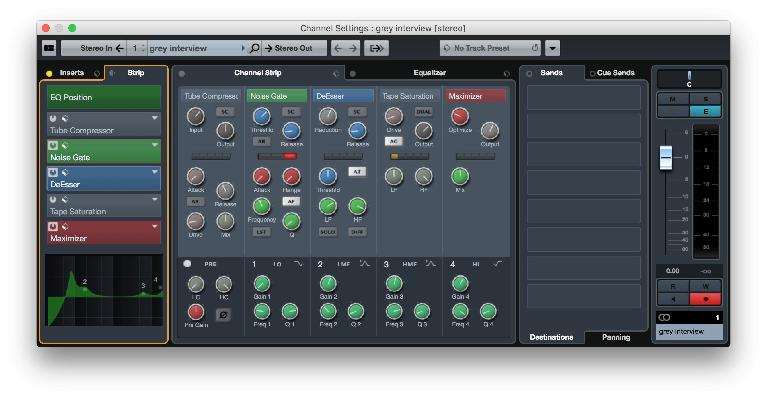
Things become a little easier to manage if you return to the Channel window, though when mixing on a large screen the main MixConsole view can be preferable. If you click through to the Strip and Channel Strip areas as shown here you can quickly turn each section on or off, view settings and load and save presets amongst other things. The Strip menu on the left provides yet another way of quickly turning effects on or off. The three views (MixConsole, Strip and Channel Strip) all control the same effects, but they give you more compact or more expanded views respectively.
7. Through the Gate
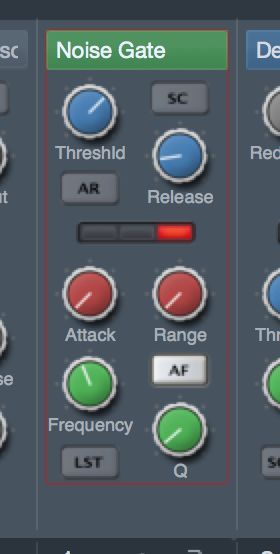
Noise Gating is a very useful effect to have in your channel strip for any kind of live recorded source. It can be set to open when the sound reaches a predetermined level and close again when it drops back down below that level. The idea is that unwanted background sounds and mic bleed can be fairly effectively removed: either during recording or preferably post-recording so that nothing is accidentally cut off thanks to incorrect setup. Use it on vocals, guitars and other mic’ed sources.
8. Shaping tools
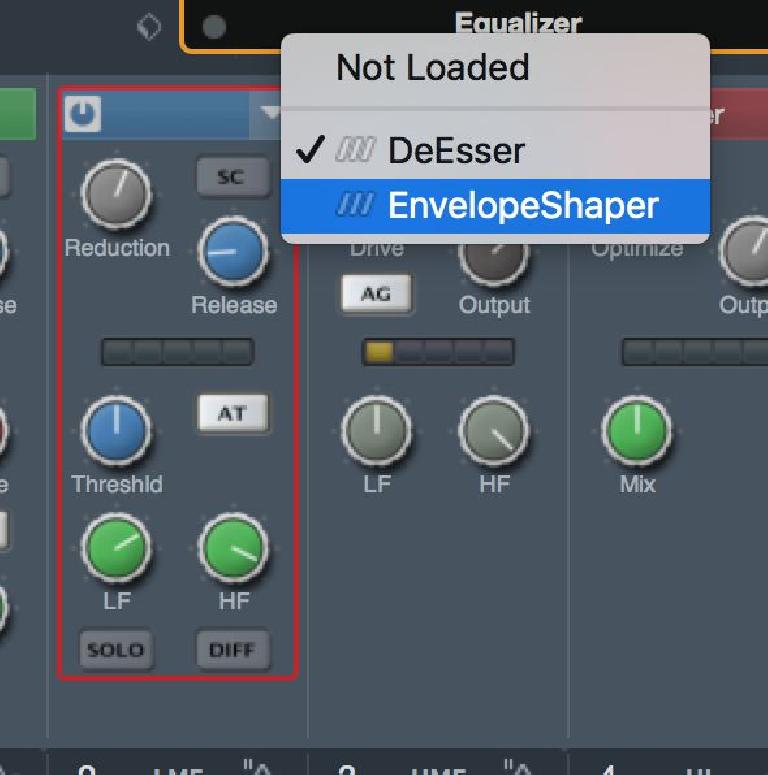
De-essing and Envelope shaping are two handy processing tools, especially for working with vocals. Again, used in conjunction with the other channel strip tools they can do the job of a third-party effects suite, and the fact that they are the same effects on each channel means that when used (because they can also be switched off if you like) they help you to achieve a more uniform sound. Tape Saturation and Maximization round off the arsenal, helping you to warm up and boost the level of your sound, respectively.
9. Preset types
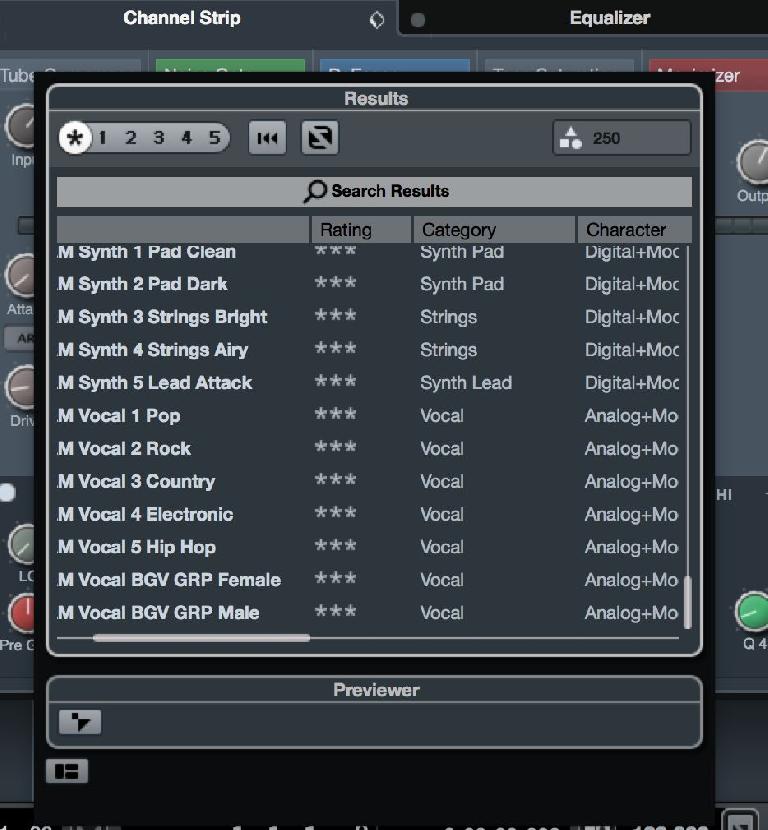
Click on the preset icon at the top of the Channel Strip box and you can choose to load a Strip Preset. These are pre-created setups tailored towards specific sounds like hip hop vocals, rock guitars and so on. You can, of course, edit these and create your own and they’re great for building a signature sound and also for quickly calling up ready-made setups for quick recording, instead of spending 10 minutes fiddling with the strip before you can get going.
10. Strips from Track Presets
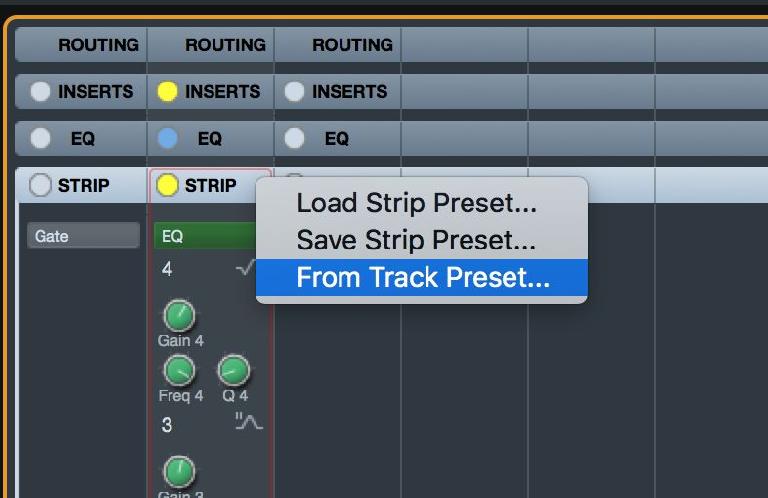
There’s another way to load a preset and that’s to load the Strip section of a whole Track Preset, but not the rest of the Track Preset. You can do this by right-clicking on the header and choosing the relevant option. This way you don’t have to store Track and Strip presets separately, or at least not always. You can pull a channel strip out of an existing track preset, but ignore the rest of it (things like the insert plug-in chain).
11. Quick EQ Access
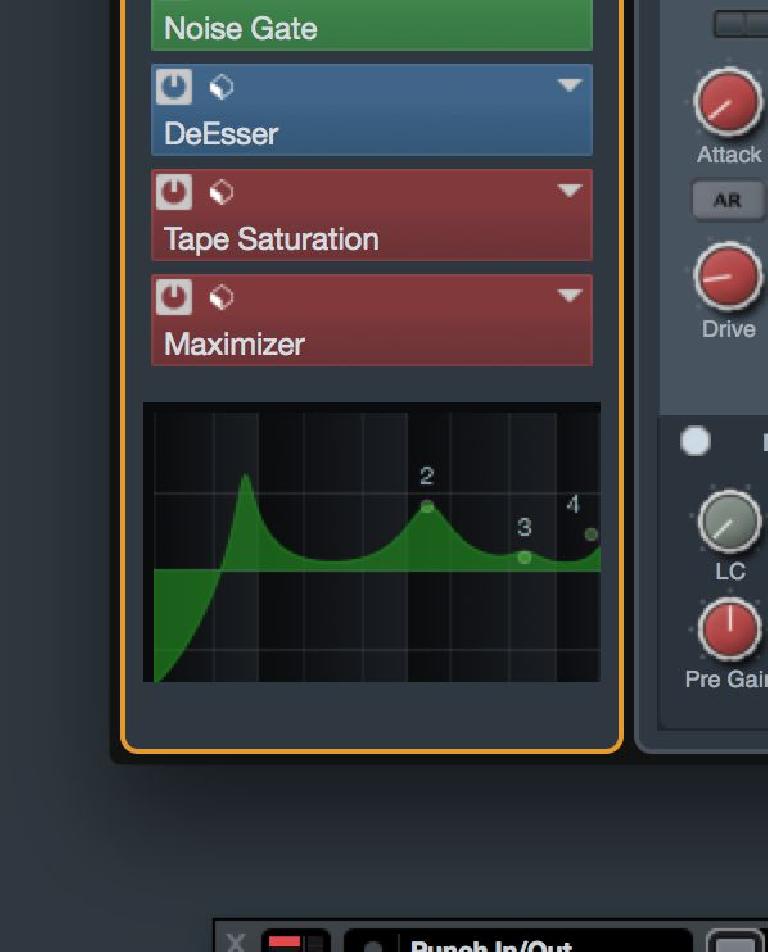
For even quicker access to EQ settings, there’s yet another trick. In the Strip area on the left of the Channel Window for any track, you can actually pick up the EQ points in the EQ grid at the bottom left and move them around. You’ll see values displayed and it can be good for making quick edits on the fly. As elsewhere, right-clicking on this display will bring up an extensive contextual menu from where you can perform various different tasks and functions.
12. Get moving!
Last but not least, don’t underestimate the utility of automating certain channel strip parameters. Making subtle changes to compression, de-essing or saturation over time can help you get greater control over your mixes without introducing lots of extra complexity.
Learn Cubase inside out in The Ask.Audio Academy here.


 © 2024 Ask.Audio
A NonLinear Educating Company
Discussion
I'm wondering where exactly this strip is in the signal chain? Since its position related to the inserts will affect a lot of our mix decisions right?
Thanks!
Want to join the discussion?
Create an account or login to get started!