If you own an iPad and have been playing around with the Garageband app, you may have realized that the drum instrument has some serious potential to replace MPC style pad controllers. The trouble I always had with such push button pad controllers is that they are not as sensitive as I would want them to be, even after adjusting the pad sensitivity. I've gone as far as to open up the controller and find ways to modify the sensitivity.
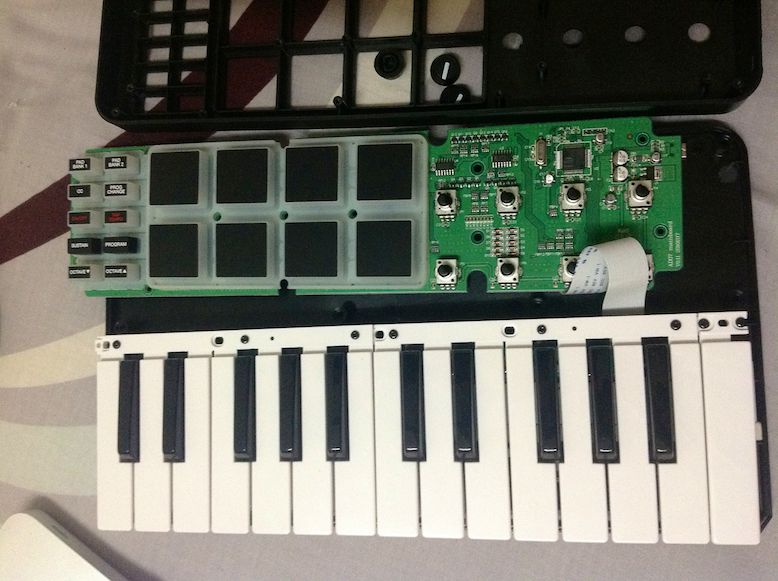
Inside the Akai MPK Mini.
With the Garageband for iOS app I find there is no such issue because all the instruments respond to touch. So even the most minimal touch on the screen will trigger the sound. This creates the potential to execute some crazy breakbeat style finger drumming with a lot more ease compared to other controllers.
Step 1 - Setting up Garageband
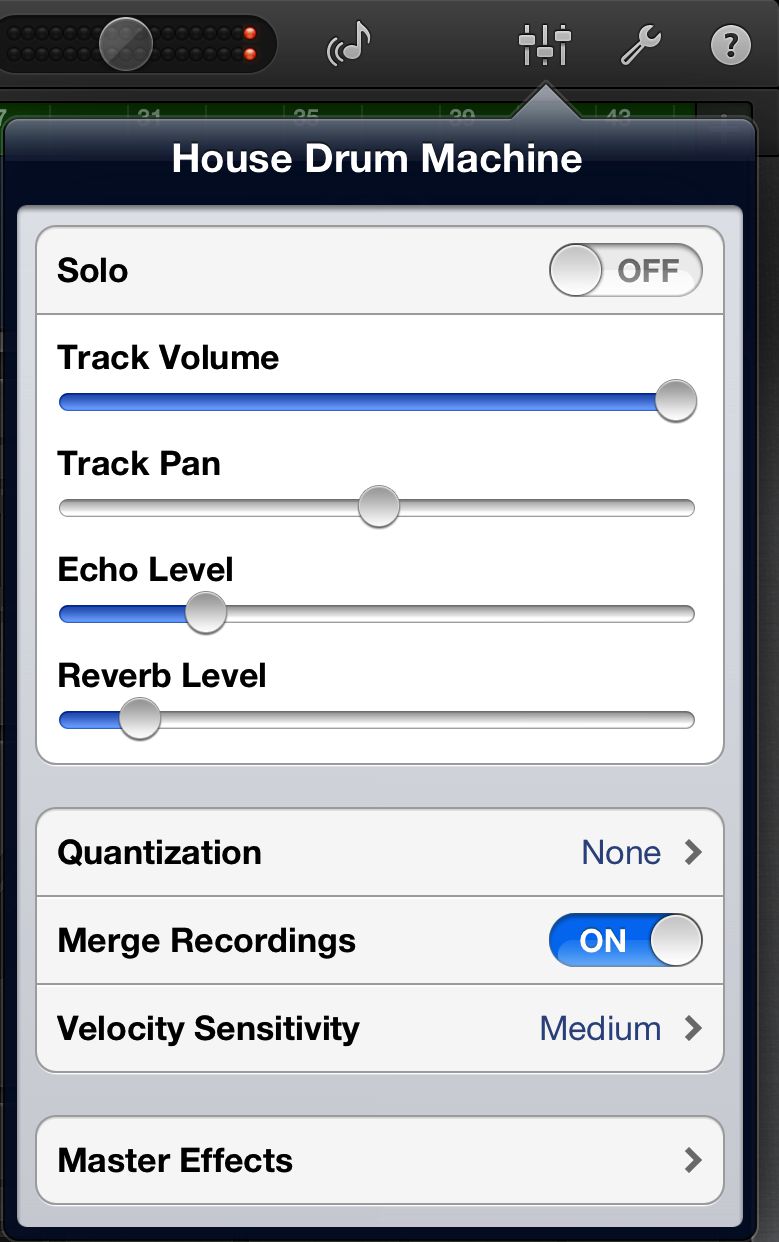
Garageband mimics velocity sensitivity by using the accelerometer data generated when the iPad is tapped. There are three levels of sensitivity (Low, Medium & High) which may be chosen based on user preference. Having no velocity sensitivity can make the performance sound robotic but at the same time, if the velocity sensitivity is set to 'High' it may get a bit erratic as relying on the accelerometer for velocity information can vary depending on how the iPad is positioned, how hard it is tapped etc. This brings us back to the pad controller issue. I would set the sensitivity to medium or low.
Garageband Velocity Sensitivity setting.
Step 2 - Choosing sounds and positioning the iPad
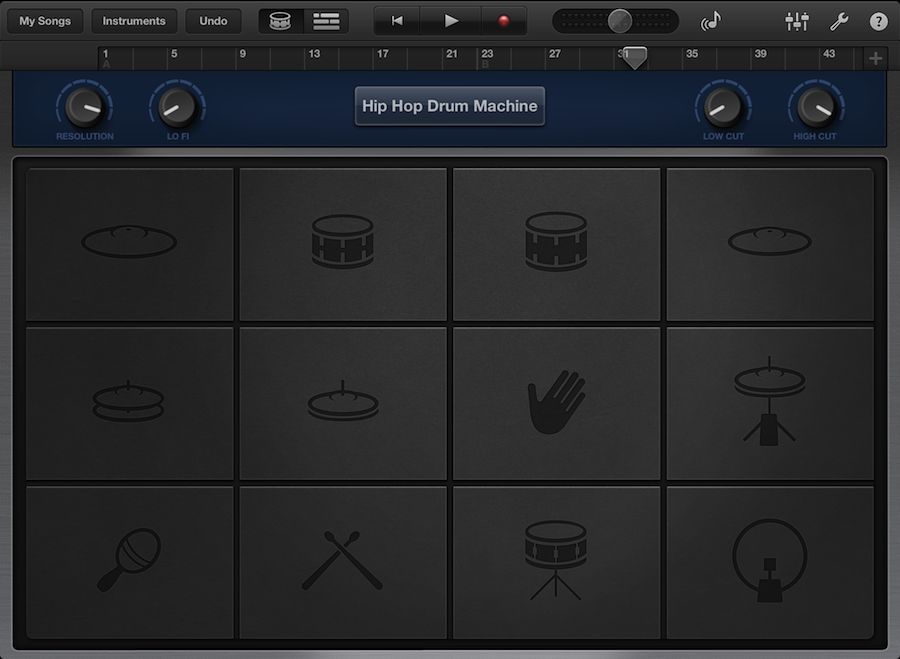
You can choose any drum kit you like, but for this example I have decided to use the Hip Hop Drum Machine. Using one of the acoustic drum sounds may not be ideal due to the close positioning of some of the hits like closed and open hi-hats.
I'm used to playing the kick and snare drum hits mainly with my left hand due to its positioning on various drum machines and pad controllers. Unfortunately, the Garageband drum kit does not follow this tradition and places the kick and snare in a position more suitable for playing with the right hand. So I just position the iPad upside down while playing. Not a big issue, you can choose what works best for you. If you are left-handed, then the iPad drum layout might just be ideal for you, but keep in mind you will have to reverse the hands on all the patterns I am about to show you.
The Garageband Hip Hop Drum Machine.
Step 3 - Hi-Hat pattern
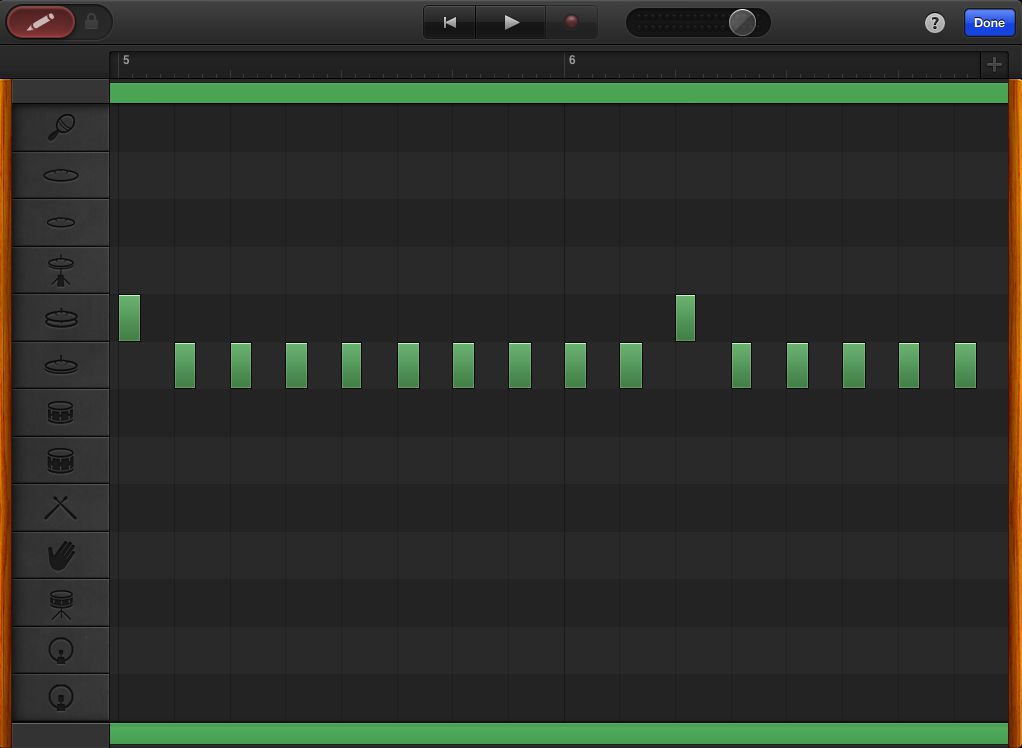
Let's start with the hi-hat pattern. Just like a drummer, who usually uses both hands while playing the hi-hat parts, I would recommend alternating between the index finger of both hands to play the hi-hat part on the iPad. Start with a slow tempo, I would suggest 70-80 BPM and work your way up to higher tempos. Also try to accent every right hand index finger hit (downbeat) as this will naturally enhance the groove. Once you are comfortable with that, try accenting the left hand index finger hit (offbeat). Eventually you should be able to alternate between these accents which will really spice up your groove. In the score, all notes with the x are all closed hi-hat hits and the notes with the x in a circle are open hi-hat hits.
Hi-Hat pattern.
Hi-Hat pattern in Garageband.
Step 4 - Kick and Snare
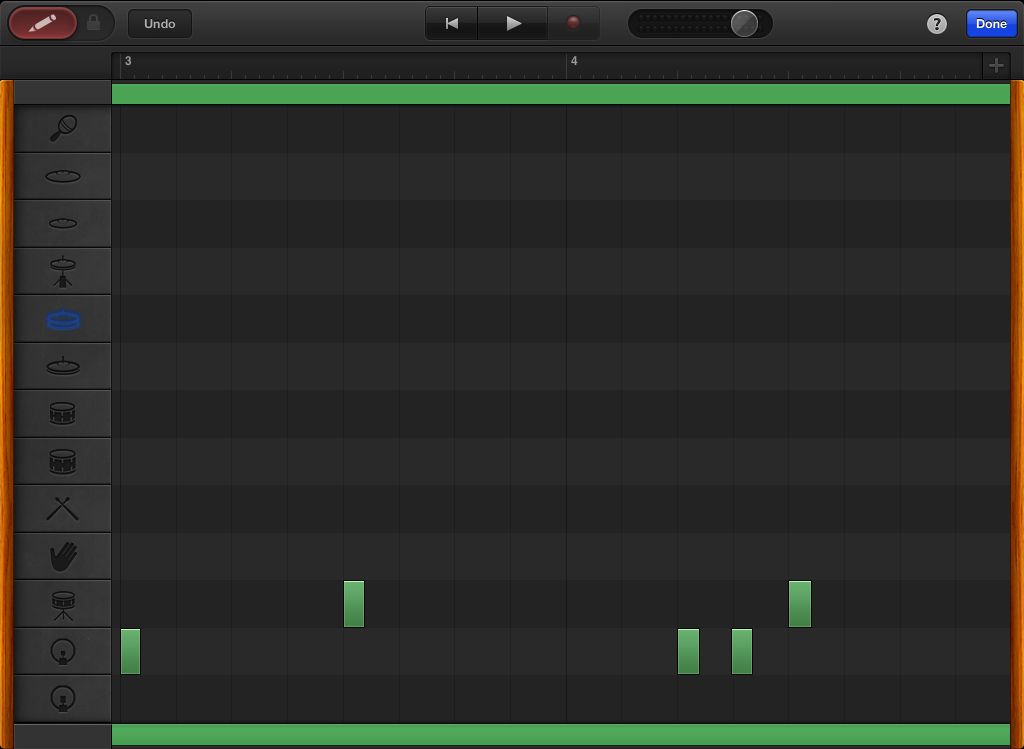
The kick and snare parts will be played with the left hand exclusively. I would suggest playing the kick with the ring finger (3) and the snare with the middle finger (2). Using the ring finger may seem difficult, but it is preferable to follow this method as it will eventually pay off when you start playing complex patterns. It's best to get used to using the ring finger for simpler and slower patterns as well. The lower notes in the score indicate the kick and the higher note indicates the snare.
Kick & snare pattern.
Step 5 - Putting it all Together
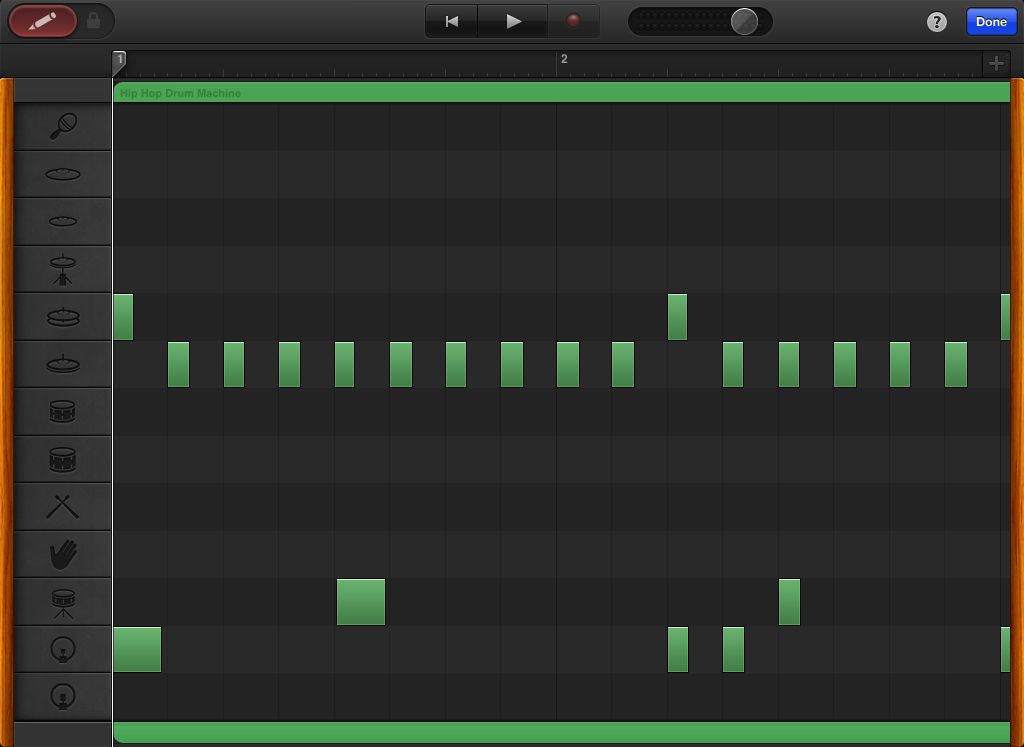
Now trying to play the hi-hat part with the kick and snare can be a bit tricky, so simplify it by skipping the kick drum hit which is in brackets. Try playing the pattern without that hit and once you are more comfortable, try bringing it in.
Complete drum pattern.
Complete drum pattern in Garageband.
Make sure to practice this slow first and always with a metronome. If you hear the metronome click just before or after you play a hit, you'll know that you are off. Try to match the metronome as much as possible to develop a steady rhythm. You may also have trouble hitting the snare and hi-hat hits together. Try not to get that flam sound. It should be as together as possible. Another tip is to try not to hit the iPad too hard. It will respond to the softest possible touch so make use of that. This will help you in the future to play really fast at breakbeat speeds!




 © 2024 Ask.Audio
A NonLinear Educating Company
Discussion
Want to join the discussion?
Create an account or login to get started!