When Pro Tools 12 was first released, it had a number of small enhancements, like I/O Setup improvements and in-app purchases, but not much in the way of major new features. But as the program was updated incrementally, those new features started appearing bit-by-bit, and now the current version, 12.4, has a number of significant new additions—some, in fact, that Pro Tools users have been pining for for years.
Pro Tools steps up
I won’t try to cover every little thing (there are lots of small changes)—I’ll just focus on five of what I find to be the most useful additions present in Pro Tools 12.4. Along with a number of other extras, there are three really significant new capabilities, all related to rendering tracks, and a couple of additional convenience features, all added in the most recent Pro Tools 12 updates, 12.3 and 12.4. These workflow enhancements offer real value to anyone who’s ever tried to manage a big session, needed to collaborate with others, or had to perform lots of small repetitive edits. Cynical users may point out that some of these are features that a number of other DAWs have had for years, and that’s not untrue, but, true to form, Avid took their time to come up with particularly well-thought-out and flexible implementations, addressing the kinds of issues, major and minor, that come up in real-world use, for a particularly elegant approach to the tasks they perform.
The three related new features are Commit, Track Bounce, and Freeze. All involve rendering tracks or regions (sorry, clips) for various purposes, ranging from computer resource management to collaboration and delivery—each has its own specific functionality, which I’ll go over in a minute. Another long-requested feature is a much-improved option for Batch Fades. And my list is rounded out by a simple, but elegant graphic improvement for editing, Clip Transparency. I’ll start with a quick look at the last two.
We can see right through you
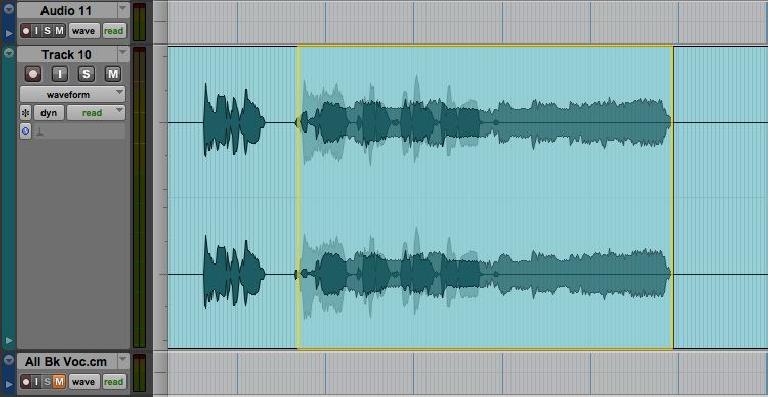
It’s kind of a small thing in the grand scheme, but I found Pro Tools’ new Transparent Clips a real help when editing. As you drag a clip, you can now see through it to the gridlines below, and if you’re dragging it onto another clip, you can see the other wave below (it even works with the MIDI displays). This makes it much easier to make small timing adjustments, like lining up a wave to a spot at or near a gridline when Command-dragging freely in Grid mode (something I tend to do a lot).
It’s a much quicker way to, say, line up a replacement phrase being flown in from another part of a track, or even to line up a phrase in one track with a similar wave in another (just make a temporary copy of the reference track’s wave, drag the edit over it, line it up, and let go). Simple, but very useful.
Whip up a batch (of fades)
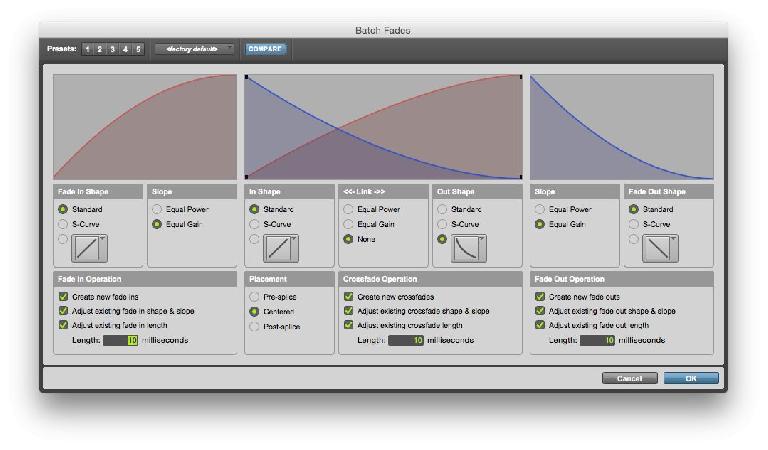
Creating Batch Fades for a bunch of selected clips can now be accomplished via the new Batch Fades window, which pops up via the old reliable Command-F (Mac). You’ve got three full panels now, each allowing for independent settings for Fade-Ins, Cross-Fades, and Fade-Outs, including different shapes and durations for each.
Being able to set these all from the single window can be a big time saver if you’re doing a lot of editing, or using the Strip Silence function. You can even save 5 Batch Fade presets, to be recalled for even greater convenience when it comes to repetitive tasks. Again, it’s not something you couldn’t have accomplished before, but now the process can be much more efficient, which is a big deal in the real world.
You oughta be Committed
The Commit feature is something new for Pro Tools—it’s Avid’s answer to previously more-limited options for rendering tracks and stems, and it’s quite well-implemented, as long as you take the time to understand the various options. Commit is, basically, a bounce-in-place feature, replacing a workflow that formerly required a number of (sometimes tedious) steps with a quick one-and-done operation. It’s great for both reducing computer overhead without having to go through a manual Bounce-to-Disk and track replace routine, or for exporting Tracks or sections as separate rendered files to be shared with other users, or submitted to a client for further work.
Commit can be applied either to entire Tracks or just Selected areas, and performed on multiple Tracks, Auxes, and even Instrument tracks with separate outputs. You can right-click on a selection, or a Track name in either window, to call up the Commit dialog, where you’re presented with a number of options. Here you choose to Commit the Track or the Selection, and whether you want to include Volume, Mute, and Pan Automation when rendering (incidentally, when this is enabled, it’ll also pick up the static Channel Fader and Pan settings, even if there’s no dynamic Automation data in the track).
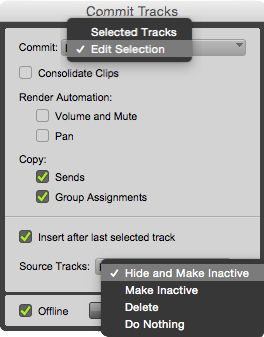
Fig 3 The Commit dialog box
When you Commit, you can have Pro Tools automatically create a new track for the new, rendered audio file—this is enabled by checking off the “Insert after last selected track” option. There are options for what to do with the original track—deactivate it, hide and deactivate it, delete it, or just leave it there untouched (the first two are the most useful, since you may need to revisit the original). For the newly created track with the rendered file, you can tell Pro Tools to automatically copy any Sends and/or Group assignments from the source track, so the new track will be ready to go, sounding identical to the original, but with the rendered audio eliminating all the processing overhead, and ready to be exported or included with a Session copy (that might be going to someone who doesn’t have all the same third-party plug-ins, for example).
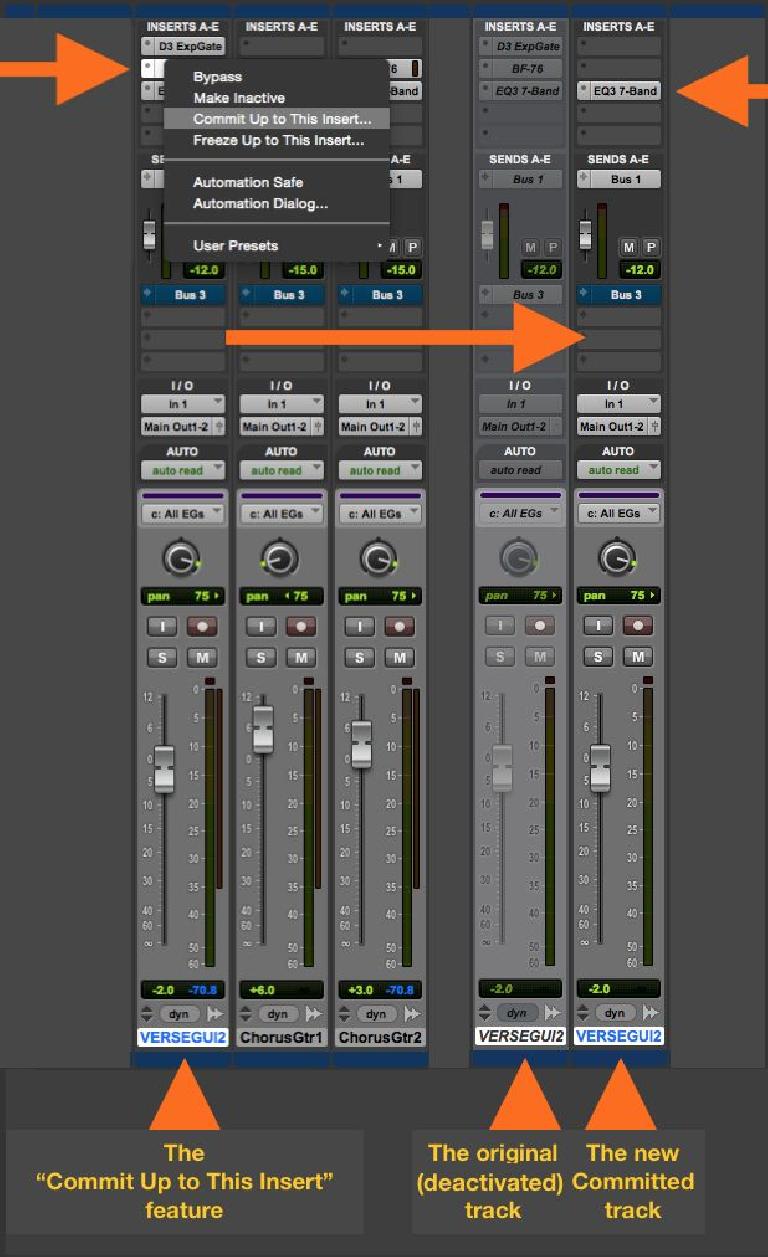
For even more specific control, there’s an option to Commit only up to a certain plug-in, copying any plug-ins that follow it to the new track.
This is kind of a best-of-both worlds feature. You can save on the overhead of a virtual instrument or a particularly CPU-hungry effect, while still retaining the ability to tweak other effects (after the last Committed effect) on the rendered track, or you could export/share that track with someone who doesn’t have the virtual instruments or plug-ins included in the rendered files, but still wants to be able to tweak the ones he does have in common.
Commit is not just for Audio tracks—it works equally well on MIDI/Instrument tracks (as I alluded to above), and can be applied to Auxes as well, for quickly rendering Stems. It can even handle Virtual Instruments that make use of separate outputs, like a virtual drumkit that distributes the different kitpieces to various Auxes for individual processing. In that case, Commit will optionally create multiple new tracks at once, with separate rendered files for each kitpiece, ready to go. You can even create a Committed track by simply dragging and dropping a MIDI clip onto an Audio track (although that approach doesn’t allow you to customize the Commit settings). And if you invoke Commit on an Aux track, it will render a single new file with all the audio that was bussed to that Aux, and disable the Aux’s input, so the new Committed track is, once again, ready to go.
Commit makes short work of what was otherwise a tedious manual process of bouncing to disk and setting up new tracks track by hand, and for larger sessions it’s an extremely useful feature, for both workflow and resource management. But it’s not the only new option when it comes to rendering files.
Follow the bouncing ball
Track Bounce is a new variation on the existing Bounce-to-Disk feature. It works pretty much the same way as that traditional Pro Tools option, with an almost identical dialog box, but it acts on individual Tracks instead of (main) Outputs, freeing you from the need to re-route tracks to get separate simultaneous track bounces. You can select multiple tracks and Bounce either complete tracks or a selection range, rendering them as individual files, via the familiar-looking Bounce Tracks dialog.
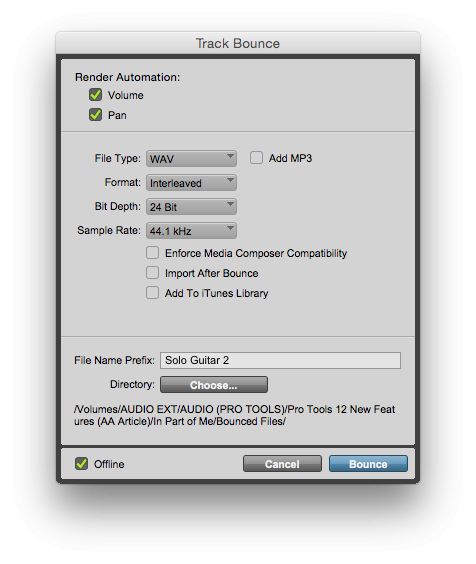
Fig 5 The Track Bounce dialog box
A new feature is the option to include Volume and Pan Automation (which once again also picks up static volume and pan levels). Track Bounce is strictly for export, which it can handle with welcome efficiency.
Freeze!
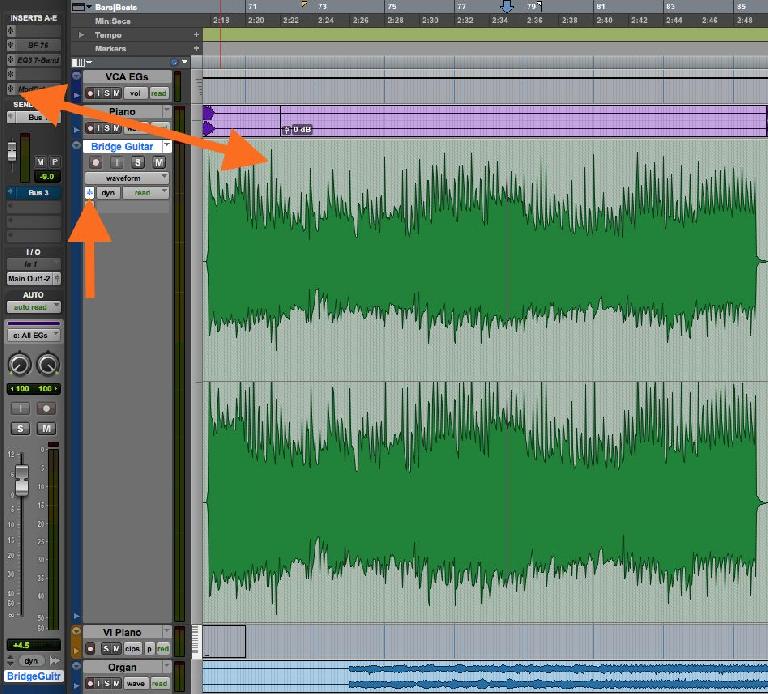
Most people know what a Freeze function does—other DAWs have had this capability for years, but now Pro Tools joins the club. Unlike Commit and Bounce Track, this is not for export, it’s strictly for freeing up system resources (or possibly for sharing an entire Pro Tools session with another user who, again, lacks certain plug-ins). Pro Tools’ implementation of Freeze is simplicity itself—besides right-clicking the track, as with Commit or Bounce, you can just click the little snowflake icon in the Track header, and viola—the track is Frozen. The display of the Frozen track is pretty cool—you can still see the wave, but the lane has a slightly-patterned, washed-out look to identify its status. A Frozen Instrument track will show the rendered, Frozen wave above the MIDI notes, and a Frozen Aux (subgroup or return) will even show the rendered wave of the combined tracks feeding it, in the Aux lane.
Freeze is easier to undo than Commit—you just click the snowflake again, or choose right-click and Unfreeze, and you’re back where you started. This is good, because, again, unlike a Committed track, editing is limited with Frozen tracks. You can’t touch the Frozen Instruments or plug-ins, but you can tweak Sends and Volume & Pan. You can’t perform cut & paste editing on a Frozen track; you can’t even make global edits (like Tempo changes) if there are Frozen tracks in the session, for obvious reasons (the temporary Frozen waves can’t follow those global tweaks). But it’s easy to just un-Freeze a track, tweak it, and then quickly re-Freeze it. And just as with Commit, you can choose to Freeze a track only up to a certain plug-in, which is a really useful improvement on some other Freeze functions.
And with that, I’m out of room. I’d waited a while to upgrade to Pro Tools 12, thinking the initial changes weren’t that exciting, but by the time I got around to it with 12.4, Avid had packed a lot of really great features and upgrades into it. If you’re still holding out, now might be a good time to make the move—there’s sure to be something new in there to catch your fancy.


 © 2024 Ask.Audio
A NonLinear Educating Company
Discussion
Want to join the discussion?
Create an account or login to get started!