
If you are into making beats in an electronic environment Maschine has to be one of the best 'all in one' groove production solutions. You can use it as a standalone production workstation, a plug-in or a hardware MIDI controller. The only thing it won't do is make your tea! [Although we've yet to test out the Maschine Mikro's tea-making ability - Ed.]
Let's break Maschine down to its core elements and hopefully this will help you understand what it's capable of and what it can do for you in your sessions.
Step 1 - The Hybrid Controller
The first thing to grasp about NI's Maschine is that itès a hybrid controller. Simply put, this means that the hardware itself produces no sound whatsoever. All the sound you hear comes from your computer (or audio interface) and all the audio data required is also stored locally on your main machine.
The controller that Maschine ships with is just that: a controller. It is connected to your computer via USB and is capable of reflecting everything the software is doing. In fact, you can operate the Maschine software from the controller without ever looking at the computer screen.

Maschine. Beautiful, isn't it?
This is a pretty innovative system and allows you the flexibility of using Maschine on just about any computer, with or without the controller. About the only thing you can't do is use Maschine without a computer!
Step 2 - Plug-in Power
After installation Maschine is initially run as a standalone application and you are able to use it completely independently of any DAW. This is great for creating ideas and getting familiarized with Maschine's internal sequencer and library (which we'll look at in the next step). However, most of us will want to run this alongside our favorite DAW.
Luckily Maschine is available in plug-in form and can be loaded into pretty much any DAW; AU, VST and RTAS formats are included in the standard install so everyone is covered here.
On first load you'll notice the plug-in is more or less the same as the standalone app. The only real difference here is that Maschine's clock is now perfectly synced with your DAW's tempo, allowing total integration between the two.
 plug-in in Logic Pro.")
Maschine running as an Audio Unit (AU) plug-in in Logic Pro.
When you have programmed your first beats and patterns these can also be dragged and dropped into your DAWs tracks. In fact, you can choose between either dropping the MIDI (this will of course trigger Maschine's internal sounds) or the actual audio that Maschine produces. Great flexibility.

Audio being dropped into a DAW from Maschine.
Step 3 - Patterns, Sequences And Groups
One of Maschine's killer features is its internal step sequencer. Couple this with its large, illuminated, touch sensitive pads and you've got a great combo for programming and performance.
Creating your first pattern is as easy as loading a kit, selecting a sound and bashing out something basic on the controller. Once you have finished your first recording you can fine-tune the position and length of events within the sequencer. If you prefer you can even input all your data in this way.

Using one of Maschine's sequencing modes.
Once you've saved a pattern, you can then create different scenes that contain either variations or completely fresh sequences. These can then be strung together to develop an entire song.
Maschine is capable of playing back up to eight different banks of sounds. This means you could essentially use a number of drum kits, a synth bass sample, a sampled groove and some vocal parts. Everything you need for a fully-fledged production, without ever touching your DAW!

A quick loop in Maschine using 5 groups.
A quick loop thrown together in Maschine, using 5 groups:
Step 4 - Simple Sampler
As I mentioned previously you can load samples into Maschine. In fact, in a recent update of the Maschine software, N.I. introduced MPC-like sample editing to Maschine's repertoire.
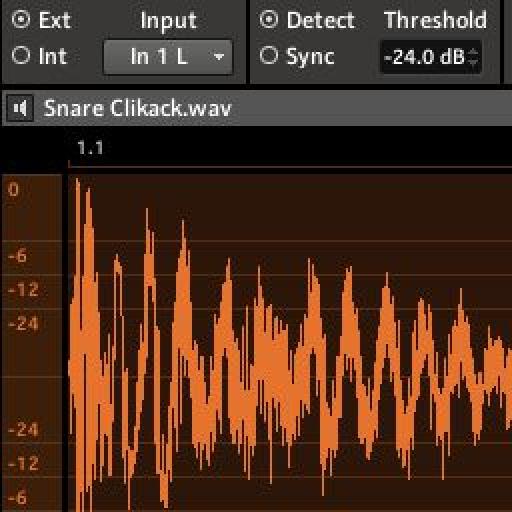
Maschine is now capable of taking any groove-based sample, cutting it up in real time and splitting it across the pads. The slices can be cut up using a rhythmical grid or a system that senses transients and dynamics. If you have ever used Recycle then this system will seem pretty familiar.

Editing samples in Maschine.
Once split up your samples can be played back via the pads, from Maschine's internal sequencer or via some drag and drop MIDI in one of your DAW's tracks. The flexibility here is again pretty astonishing.
Step 5 - A World Of Effects
As this is an overview of the Maschine system, I wanted to talk a little bit about the signal processing available when working on a typical project. First up we need to talk about the internal effects that ship with Maschine.
There is a quite a list here, covering everything from the run-of-the-milll compressors, EQs and modulation effects to more creative processors such as delays, reverbs, distortions and bit crushers.
The really impressive thing here is how many effects you can apply at any one time. You can have up to three processors per sample, a further four per group and another four master processors. This is great for setting up complex projects.

Accessing effects in Maschine 1.6.
Since version 1.6 you can also load up your own Audio Unit or VST plug-ins into Maschine and even control their parameters via Maschine's controller. This gives you access to every plug-in in your system.
One thing worth thinking about is that you can actually use this feature to access formats of plug-ins some DAWs can't usually load. For instance using Maschine (version 1.6 and above), you can access VST format plug-ins in Logic and AU ones in Pro Tools.
So, all in all you can see that Maschine is an extremely powerful groove production workstation that integrates seamlessly with your DAW. In the next installment of my Maschine tutorials, I'll run through a project step by step, showing you how to program, mx and process a beat from within the plug-in version of Maschine.
Maschine is more flexible and powerful than many users know! Check out Matt Celliti's 3 Tutorial-Videos on Maschine to learn more!

Discussion
We've already published a specific written tutorial on The Hub re: Maschine for Logic users (on the 8th September):
http://www.macprovideo.com/hub/logic-pro/maschine-for-logic-users
Hope this helps.
R
Want to join the discussion?
Create an account or login to get started!