FL Studio is flexible in the way it handles editing and function operations, and this is evident in how easily audio is routed to different tracks in the mixer. Let’s take a look at creative ways to route your audio around with FL Studio.
Assigning Your Track to a Mixer Track
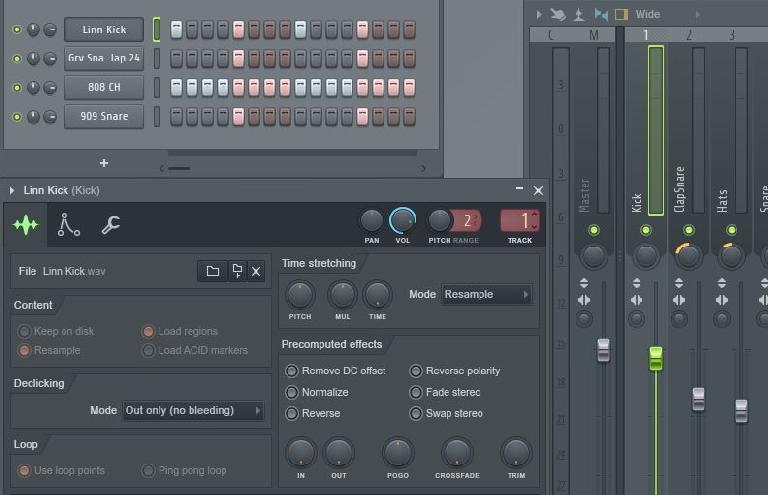
If you have moved across from another DAW, FL Studio’s routing can be a bit confusing at first, especially as it tends to be very linear in its approaches. The tracks that you create in FL Studio in the channel rack are not exactly replicated in the mixer window. You have to first assign these to a mixer track. This can be done in the channel settings window of the channel track. Make sure all your tracks are assigned to their own unique mixer track.
When you’ve done this, it makes the mixing much easier as you can adjust volumes and pans, and assign specific effects to each track. But what if you want to take this a step further and create a sub group, for example like a drum sub group?
Creating Sub Mixes
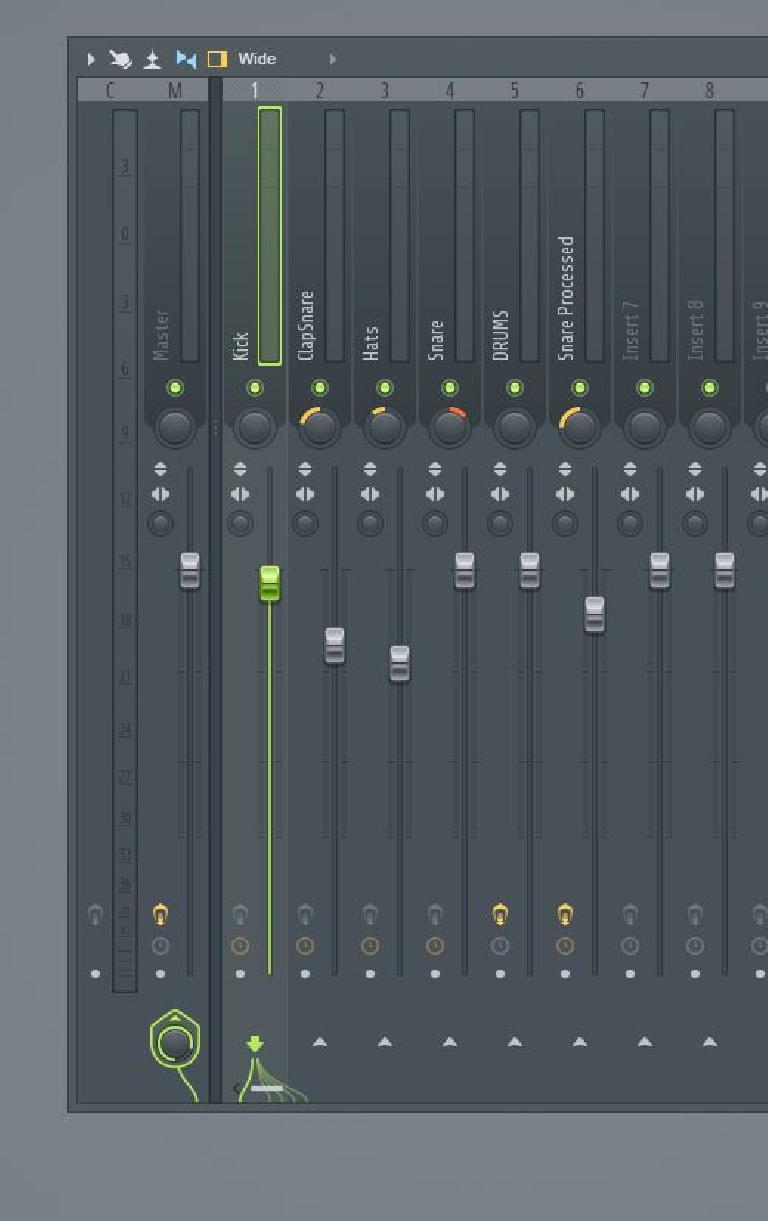
When you select a track, you’ll see at the bottom a downward facing green arrow with a bunch of cables going off it. This is showing that audio is passed out of this track. You’ll also notice, on the Master track, a green cable coming up to a rotary knob. This indicates that the selected track is being routed to the master.
If you click on the upward facing arrow above this rotary knob, it’ll disable the selected track being routed to the master. Now you can route this track to another track in the mixer.
My selected track is my Kick, and I’m going to route this to an empty mixer track. So first go to an empty insert track on the Mixer and click on the upward facing arrow. You’ll see that this routes the selected track to this new empty track, and you’ll also notice the green cables linked between to the two. That’s how easy it is to re-route a track from your master to another track.
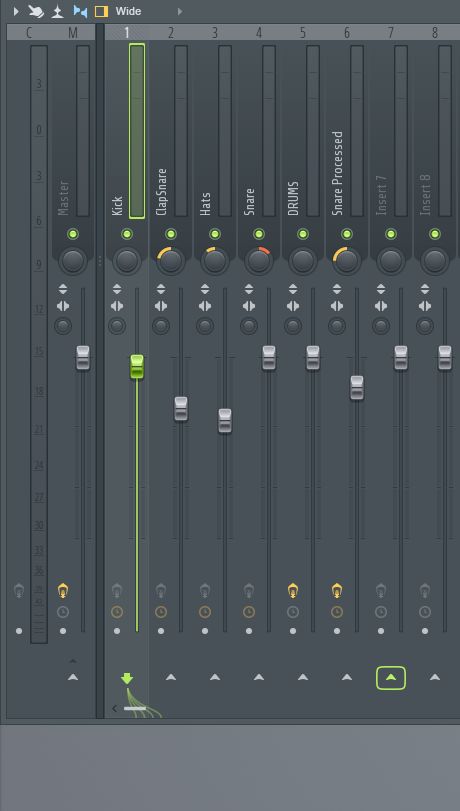
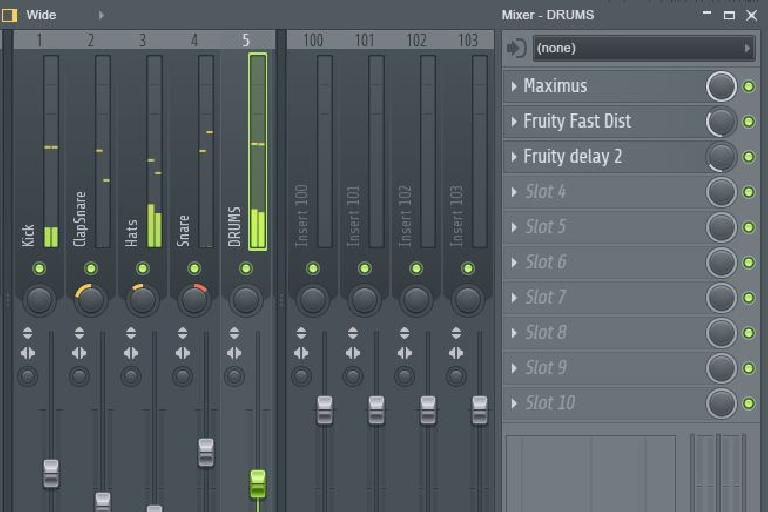
Rename this new track to DRUMS—this will be the drums sub mixer track. All the other drum tracks will be passed through this track.
Your Drum Sub Mix
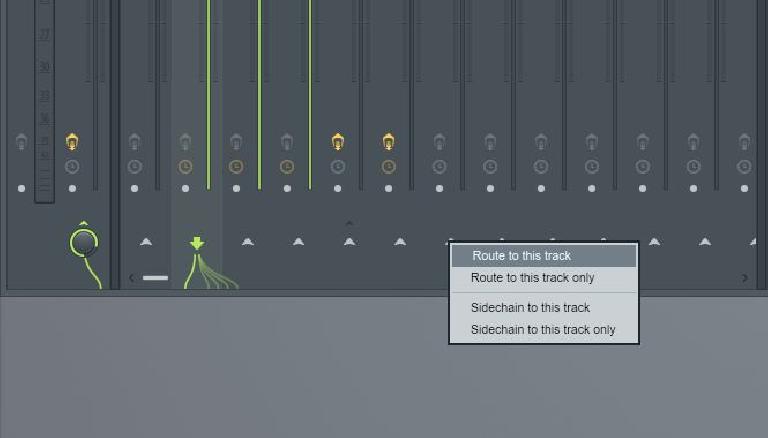
Go to your other drum tracks in your song—you can select multiple tracks by holding down Shift-Ctrl. Then go to the Drum sub mixer track. Right-click on the knob and choose ‘Route to this track’. Now all those drums tracks will be routed to the drums sub mixer.
Now that you have your own drums sub mix, you can add bus processing effects such as bus compression or EQ onto the track to process your drums as a whole. And you have control of the overall volume level of the drums, so if you need to drop the drums level, you can easily grab this fader and drop it down accordingly.
Route to Other Tracks
What’s neat about FL Studio is that you can easily route tracks that have been routed to the drums sub mix to other tracks. I want to route my snare to another track and apply some delay processing on that track that’s separate from the drum mixer track. So select the snare track. Then choose another track on the mixer and route it to this. Now I can apply some heavy delay effects. With the rotary dial, it’s set by default to 100%. If you dial this back, you drop the amount of audio that is being sent from the snare track to the newly created delay sub mix. Not only is it easy to route audio around in FL Studio, but you can also easily control how much signal is sent to each track too.
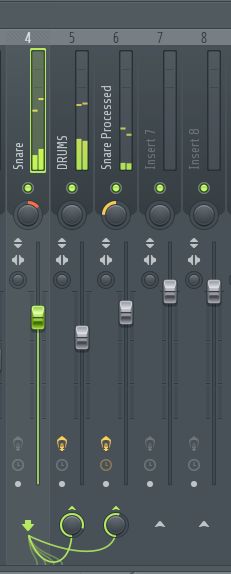
Setting up different types of bus processing on your sub mixes and choosing how much you want the sub mixes to be processed is a simple task thanks to FL Studio.
Automating the Routing
Now let’s look at other creative ways to use channel routing. In FL, you can link nearly any parameter to an automation clip. Let's look at how you can link the assignable mixer and automate it. Stick with me here and see how unique and interesting this use of routing is.
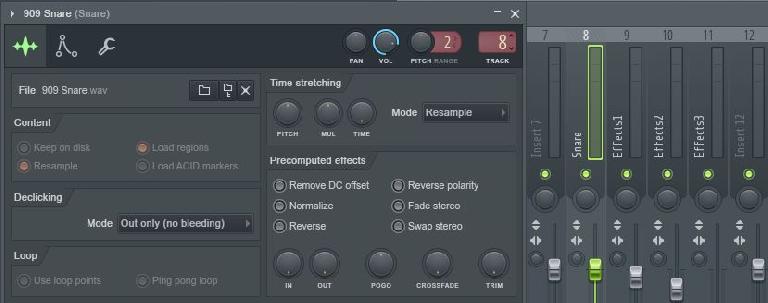
I have a snare track that is assigned to the mixer track 8. I have created three effects tracks on the mixer (going from mixer tracks 9–11). Each track has a set of different processing effects.
Now go over to the channel settings window for the Snare, and right-click the track number box in the top right and choose ‘create automation clip’.
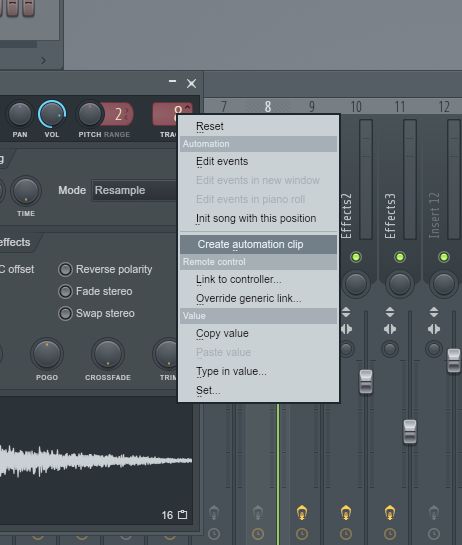
This creates an automation clip in the channel rack. You can paste this automation clip into the Playlist view.
Now go back to the Channel settings window for the snare. Move the assignable track number up to one of the effects tracks in the Mixer, mine is track 9. Then right-click this and choose Copy Value from the contextual menu that pops up.
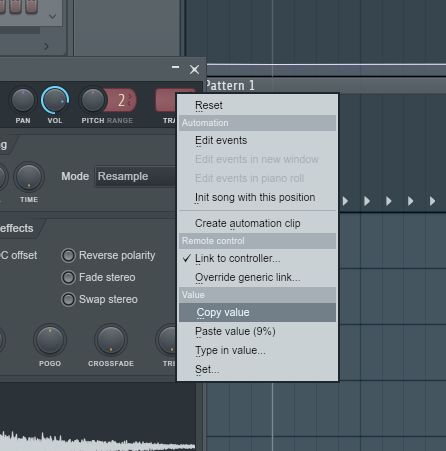
Navigate to the playlist automation clip. Create a node point and then right-click on it and choose Paste Value. Do the same for the other mixer effects tracks and paste their values onto the automation clip.
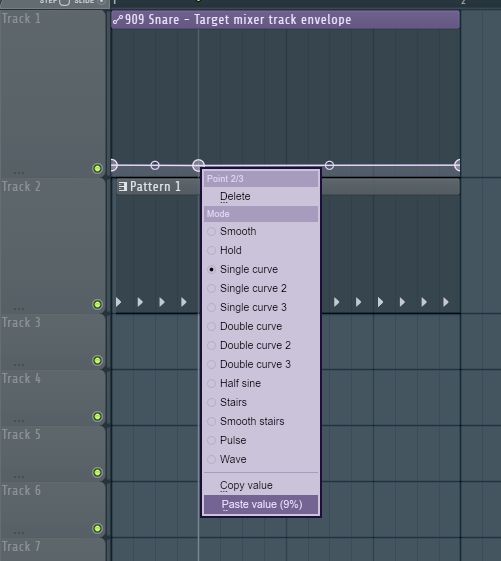
Now when you playback your audio, hear how the snare track jumps through the tracks it’s routed to via the automation. How crazy is that, thanks to FL Studio's architecture being so open. That is very cool!
Conclusion
And that’s how you route your channel tracks around in the FL Studio Mixer. FL is unique in how open-ended it is, and you can see this in the ease of routing audio in unique ways. So try out some sub mixes in your next production and maybe even some channel assignable track automation to add something new to your audio.


 © 2024 Ask.Audio
A NonLinear Educating Company
Discussion
Want to join the discussion?
Create an account or login to get started!