Reaper has some nice handy editing features, and the one I really like is the Ripple Editing function. It allows you to easily change up your project on a track basis, or on all the tracks simultaneously. In this article I'll give you the run through on how to enable ripple editing, and how to apply it to single track or multiple tracks. You will see how helpful this editing function is, and it will definitely help speed up your workflow. Let's get into how this is done.
Step 1 – The Different Modes
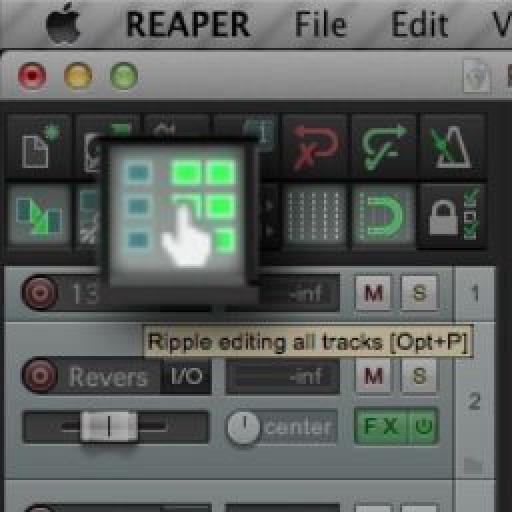
Ripple Editing is enabled from the Toolbar, the Options Menu, or you can use the shortcut Option-P (Mac) or Alt-P (PC). But I like toggling it via the Toolbar menu as the icon gives you a visual aid on which mode it is in.
By default, ripple editing is disabled. When you click on the icon or use the menu or shortcut it will change the mode to Ripple Editing per-track. Take note of how the Toolbar icon changes to show you it is in this mode.
If you click it again, it changes it to Ripple Editing All Tracks, and again make sure to take note of the look of the icon change in the Toolbar. This way you can easily tell what mode you are in by quickly eyeing out the icon. Next I'll go into detail on each mode.
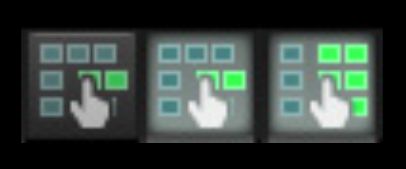
Here are the three modes. On the left Ripple editing is disabled, in the middle it is set to Ripple Editing per-track, and on the right is Ripple Editing All Tracks.
Step 2 – Ripple Editing Per Track
Like the name entails, ripple editing has a 'ripple' effect on the items that follow after it. Choose an item in your arrangement and move it around. It is a single item that doesn't affect or alter any of the other items in the arrangement. Now enable Ripple Editing per-track. Take the same item and move it. See how any items after it are moved simultaneously with this item.
This comes in real handy when you need to make edits to your arrangement. Let's say on your one track all the guitar regions come in too early. You need to move them all over the right by a bar measure. You'd have to select all the items on that track and then move them over. But with Ripple Editing per-track you only have to select the first item on that track and move it across one bar, the rest of the items follow.
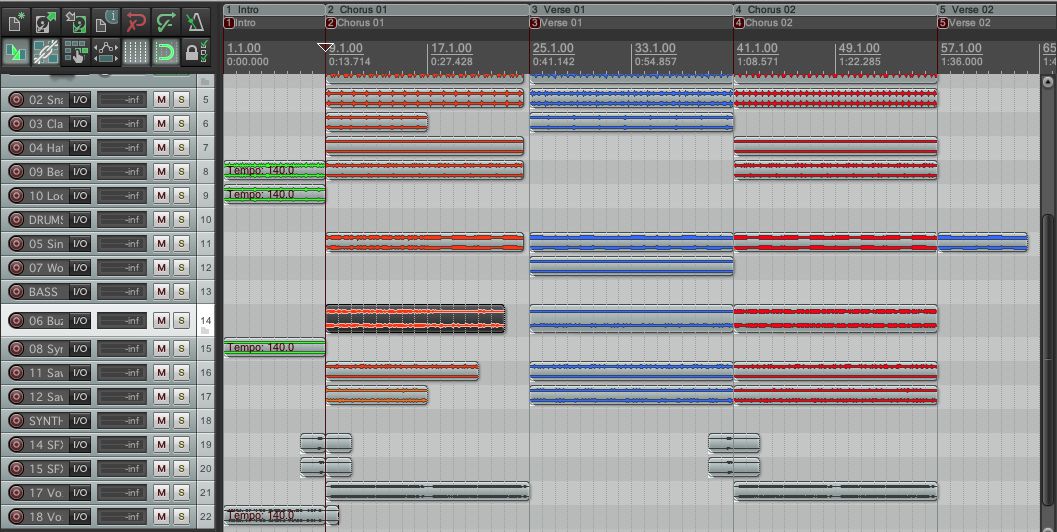
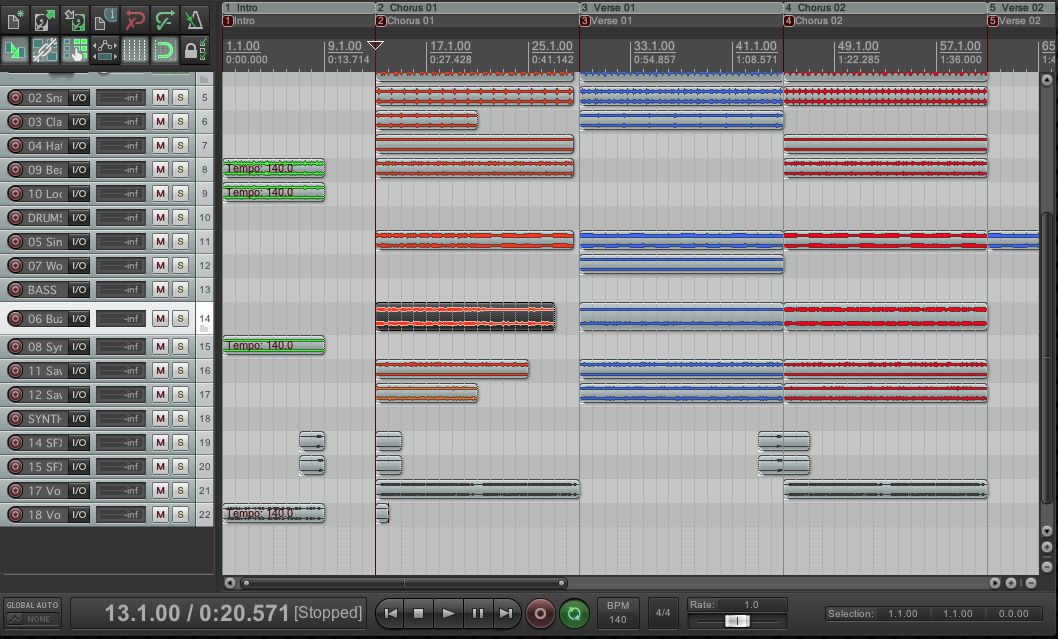
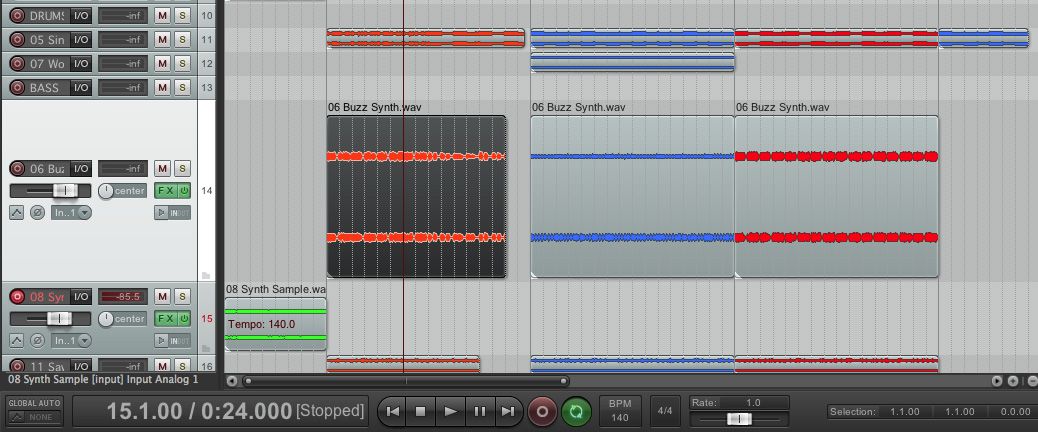
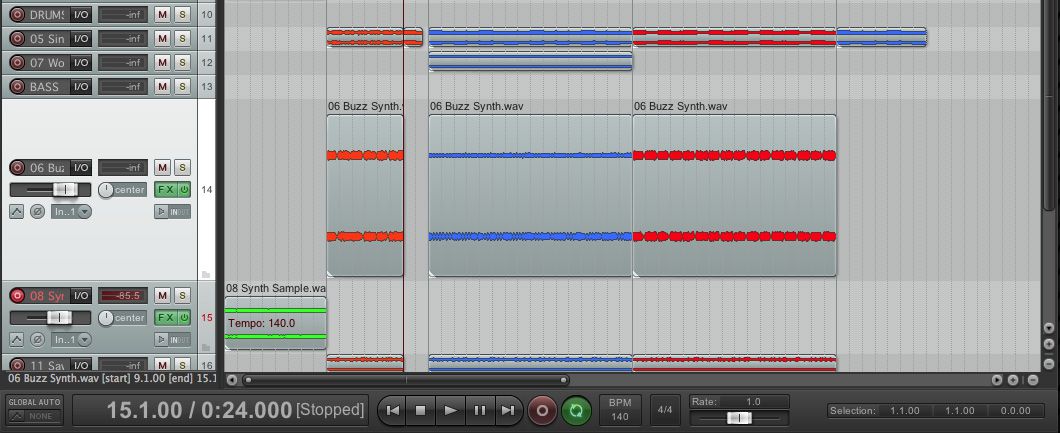
This is what my arrangement looks like before the Ripple Editing per track. You can see I have an item selected.
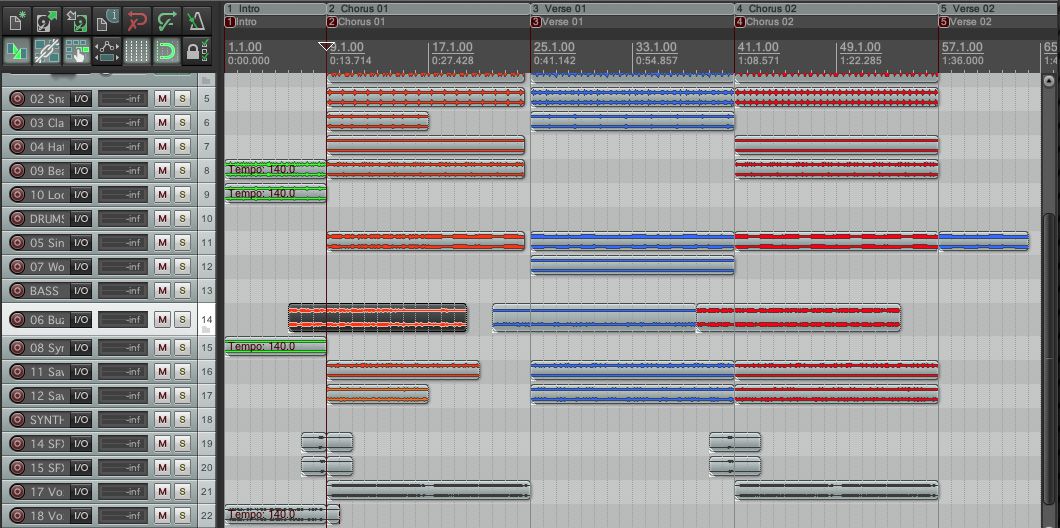
I have moved the item left 4 bars, and the items after have followed suit.
Lets take a look at the difference with Ripple Editing All Tracks.
Step 3 – Ripple Editing All Tracks
As you can tell from the name, Ripple Editing All Tracks works on all the tracks in the project. Enable this mode, now select an item in your project and move it. See how all the items on this track after the selected item are altered and any items on the other tracks after this item are also changed.
I have an item selected and Ripple Editing All Tracks is enabled.
As I move the item all the items on all the tracks move over as well.
This comes in real handy when doing overall changes to your song arrangement. Let's say you need to extend a chorus. Select an item after the chorus, move it over, and all the items that follow in the arrangement move as well. Creating an empty space for you to extend the chorus.
Step 4 – Try It Out with Deleting As Well
This works with the other edit functions as well. Let's say your chorus section is too long and you want to shorten it. You would first have to split the chorus items. Then remove them and then select all the items that follow and move them across to fill the gap.
Let's try this out rather with Ripple Editing All Tracks enabled. Take one item in your chorus.
Before splitting...
I have an item selected. My cursor is placed where I want to split the item. Split it with S where you want to shorten it. Now with this item still selected, press the Delete key to delete it. You will notice that this item and all its associated items on the other track that fall in the same area in the arrangement are deleted and the items that follow are all shifted over. How much easier is that? And all it took were 2 steps.
I have split the item and deleted it. After deleting the split items all the tracks moved across to fill the gap.
Conclusion
As you can see the Ripple Edit function can come in real handy in the editing phase of your song where you want to make some changes to the arrangement in a hassle free way. I find that it works very quickly and efficiently. It definitely helps speed up my workflow in this editing phase. Doing it the other ways can really take a lot longer and eat into time you could be spending being more creative with your track. Try the Ripple Edit function out in your next Reaper project and see how it speeds things up.
Take a look at the following tutorials to get further techniques with Reaper:
Reaper 101 - Introduction to Reaper
Reaper 102 - Working With Audio
Reaper 103 - MIDI, Instruments and Plugins
Reaper 104 - Mixing and Automation


 © 2024 Ask.Audio
A NonLinear Educating Company
Discussion
Want to join the discussion?
Create an account or login to get started!