
In this article I'll be showing a couple of ways to flip your sounds around. Backward sounds are great for creating anticipation for a frontward sound that plays directly after, or for creating cool slippery effects in beats. They're also cool for those paranormal pre-verb effects! We'll do all of that in this article.
Either open an existing song, or open a new project, and save it. We'll be using Apple Loops for this lesson, but interestingly enough... you can't reverse Apple Loops! For the sake of keeping things simple in this article, we'll first convert the Apple Loops to standard uncompressed AIFF files. If you're following along, and you'll be reversing areas of your own recordings, bounces, or files that have been “bounced in place”, then you won't need to convert your files.
Step 1 - Choose the loops and convert
Open the loops browser and drag in “Club Dance Beat 216” onto its own track. Also grab “Edgy Synth 02” and drag it also to its own track. Choose not to import the tempo information for both of these loops. Click to select each loop, and from the region parameters window at the top of the Inspector, deselect “Follow Tempo”. You'll notice that they change back to their original length.

Deselect “Follow Tempo”.
Click the beat loop, and while holding Option, drag its bottom right corner OUT so it occupies exactly two bars (we've stretched this loop). Release the mouse before releasing the Option key. Click “Convert and Process” on the window that appears. Do the same for the Synth loop, but drag its corner IN so it occupies exactly one bar. Mute the Synth loop temporarily. This process has converted these loops to editable AIFF files.

Click “Convert and Process”.
Step 2 - Select the area to reverse
Hit the “L” button to loop the beat. Switch to the Marquee tool (hit ESC and select it), and highlight an area of one of the ghosted alias loops you'd like to reverse. The images below shows the area I chose.

Highlight the area you want to reverse.
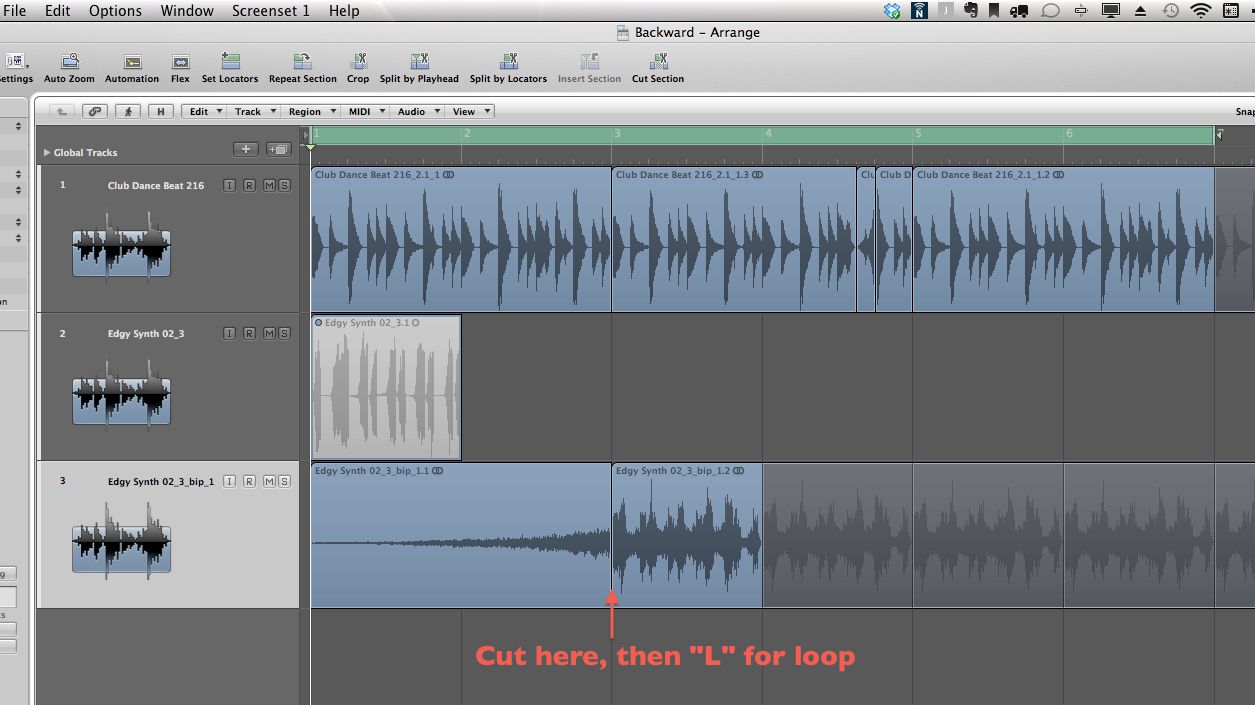
Step 3 - Cut the area into its own region
When you've selected the area, use key command Command- to cut the region by the boundaries of your Marquee selection. Look what happened... It turned the ghosted loops into real copies, cut out the section you chose, and it kept the original uncut loop continuing after it! The slice you picked should be selected.

Slice made with the Marquee tool.
Step 4 - Convert to a new audio file
Now from the Arrange window's Audio menu, select “Convert Regions to New Audio Files” and save it with its default name. We need to do this so we don't flip every instance of this beat, since we'll be looping it. Remember, if you've looped an audio region, whatever change you make to the original will apply to all the alias/loops unless you save it as a separate audio file as we've done.

Audio > Convert Regions to New Audio Files.
Step 5 - Reverse the region/slice
Hit the Escape key twice to choose the Pointer too and double-click the slice to open it in the Sample Editor, and from the Functions menu, choose “Reverse.”

Functions > Reverse.
Here's what I have so far:
Step 6 - Reverse the synth loop
Now let's add a “pre-verb” to the synth loop we dragged in. Un-Mute the loop. Double-click the Edgy Synth 02 loop to open it in the sample editor, and from the Functions menu, choose “Reverse.”

Functions > Reverse.
Step 7 - Add a reverb to the synth loop
On the Synth Loop's channel, add a Space Designer reverb, and choose a large preset setting. I picked “Upper Echelons” from Large Spaces > Outdoor Spaces.

The Upper Echelons Space Designer preset.
Step 8 - Bounce the synth loop in place
Right-click (or Control-click) the region now, and from the “Bounce and Merge” menu, select “Bounce in Place.” Make sure to select “New Track” and that “Include Audio Tail in File” is checked off (see image below), then click OK.

Bounce the loop in place.
Step 9 - Drag the synth loop out
Drag the bottom right corner of the new region out for two more bars as I did in the image below.

Drag The Synth Loop Out to reveal the reverb tail.
Step 10 - Reverse it again!
Double-click the region to open the Sample Editor, and again, from the Functions menu choose Reverse. That should do it!

Reverse again!
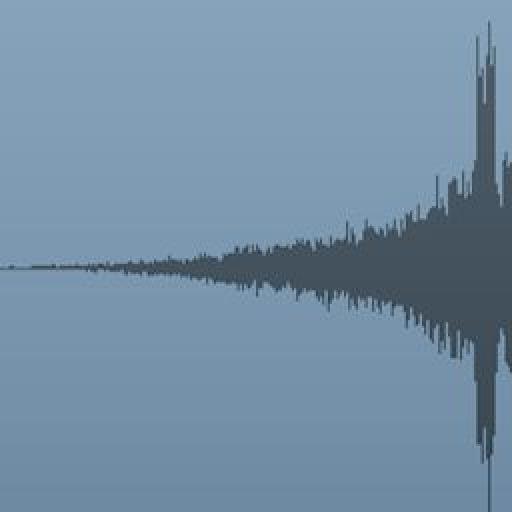
Tips: Try this effect on vocals for that Poltergeist effect! Cut the original bar(s) after the backward reverb on the synth and loop them (See image).
Here's the final result:

Discussion
Want to join the discussion?
Create an account or login to get started!