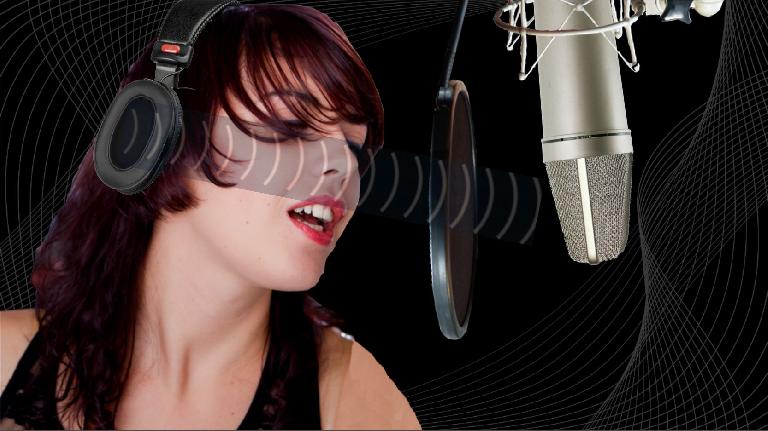
There are any number of pitfalls to watch out for when recording acoustic parts with a microphone—especially with vocals—like plosives (p-pops on the letters “p” and “b”) and proximity effects (excess bass from too-close-miking). One problem that can rear its head in many ways is leakage—unwanted sound getting picked up by the mic.
Leakage can take the form of background/outside noise from adjacent rooms or open windows, sounds generated by the performer, like other instruments nearby or jangling jewelry, and high-pitched sound emanating from the headphones worn by vocalists during recording. Even if none of these unwanted sounds are present, the sound of the room itself can sometimes be problematic. The ambient quality of the recording room—a.k.a. room tone—may lend an unpleasant echoey quality or excessive midrange, and even if the room has a well-balanced character, too much room tone in the recording can make a vocal sound overly distant, making it hard to get that part to sit properly in the mix down the road. With that in mind, here are a few suggestions for avoiding the typical problems of unwanted sound in microphone recordings.
Mic Setup
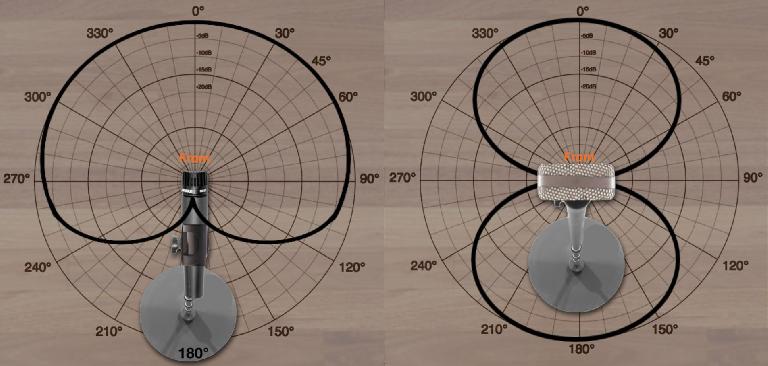
Naturally, the first line of defense in keeping unwanted sound out of the mic is careful selection and setup of the mic itself. Most recordists—even novices—know to use a directional microphone when the recording space is less-than-ideal in any way like noisy or overly “wet”. The typical large-diaphragm side-address condenser mics normally used for vocals will either offer a single directional pattern or a choice of patterns. Most of the time a uni-directional pattern—some kind of cardioid pattern—will be used; a cardioid mic picks up sound from the front (on-axis) and is designed to reject sound from the rear, and sides to some degree.
While a Figure-8 (bi-directional) mic—which picks up sound from front and rear and rejects sounds from the sides—can also be useful, nine times out of ten cardioid will be the pattern of choice. Keep in mind, though, that the rear rejection is not absolute, and some sound may still leak in, usually highly colored in tone, so mic directionality alone is not a panacea for leakage and room tone problems—but it is the first step in the chain.
The distance of the mic from the source can help isolate that source and reject leakage. When close-miking is suitable this can ensure that the level of the desired signal is much louder than any leakage from more distant sources. A mic an inch from a loud guitar amp’s speaker grille will likely offer excellent rejection of even fairly loud sounds in the room.
However, many acoustic sources require a bit more distance—vocals and acoustic guitars will both need about a foot between mic and source—and this will not isolate the source as well, so additional measures will be needed. In some situations, a bi-directional mic’s side nulls may offer greater rejection than the back of a cardioid mic. An example might be an acoustic guitarist who plays and sings at the same time, but the rear pickup must be carefully controlled or excess room tone may get picked up.
Naturally, whatever the distance from the source, positioning a cardioid mic so its null pickup (the rear) is pointing at the most likely source of unwanted sound will be necessary to get the best results—I know that’s obvious, but you’d be surprised how often people overlook details like this in the hustle and bustle of setting up for a session. Needless to say, a little attention here can make a big difference later on.
Headphone Leakage
One of the most common leakage problems in the studio is that familiar high-pitched sound (tst-tst-tst) that often emanates from headphones. Of course closed-back headphones are required for any vocal recording, but problems can still crop up. Many vocalists like to hear a little of their own voice acoustically when recording as it helps them maintain pitch better. They often remove one earcup to accomplish this, and that open earcup can then blast headphone sound into the nearby mic if the recordist doesn’t notice it before recording begins. It’s important to keep an eye out for this and to make sure that if a performer is doing this, all the sound in his/her monitor mix is routed to the other ear (in mono left- or right-only) so that open earcup will be silent.
Even if the performer keeps both earcups on, it’s still a good idea to not only solo the mic during sound check but also to go out into the live room and check for leakage acoustically as well. Sometimes the phones aren’t sitting as tightly as they need to be for proper isolation, or the level may simply be so loud that some sound is leaking out anyway. This kind of sound can be difficult to get rid of later, and that high-frequency content can often stick out even in a dense mix. Gating won’t help if it’s audible under the main signal, and while some audio repair programs have tools to try and eliminate it after the fact, it’s far better to prevent it at the get-go.
Isolation
For sounds at a somewhat greater distance, isolating the mic from the unwanted sound will help keep recordings as clean as possible. There are a lot of ways to go about this, depending on the source of the unwanted sound and how severe (how loud) it is at the mic, relative to the desired signal.
If the leakage is stray sound/noise, then the ideal solution is to eliminate that sound, either at the source or by positioning a barrier between the mic and the unwanted noise. The hum and buzz of air conditioning is a common problem. Since low-frequency sound tends to fill the room, the best solution may be to simply turn the AC off while recording. To keep the recording room from getting too hot and stuffy, the AC can be run between takes or whenever there’s a pause in the session—this is not ideal, but it can work. A split system where the noisy compressor is outside and only a blower is in the room itself is much better, but even that can still be noisy enough to be picked up if it’s not a system that’s optimized for quiet (low air velocity) operation.
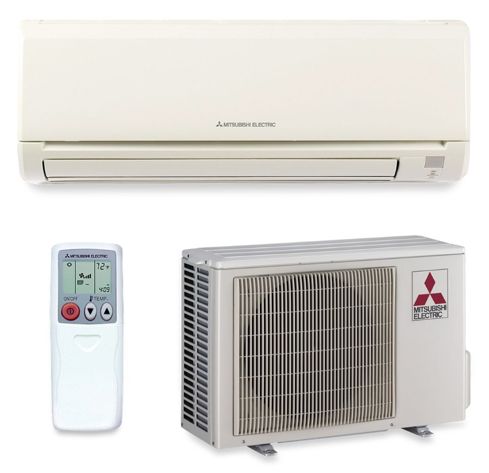
A split AC system
Naturally, open windows must be closed and if possible, thermal (double-paned) windows should be used as these provide much better sound isolation. Some sounds like loud nearby sirens or helicopters may still get through, but probably not often enough to be too problematic—just be sure to wait for them to pass, or check a recording to see if it’s been compromised when one shows up mid-take.
Lo-Tech Solutions
If the source of the leakage can’t be completely eliminated, or if the leakage is coming from other musical sounds that are part of the recordings like other instruments in a multitrack session then some kind of barriers can be used in conjunction with careful placement of the mics. People sometimes rig up heavy blankets or packing blankets around the mic/performer or between the mic and the source of the leakage. This doesn’t look very slick, but it may help a little.
Reflection Filters
A new trend is the use of dedicated reflection filters. These are sometimes small-ish barriers placed close behind the mic and they’re meant to help block unwanted sound - their designs are often optimized for this function. Larger floor-standing barriers are sometimes made up of the familiar studio foam panels mounted on stands. These are also set up around the mic/performer, to help create a small partly-isolated area in a larger room that may otherwise be too noisy or too ambient. These are probably more effective in controlling excess ambience than blocking specific unwanted sound sources, but they can help and are small enough or lightweight enough to be positioned easily.
Gobos
Traditional studio barriers are called “Gobos”—it’s short for “go-betweens”. Traditional Gobos are larger panels made up of a wood frame with sound absorbing/blocking panels; a typical gobo might be around 3-4 feet high and wide and several inches deep—some may have glass (or plexiglass) panels at the top to provide sight lines. Google some photos of larger recording studio sessions and you’re likely to see a number of them dividing up a larger recoding room into smaller areas, with various musicians semi-isolated in each area.
Some modern gobos are made of more lightweight but still effective materials, making them stackable. For example, Taytrix offers a line of lightweight stackable gobos that can be used to create makeshift “iso-booths”—these can be surprisingly effective for may applications.
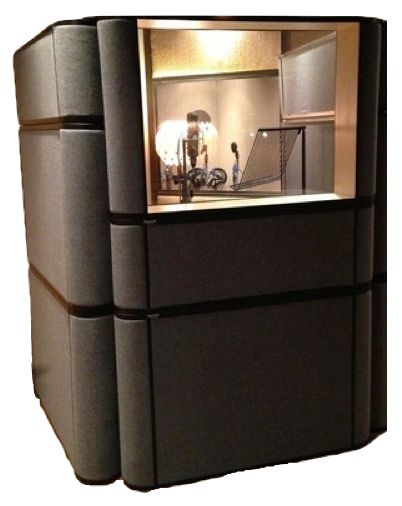
A makeshift “iso-booth”, made with lightweight gobos
Iso-Booths
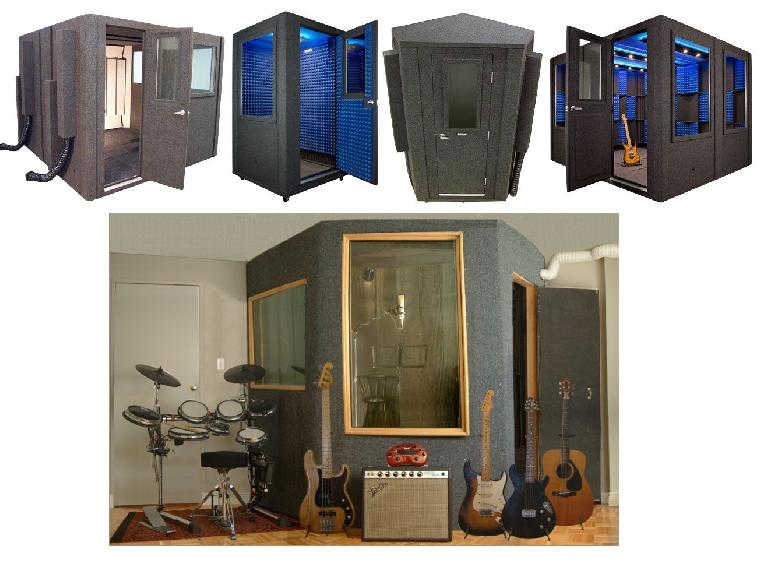
Of course, the most effective way to achieve isolation for microphone recordings is to have the mic in a separate dedicated room. Bathrooms are often pressed into service in home studios, but a better option is to use an iso-booth (a.k.a.vocal booth). This is a small-to-medium-size sealed room-within-a-room; walls, floor, ceiling, including windows and some kind of HVAC. While these booths may not be able to block the sound of a live drum kit or cranked up amp, they can be very effective for the majority of situations where the recording environment suffers from unwanted noise or the sound of other instruments.
Commercial iso-booths are convenient, well-constructed, and can often be assembled relatively quickly; the downside is that that performance and convenience comes at a price—typically a couple grand and up, depending on size and features (windows, AC, etc). Intrepid DIYers can easily build their own from standard construction materials (wood/steel frame, drywall, insulation, glass/plexiglass), saving on considerable labor costs, but they need to be careful to not only seal the booth well but also provide for suitable airflow since that last issue can be the downfall of an otherwise decent home-built iso-booth.
Other DIY considerations relate to the inside of the booth. Standard studio foam is typically used liberally to absorb any potentially nasty reflections, providing a fairly dry sound; remember, a vocal can be beefed up with reverb later but an overly-ambient recording—especially one with the peaky room tone of a small space—may prove to be unusable. DIYers should also pay some attention to the dimensions of the booth to avoid standing wave issues which in that kind of smaller space can be high enough in frequency to affect voices noticeably.
Final Word
Of course, sometime you just luck out. A decent space with a good directional mic and a pair of suitably closed phones may provide perfectly clean recordings without having to deal with any of these issues. But when leakage does raise its ugly head, there are many ways to address it, even on a limited budget, to ensure the best acoustic recordings possible.



 © 2024 Ask.Audio
A NonLinear Educating Company
Discussion
Want to join the discussion?
Create an account or login to get started!