In principle, risers are simple sustained sounds that start at a chosen pitch, and literally “rise” up an octave or two to create a powerful crescendo. As they rise, things like filter cutoff, LFO speed, gate, reverb level, volume and more can be changed over time. However, they can be a hassle to set up from scratch every time… so much so that most producers use purchased riser loops from sample packs instead. Read on for a great method to create risers and simplify the setup so it’s easier to make your own. With one “fell swoop” of a single Smart Control knob, you can modulate multiple parameters for a constantly changing/evolving riser, then save the setup for easy recall in any project.
Step 1: Make a Pitch Bend Template Loop
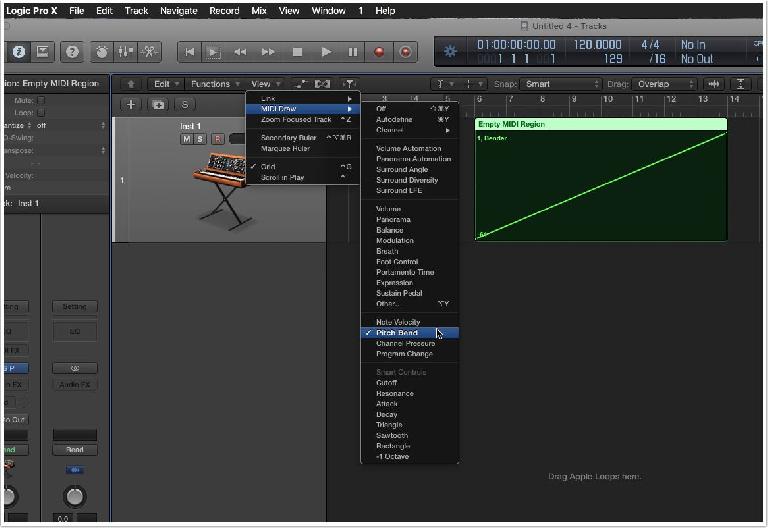
We’ll need a simple way to “bend” the pitch up so it’s constantly rising. Let’s start by making a pitch bend loop/template we can recall. We’ll create it, then save it to the Apple Loops browser so it can be grabbed easily for future risers while producing. Create a new software instrument and choose the ESP Synth. Create a new empty region by right-clicking the arrange area of the track and choosing “Create Empty MIDI Region.” You can also create a new empty region by using the Pencil tool and single clicking where you want it. Drag its corner out so the region lasts 8 bars. Make sure the track is selected, and from the local View menu, MIDI Draw > Pitch Bend. Make sure you’re zoomed vertically enough to be able to see the Pitch Bend MIDI Draw… if you’re too far out, it will not be displayed. Click to create a single point on the line and drag it down and to the bottom left. Create another point and drag it up to the top right corner like in the image below. Put a cycle/loop around the full 8-bar region so it will loop.
Step 2: Save the Pitch Bend Loop to the Browser
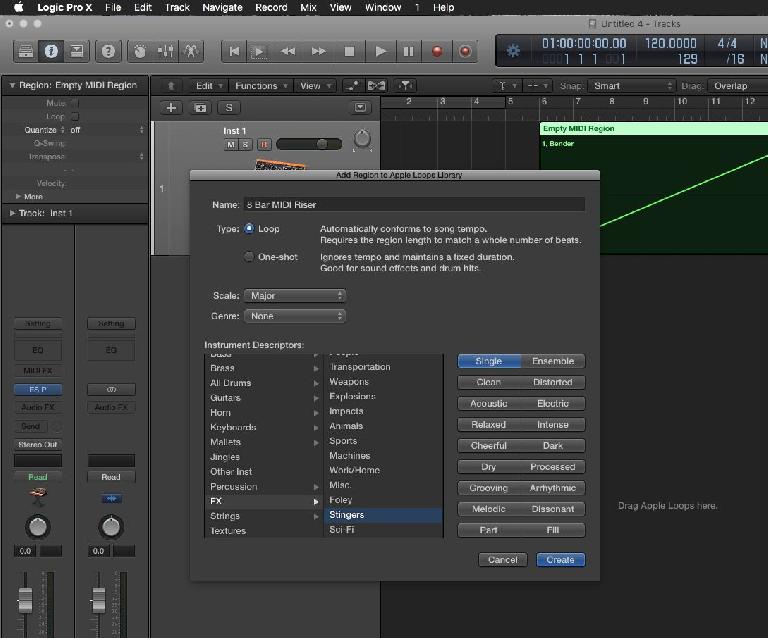
Now let’s save it to the Apple Loops Browser. Make sure the region is selected, and from the File Menu, go to Export, then select “Region to Loop Library.” Name it at the top of the window (something you’ll remember when searching for it later from the Apple Loops Browser). I used the word “Riser” in mine. Use the descriptor options, or simply go with the default settings and press the “Create” button. Once saved you can easily grab it from the Loop Browser while in any project.
Step 3: Choose a Sound and Add Some MIDI
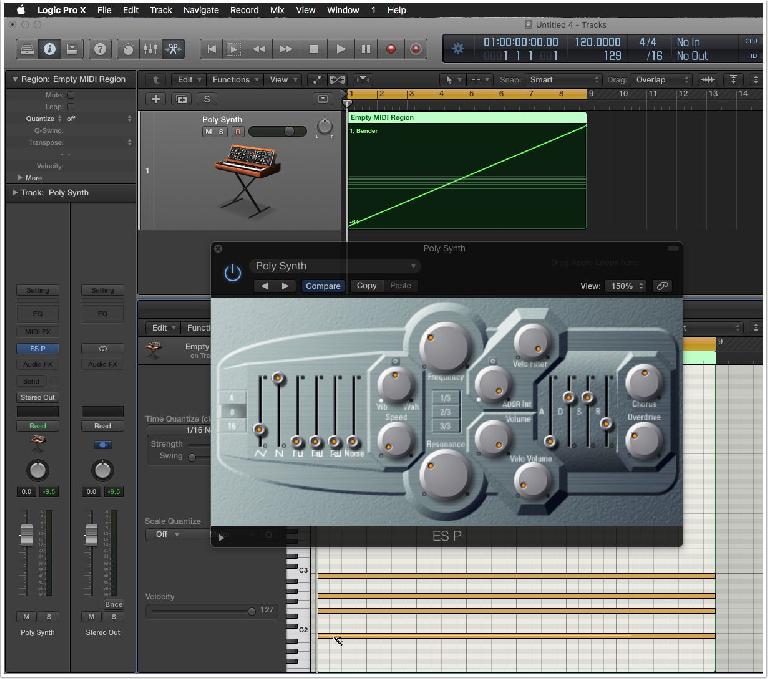
Open the ESP synth on the track and choose or synthesize a patch that has “Sustain.” Without sustain, you have no riser because the note/notes will not hold out but fade away. In ESP, I chose the preset “Poly Synth” then raised the “S” on the ADSR envelope to equal the Decay amount. Start playback of the 8 bar region (put a cycle around it so it loops if you haven’t already). Hold a note or chords down now and you’ll hear the pitch start to rise. Depending on the ESP Patch you chose, you may have to adjust the Bend Range so it reaches a full octave or more. Click the small grey triangle on the bottom left corner of ESP’s interface. Set the “Pos Bend Range” to 12 or 24. Once you know what you’ll be playing, open the MIDI region and draw the notes in making sure to stretch them out the full 8 bar length. You can also record your MIDI notes directly into the region by selecting it first, then record right on top of it. (This is depending on whether or not “Merge” is set in your song’s Overlapping Recordings settings—in the Project Settings/Recording Tab).
Step 4: Select the Smart Control to Use
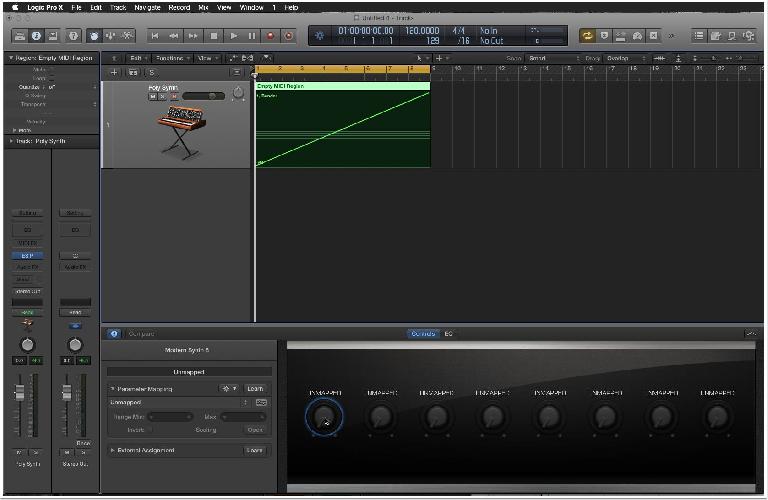
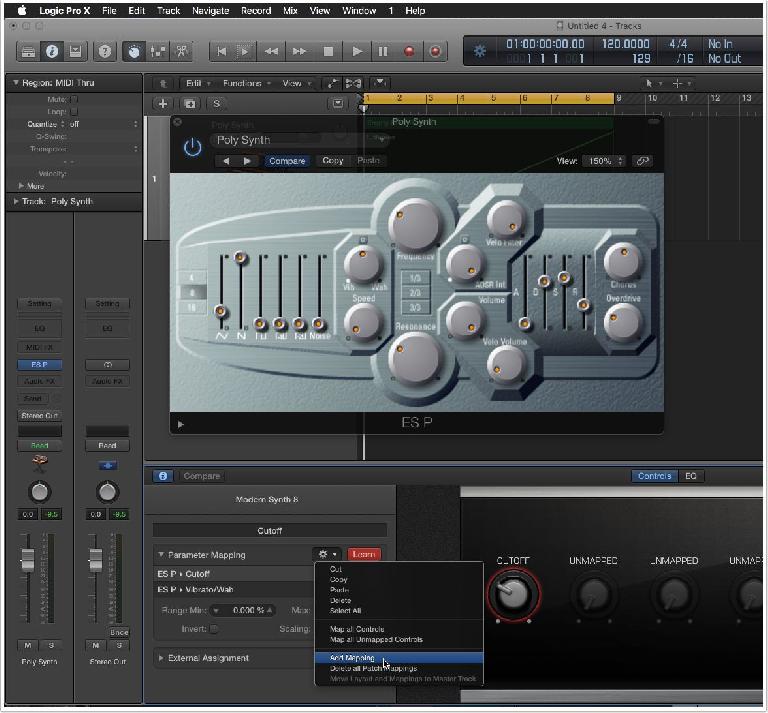
Press B to open Smart Controls. Click the tiny “i” (inspector) on the left. The panel that opens is where we’ll create our riser modulations. To keep it simply, let’s erase all the existing Smart Control assignments. From the gear icon in the Parameter Mapping field, click and select “Delete All Patch Mappings. We’ll be using a single Smart Control knob to “sweep-in” changes across the riser as it sustains. Click the far left Smart Control knob to select it. When a control is selected it has a blue halo around it. A single knob can affect as many parameters as you like, and can be any combination of not only synth parameters, but audio effect parameters too.
Step 5: Add Synth Mappings to Smart Control
While the 8 bar pitch bend cycle loops, try out some different parameters on the synth to see what you can do to it over time. I chose to modify the Filter Cutoff, and raise the Wah and Speed controls on the ESP. Let’s assign those now to our smart control knob. Make sure the far left Smart Control knob is selected, then click the “Learn” button in the Parameter Mapping field (it turns red). Now back on ESP click the “Frequency” knob. Go back to Smart Controls, and click the gear drop-down menu and select “Add Mapping.” Now click back onto the ESP interface and click the “Vibe/Wah” knob, one more time back to the Smart Control—add another mapping—then click the “Speed” knob on ESP. Take the smart Control out of Learn mode by clicking it so it’s no longer red. All three parameters are mapped now to the single Smart Control knob.
Step 6: The Scaling Window
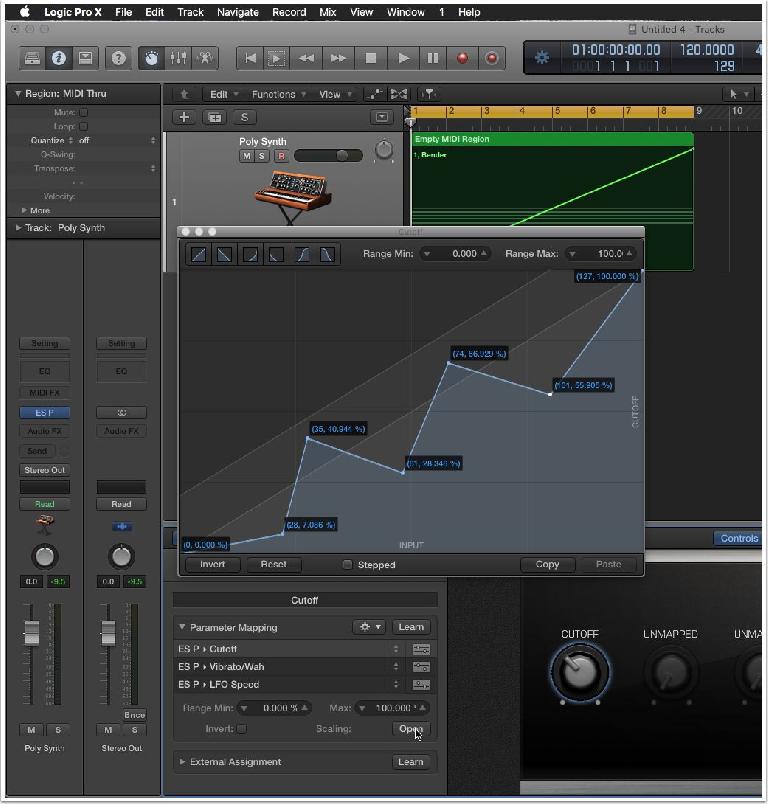
Now that your chosen synth parameters are mapped to the Smart Control, you’ll want to choose how each parameters opens and closes (and start and end positions) as the Smart Control knob is swept. If it’s not already opened, click the small grey triangle on the Parameter Mapping in Smart Controls to expand it. Depending on how many parameters you’ve assigned to the SC knob, you may have to scroll down till you see the Scaling “Open” button. Click this to open it. This great window visually represents the “scale” or path of the full knob movement. The left corner represents the knob in its far left/off position, and the right is the knob turned all the way up. You can use simply shapes with buttons at the top of this window, or draw in any shape you wish with as many “points” as you want. If you’ve created points with both positive and negative values, then a full Smart Control knob sweep would actually move the chosen synth parameter up AND down! Basically crazy-cool parameter motions with a single turn of a knob.
Step 7: Adjust Each Parameter’s Scaling
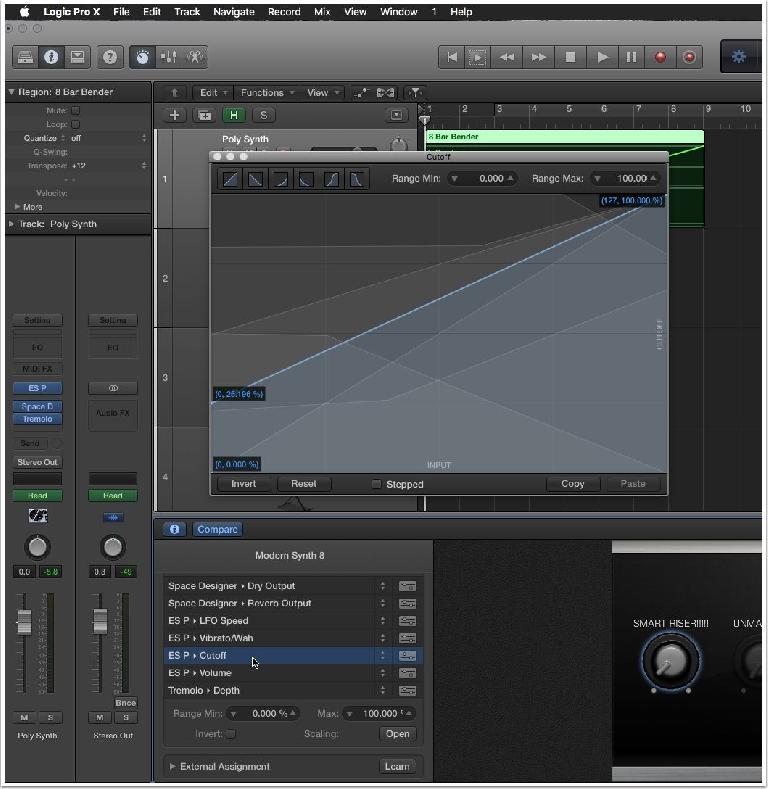
When you click on each parameter mapping in the Smart Control window, that same parameter becomes the currently selected parameter in the scaling window. Click the “Cutoff” parameter so it displays in the Scaling window. If you want your filter to start somewhat open, then create a point somewhat above the lowest position on the left side. So the filter opens over time as the knob sweeps, create a slope up to the top right corner. Now when you sweep the Smart Control knob, the filter will start at a lower position and end all the way up! Try turning the Smart Control knob as you’re adjusting the various mapped parameter scales to check the effect. Repeat the process of adjusting each mapped parameter’s scaling.
Step 8: Record the Smart Control Knob as Automation
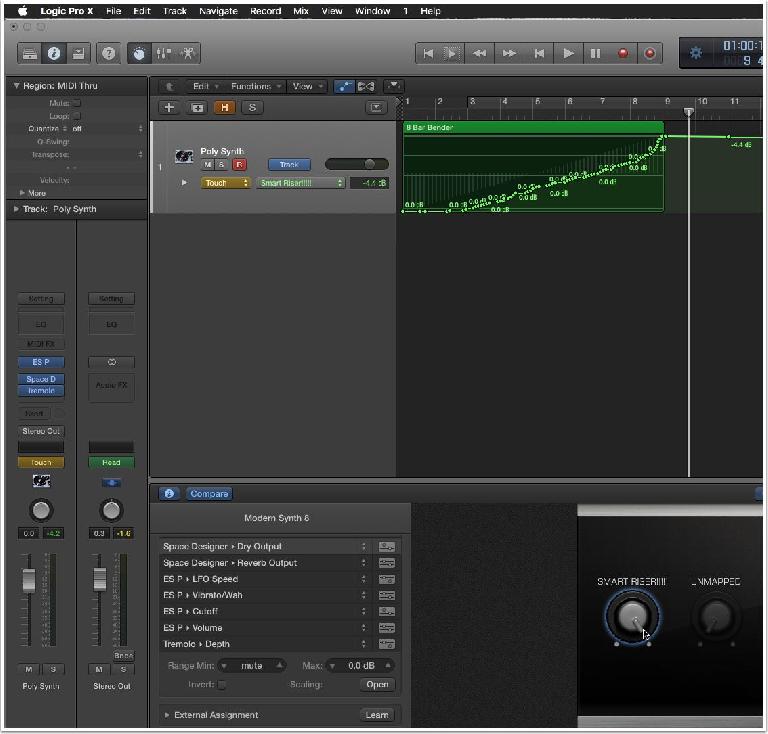
Once you’re satisfied with the effect of sweeping the Smart Control, you’ll want to record it as automation on the track. Click onto the track in the Arrange/Workspace and press “A” to enable automation. Change the Automation menu to either Touch or Latch and record the Smart Control sweep as automation! Here’s what I made while writing the article. In addition to the three parameters I mapped above, I also added a Space Designer reverb and a Tremolo. The Tremolo starts out in the beginning and fades away as the ESP’s built-in Wah/Speed knobs rise up at the end along with the Reverb and Dry levels on Space Designer.
Audio Example:
Step 9: Save the Patch to the Library
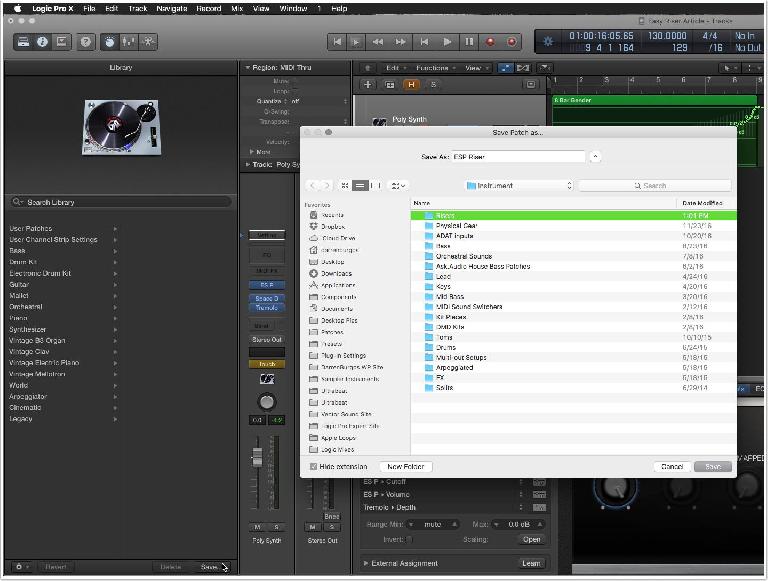
Save the full channel strip as a patch to the Library so you don’t need to set up the ESP (or any other Logic or third-party instrument) by hand again. All your Smart Control mappings will save with it for easy recall from the Library while producing. Press Y to open the Library and make sure the small blue triangle pointing to the track is at the very top of the channel strip (it will say “setting”). Now click the “Save” button at the bottom of the Library and name it. When you’re ready to make a riser in a new song, first grab the riser loop saved to the Apple Loops Browser to get the MIDI, then open the Library and select from your saved riser patches.


 © 2024 Ask.Audio
A NonLinear Educating Company
Discussion
Want to join the discussion?
Create an account or login to get started!