
A NonLinear Educating Company
Review: Toontrack Superior Drummer 3
Shane Berry on Aug 15, 2017 in Review | 1 comments
Superior Drummer 3’s core sound library was recorded at the extraordinary Galaxy Studios in Belgium. Its main studio, Galaxy Hall, is a 330 meter square, 8 metre high multi-purpose room with near-perfect acoustics. The hall has a reverberation time ranging from 1.1 to 2.4 seconds, depending on the use of curtains and additional acoustic treatments. It is quite possibly one of the quietest recording spaces on earth. Despite its size, background noise measures a mere 14 dbA SPL, and the air conditioning is so quiet it cannot be detected or measured by music-recording microphones. In other words, it’s a perfect place to record drums.
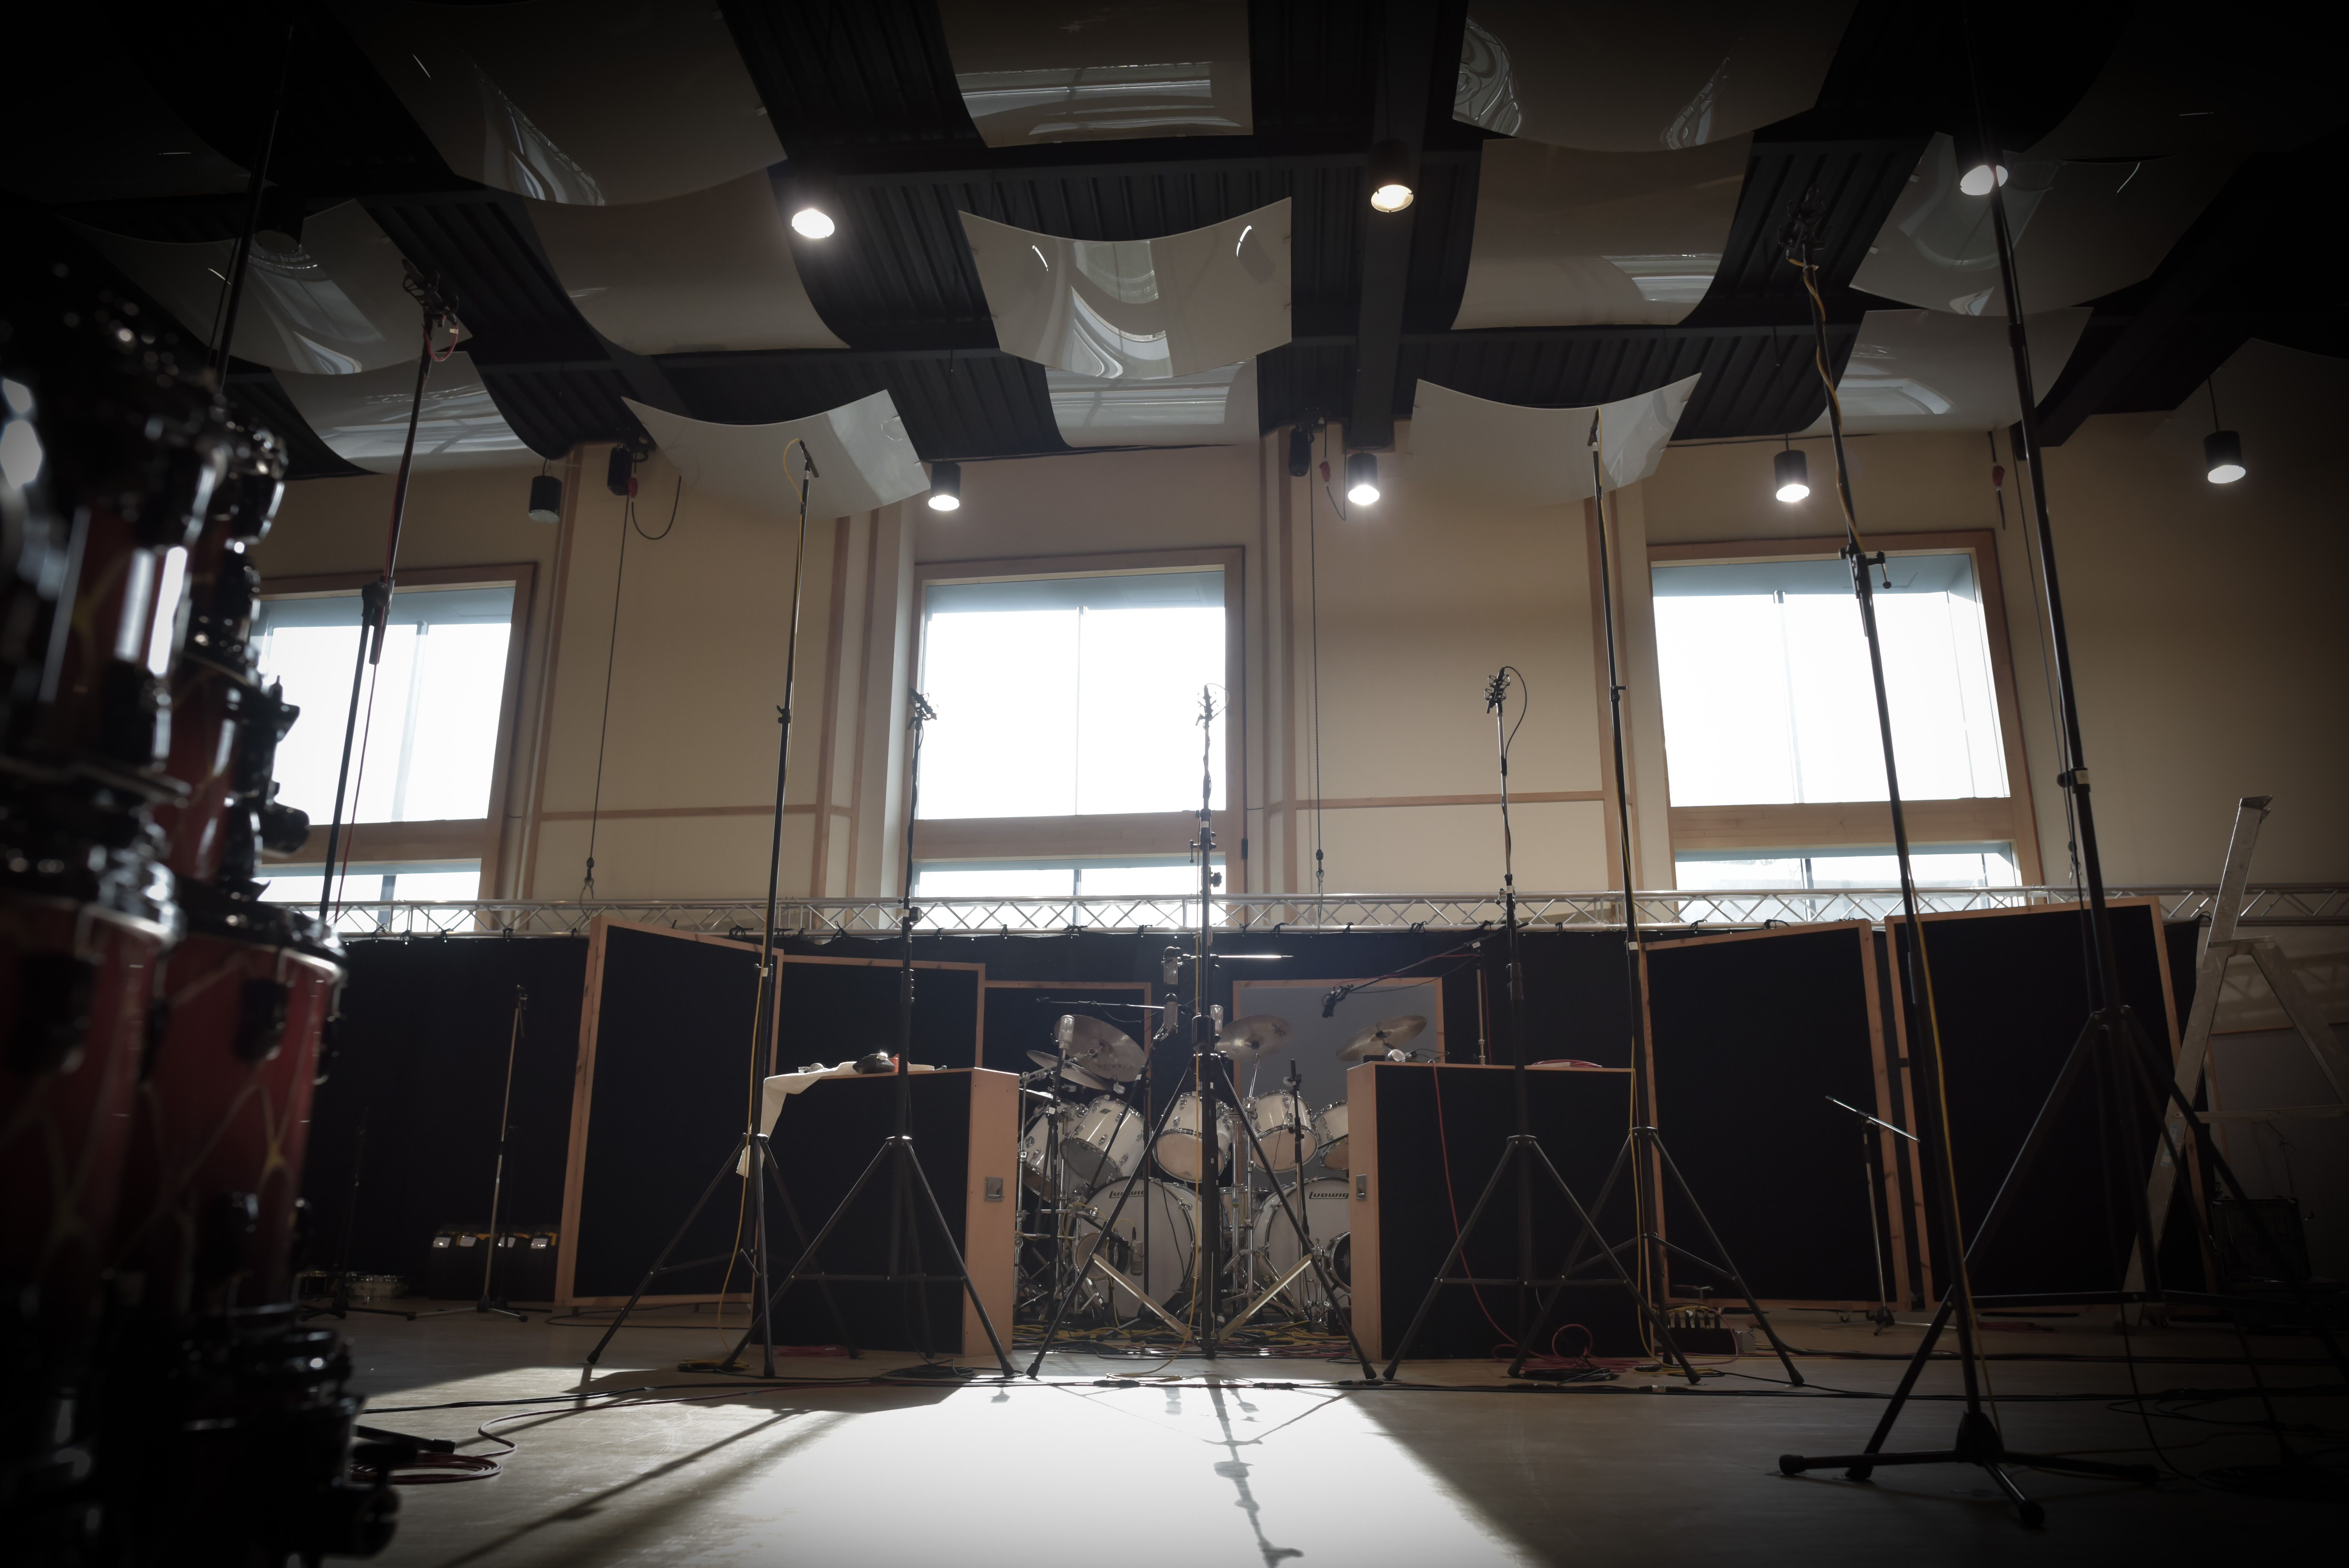
The studios themselves are a series of concrete bunkers that rest on custom designed architectural springs that bring the resonant frequency for each room to less than 3Hz.

The custom springs decoupling Galaxy Studios from Earth.
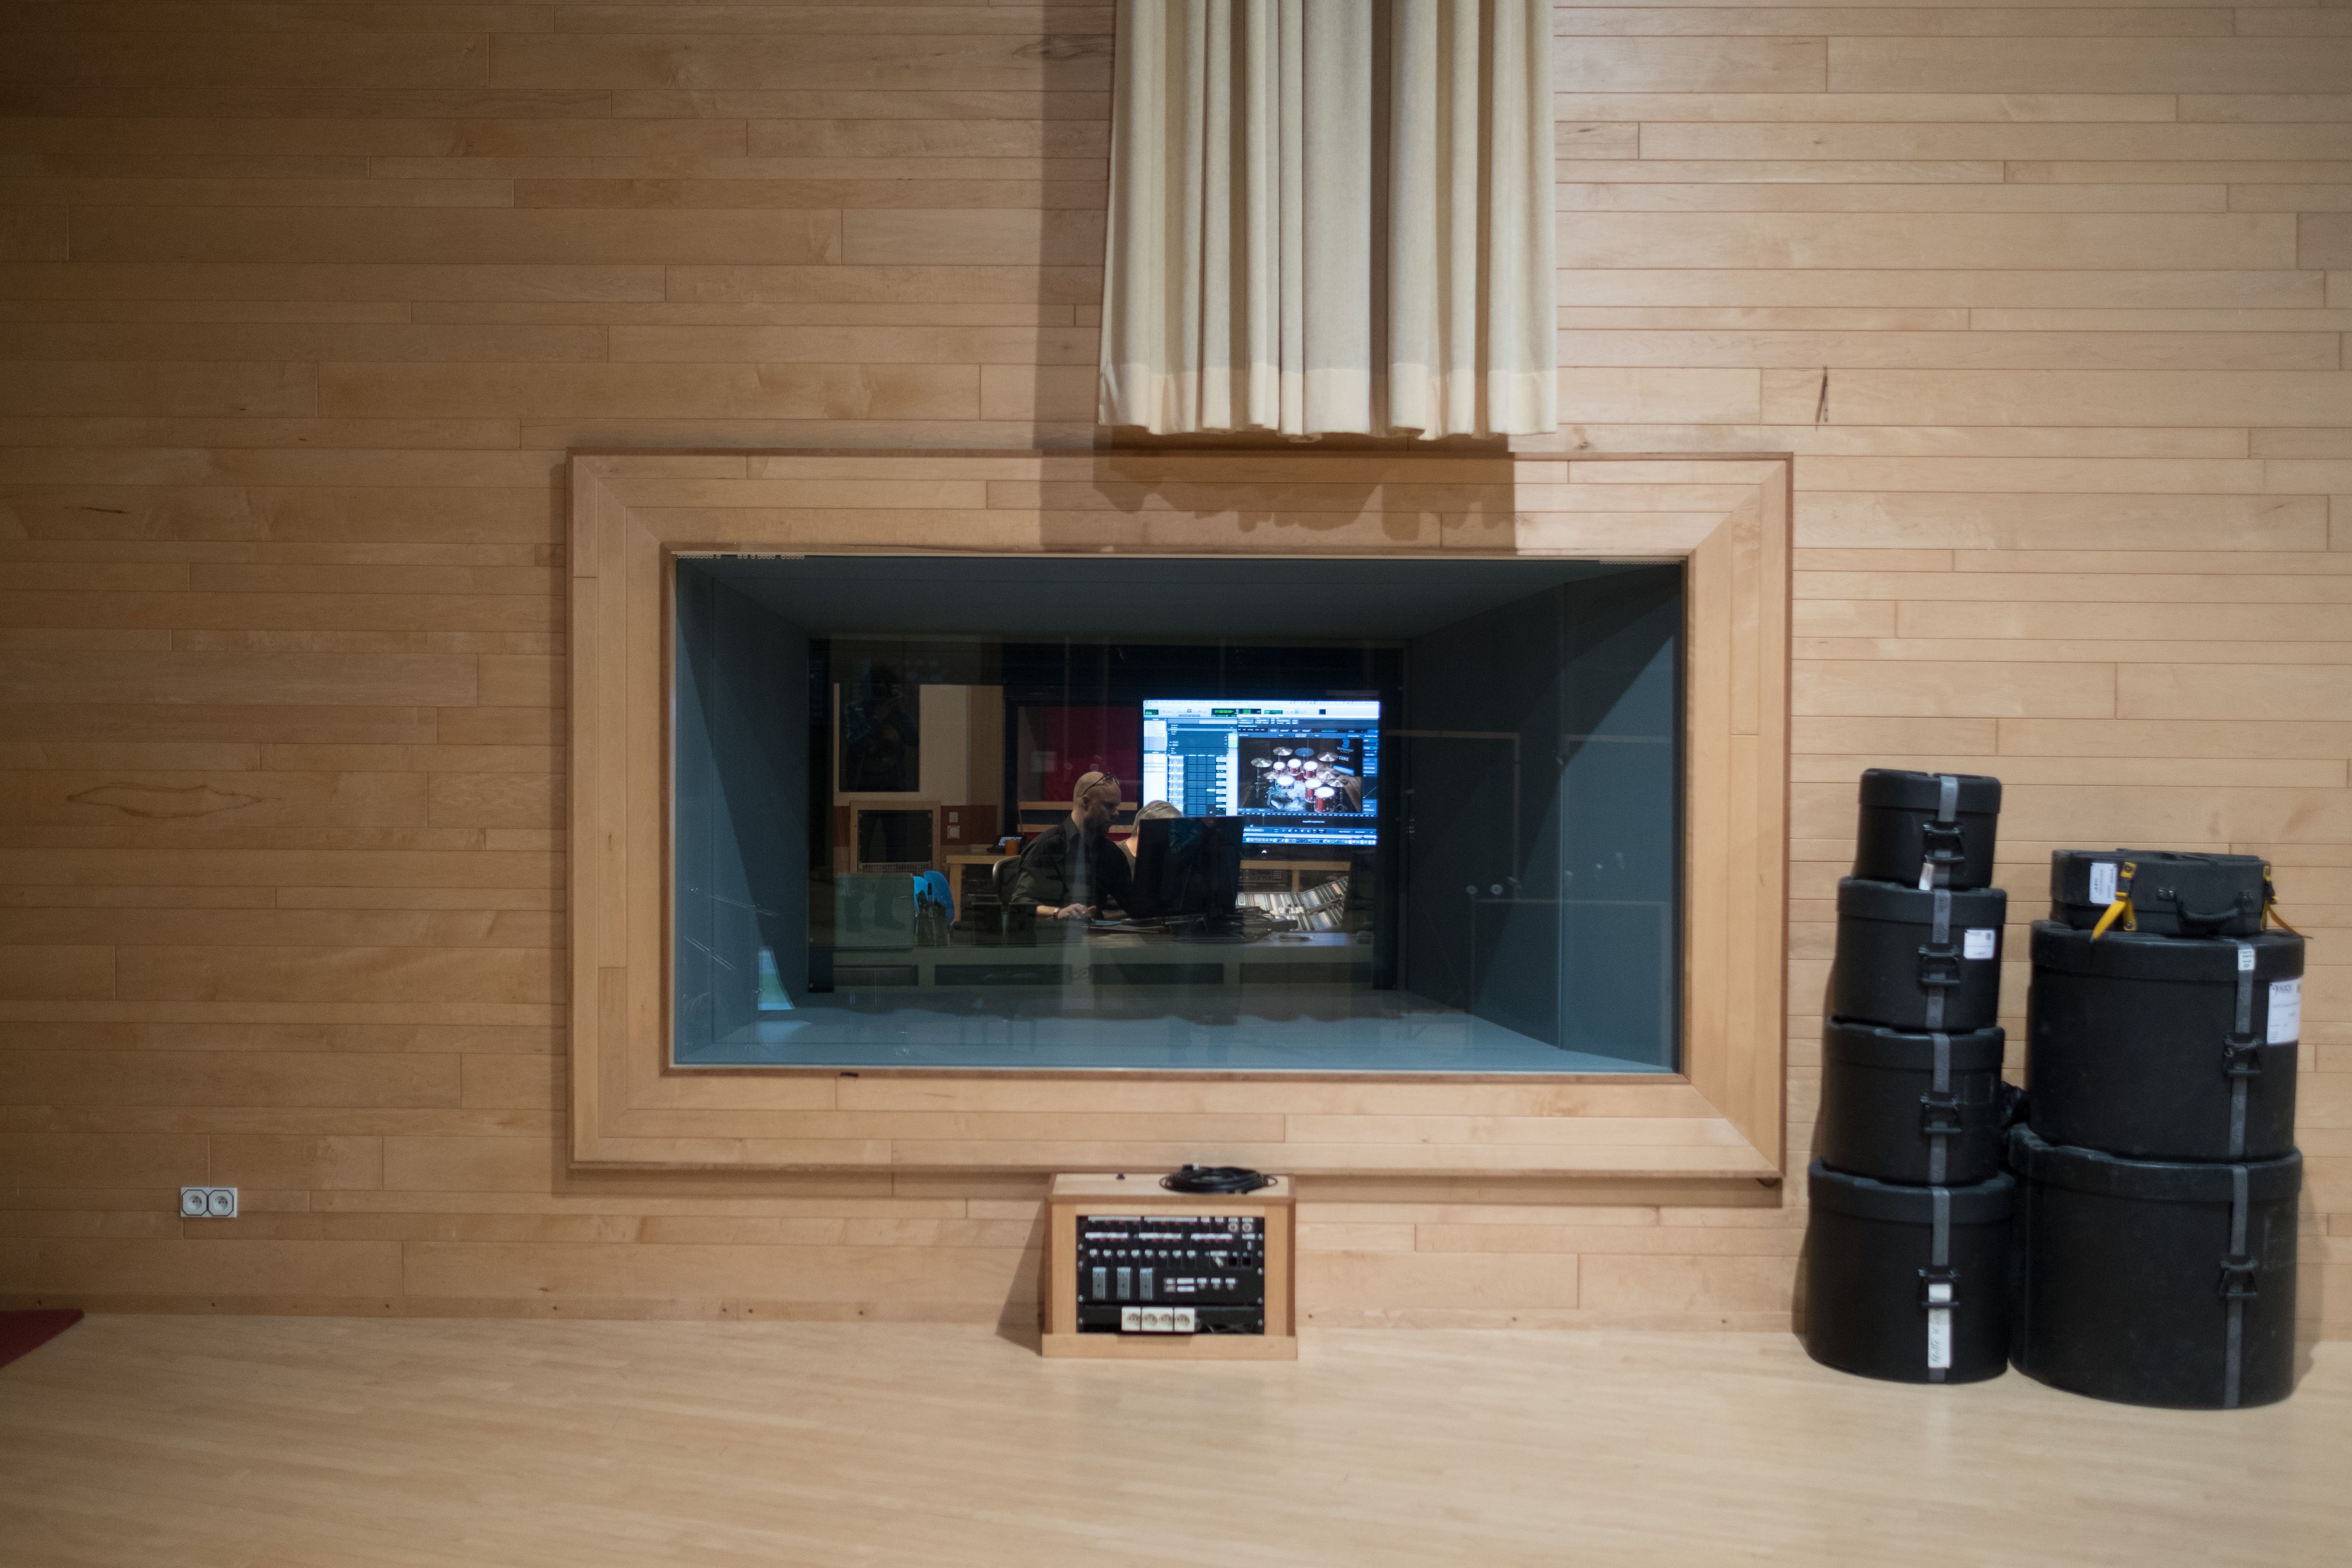
The eleven centimeter thick studio glass between galaxy hall and the control rooms weigh in at a ton apiece. In addition, there are least 3 doors in between every unit ensuring the measured result – 100,7 dB between each room – is a world record.
Why all this detail about Galaxy Studios and the set-up? Well, under great secrecy and multiple NDA’s I, along with a who’s who of audio press, was brought there by Toontrack to physically listen to the drums in Galaxy Hall, to have a first hand experience of the space, and the recording process, and to spend a day getting acquainted with SD3 and its creators.

Legendary Sound Engineer, Audio Pioneer and Inventor George Massenburg sets up a pair of mics to record some drums at Galaxy Studios, Belgium.
Meet The Team
We were taken through the mic setup and recording process by legendary audio engineer George Massenburg himself, and superior drummer Norman Garschke was on hand to play the drums for us in real time. We were able to ask him to play softly, loudly, busily, minimally, single shots, rim shots, rolls, runs, and everything inbetween.

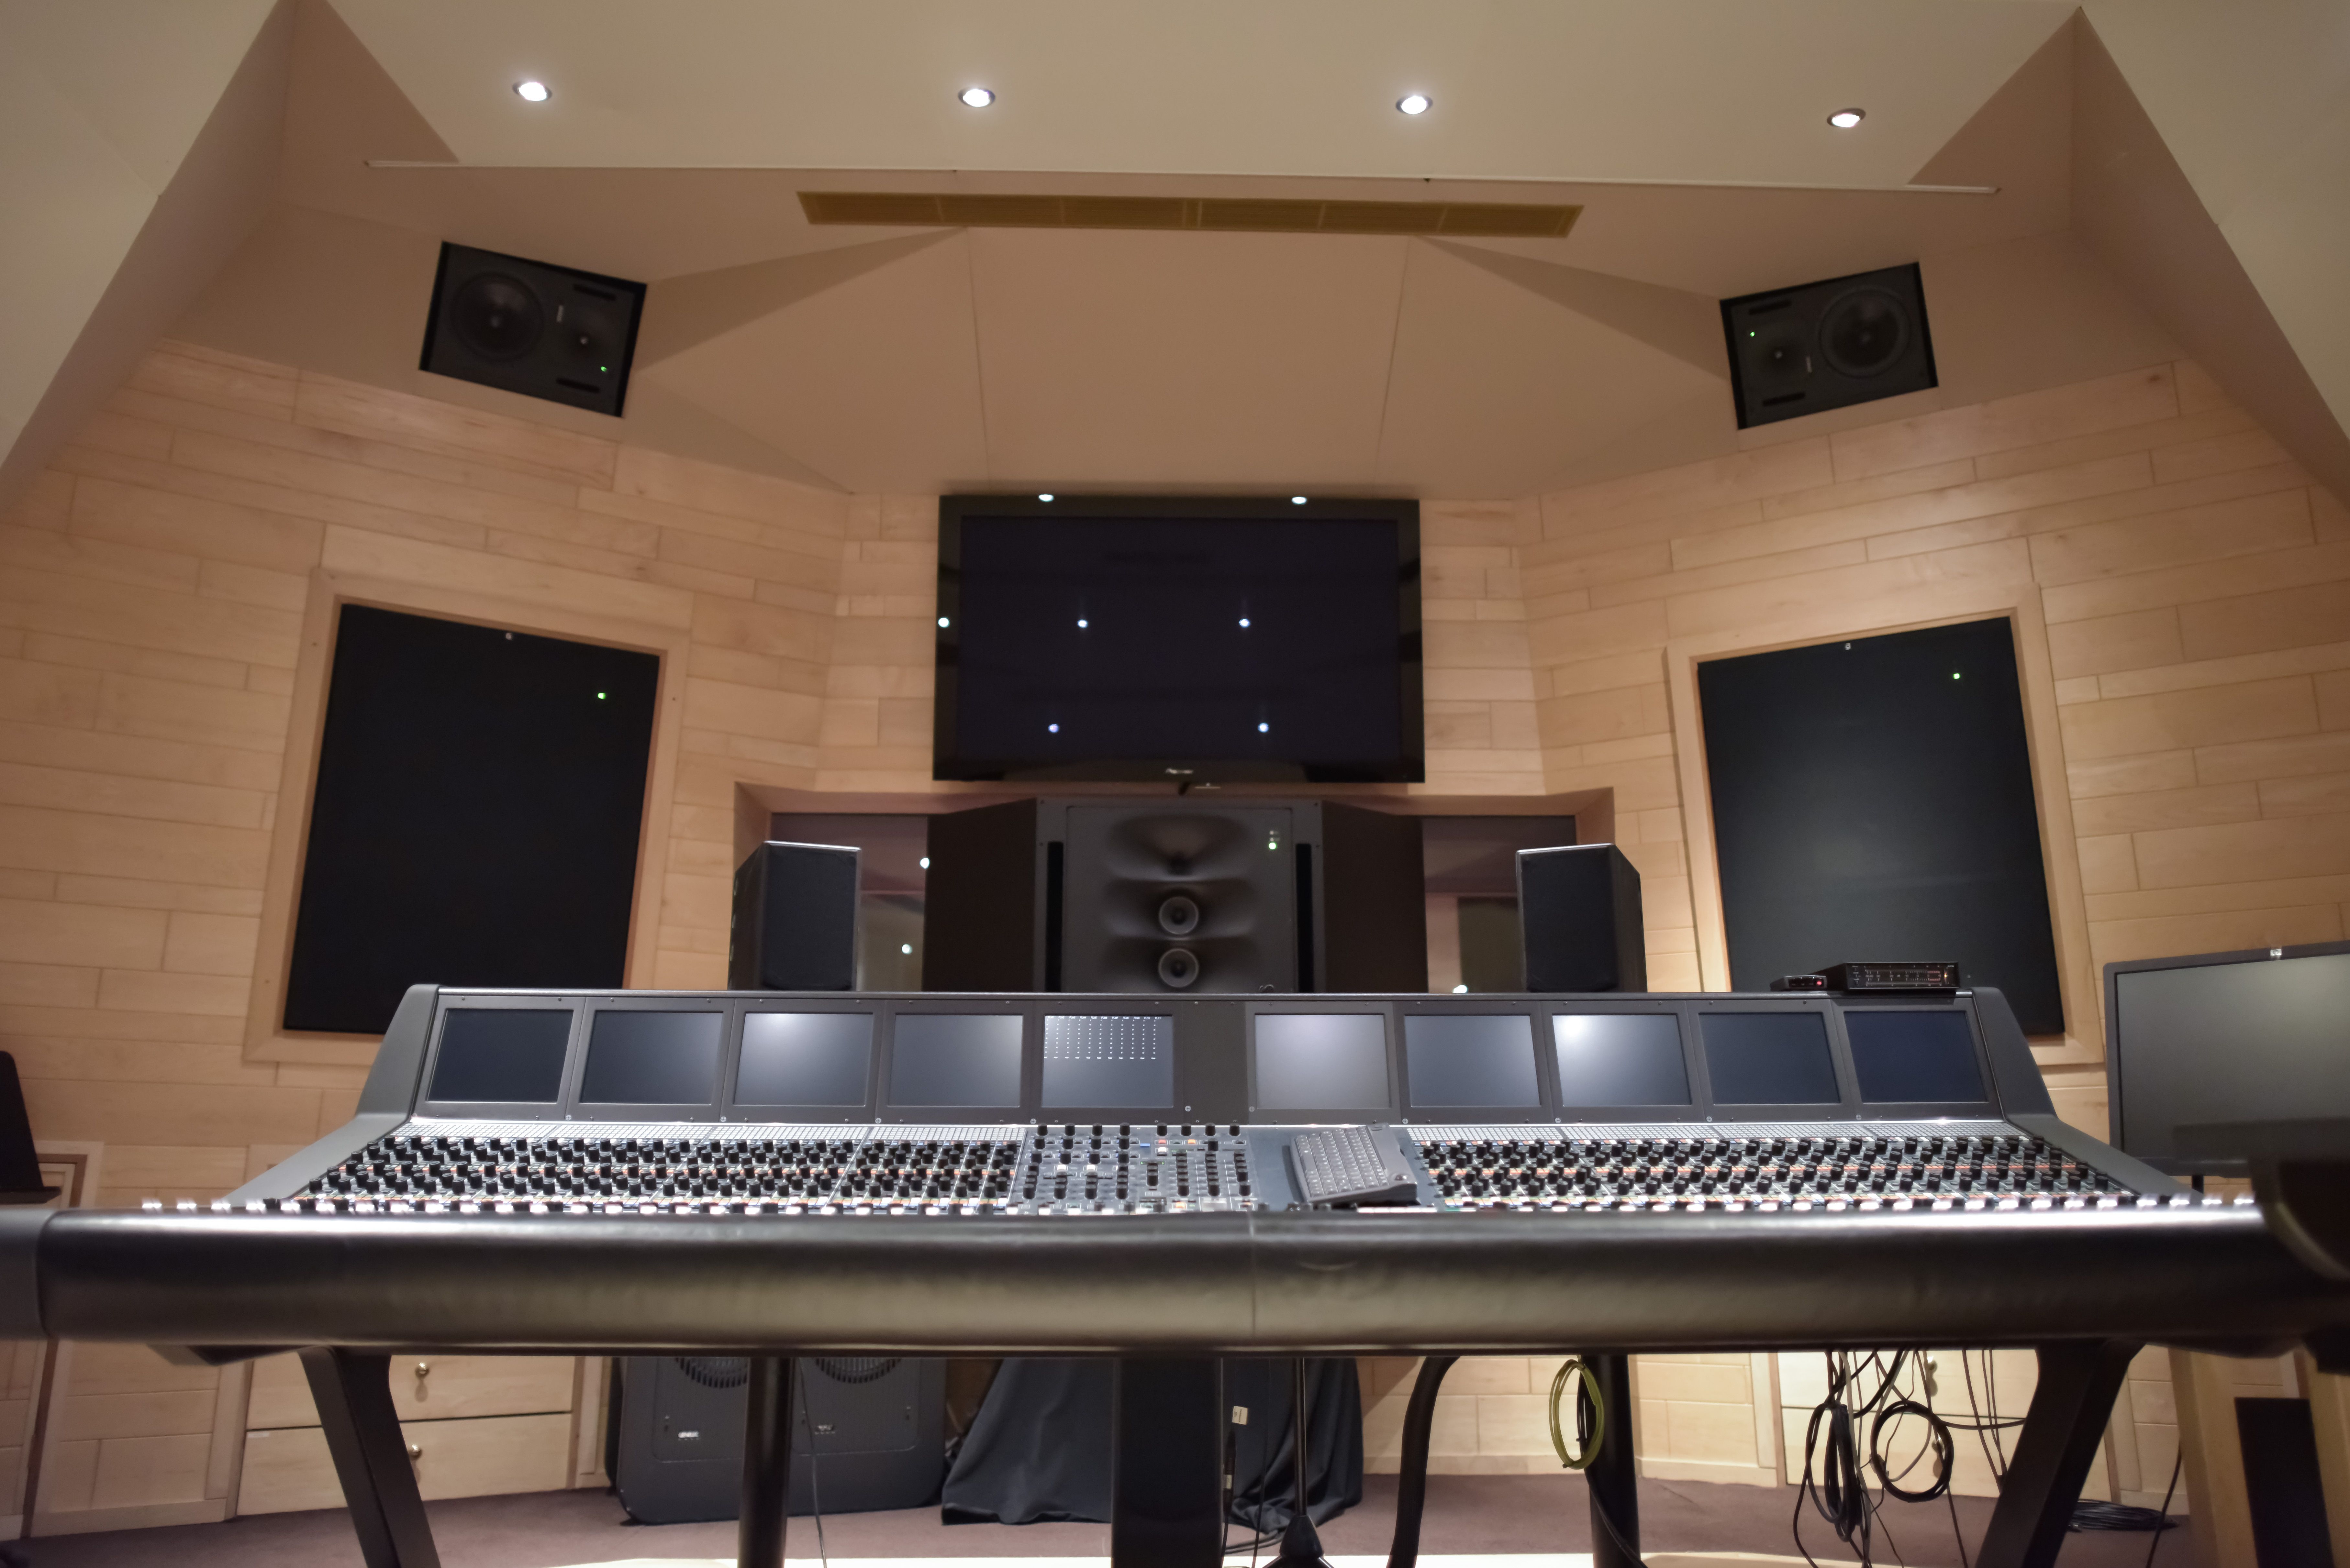
We were then taken into one of the three main control rooms looking into Galaxy Hall, the Neve 88D control room, to see and hear how this incredible 11.1 immersive set-up had been translated into a no-holds barred, no expense spared, game changer of a drum workstation.

George Massenburg explains details of the drum recording process in the Neve 88D control room.
It is impressive at every level, and I can tell you first hand using SD3 is like having a portable galaxy studio that fits right into your DAW.
Interface
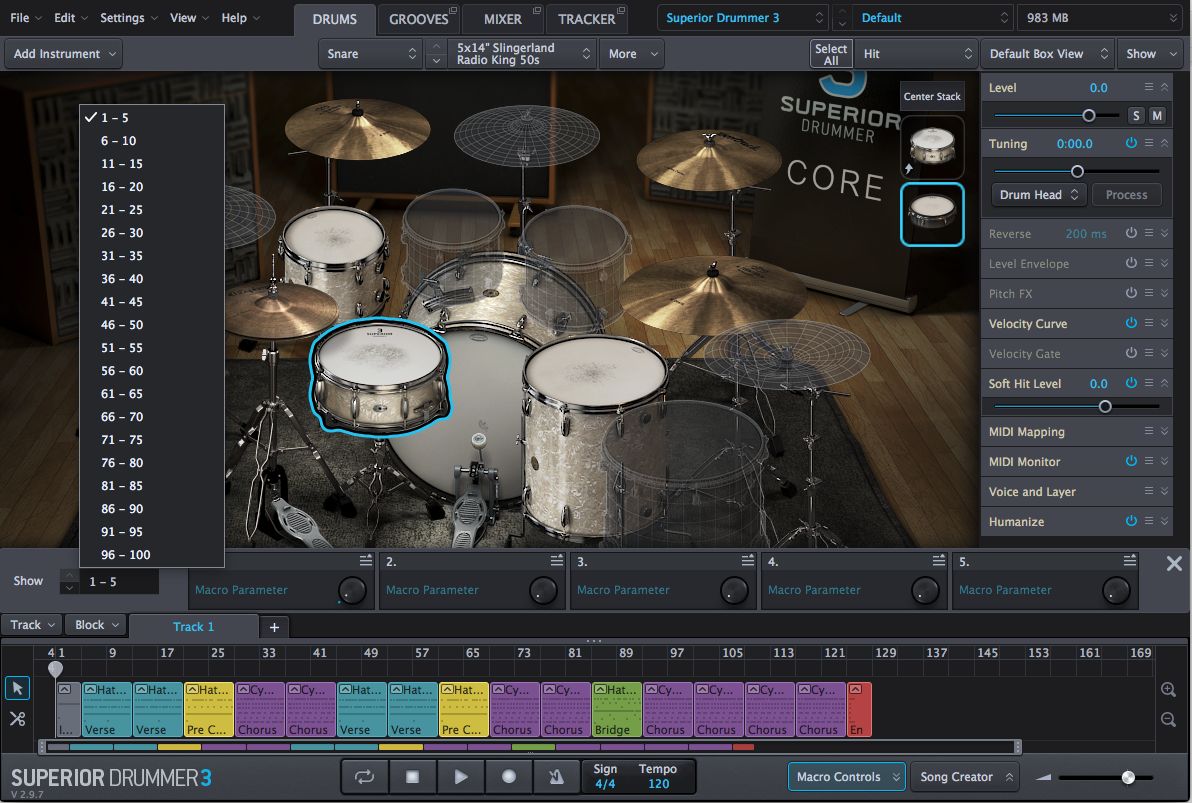
As you can tell already, this upgrade is a serious go big or go home affair, so it’s no surprise that SD3’s interface has been completely revamped and modernised. It is now resizable and can be expanded to any screen size, and the four main windows are detachable and scalable too. Furthermore, the entire GUI can be scaled larger or smaller to suit your viewing needs, useful if one of your screens is a little further back, or you are working on a cramped laptop.
As someone with multiple screens in my studio, GUI scalability is a deal breaker when investing in plug-ins, and the ability to arrange plug-in windows to size and taste across multiple screens is very useful, especially the ability to detach the Mixer and get a full spread across a second screen. Each drum features its own individual custom graphic making it easy to spot both in the main drums window and also in the Search Instrument window. This is awesome for a visual guy like myself because I’ve already memorised the look of a few snares that I like, but couldn’t name them if you paid me.
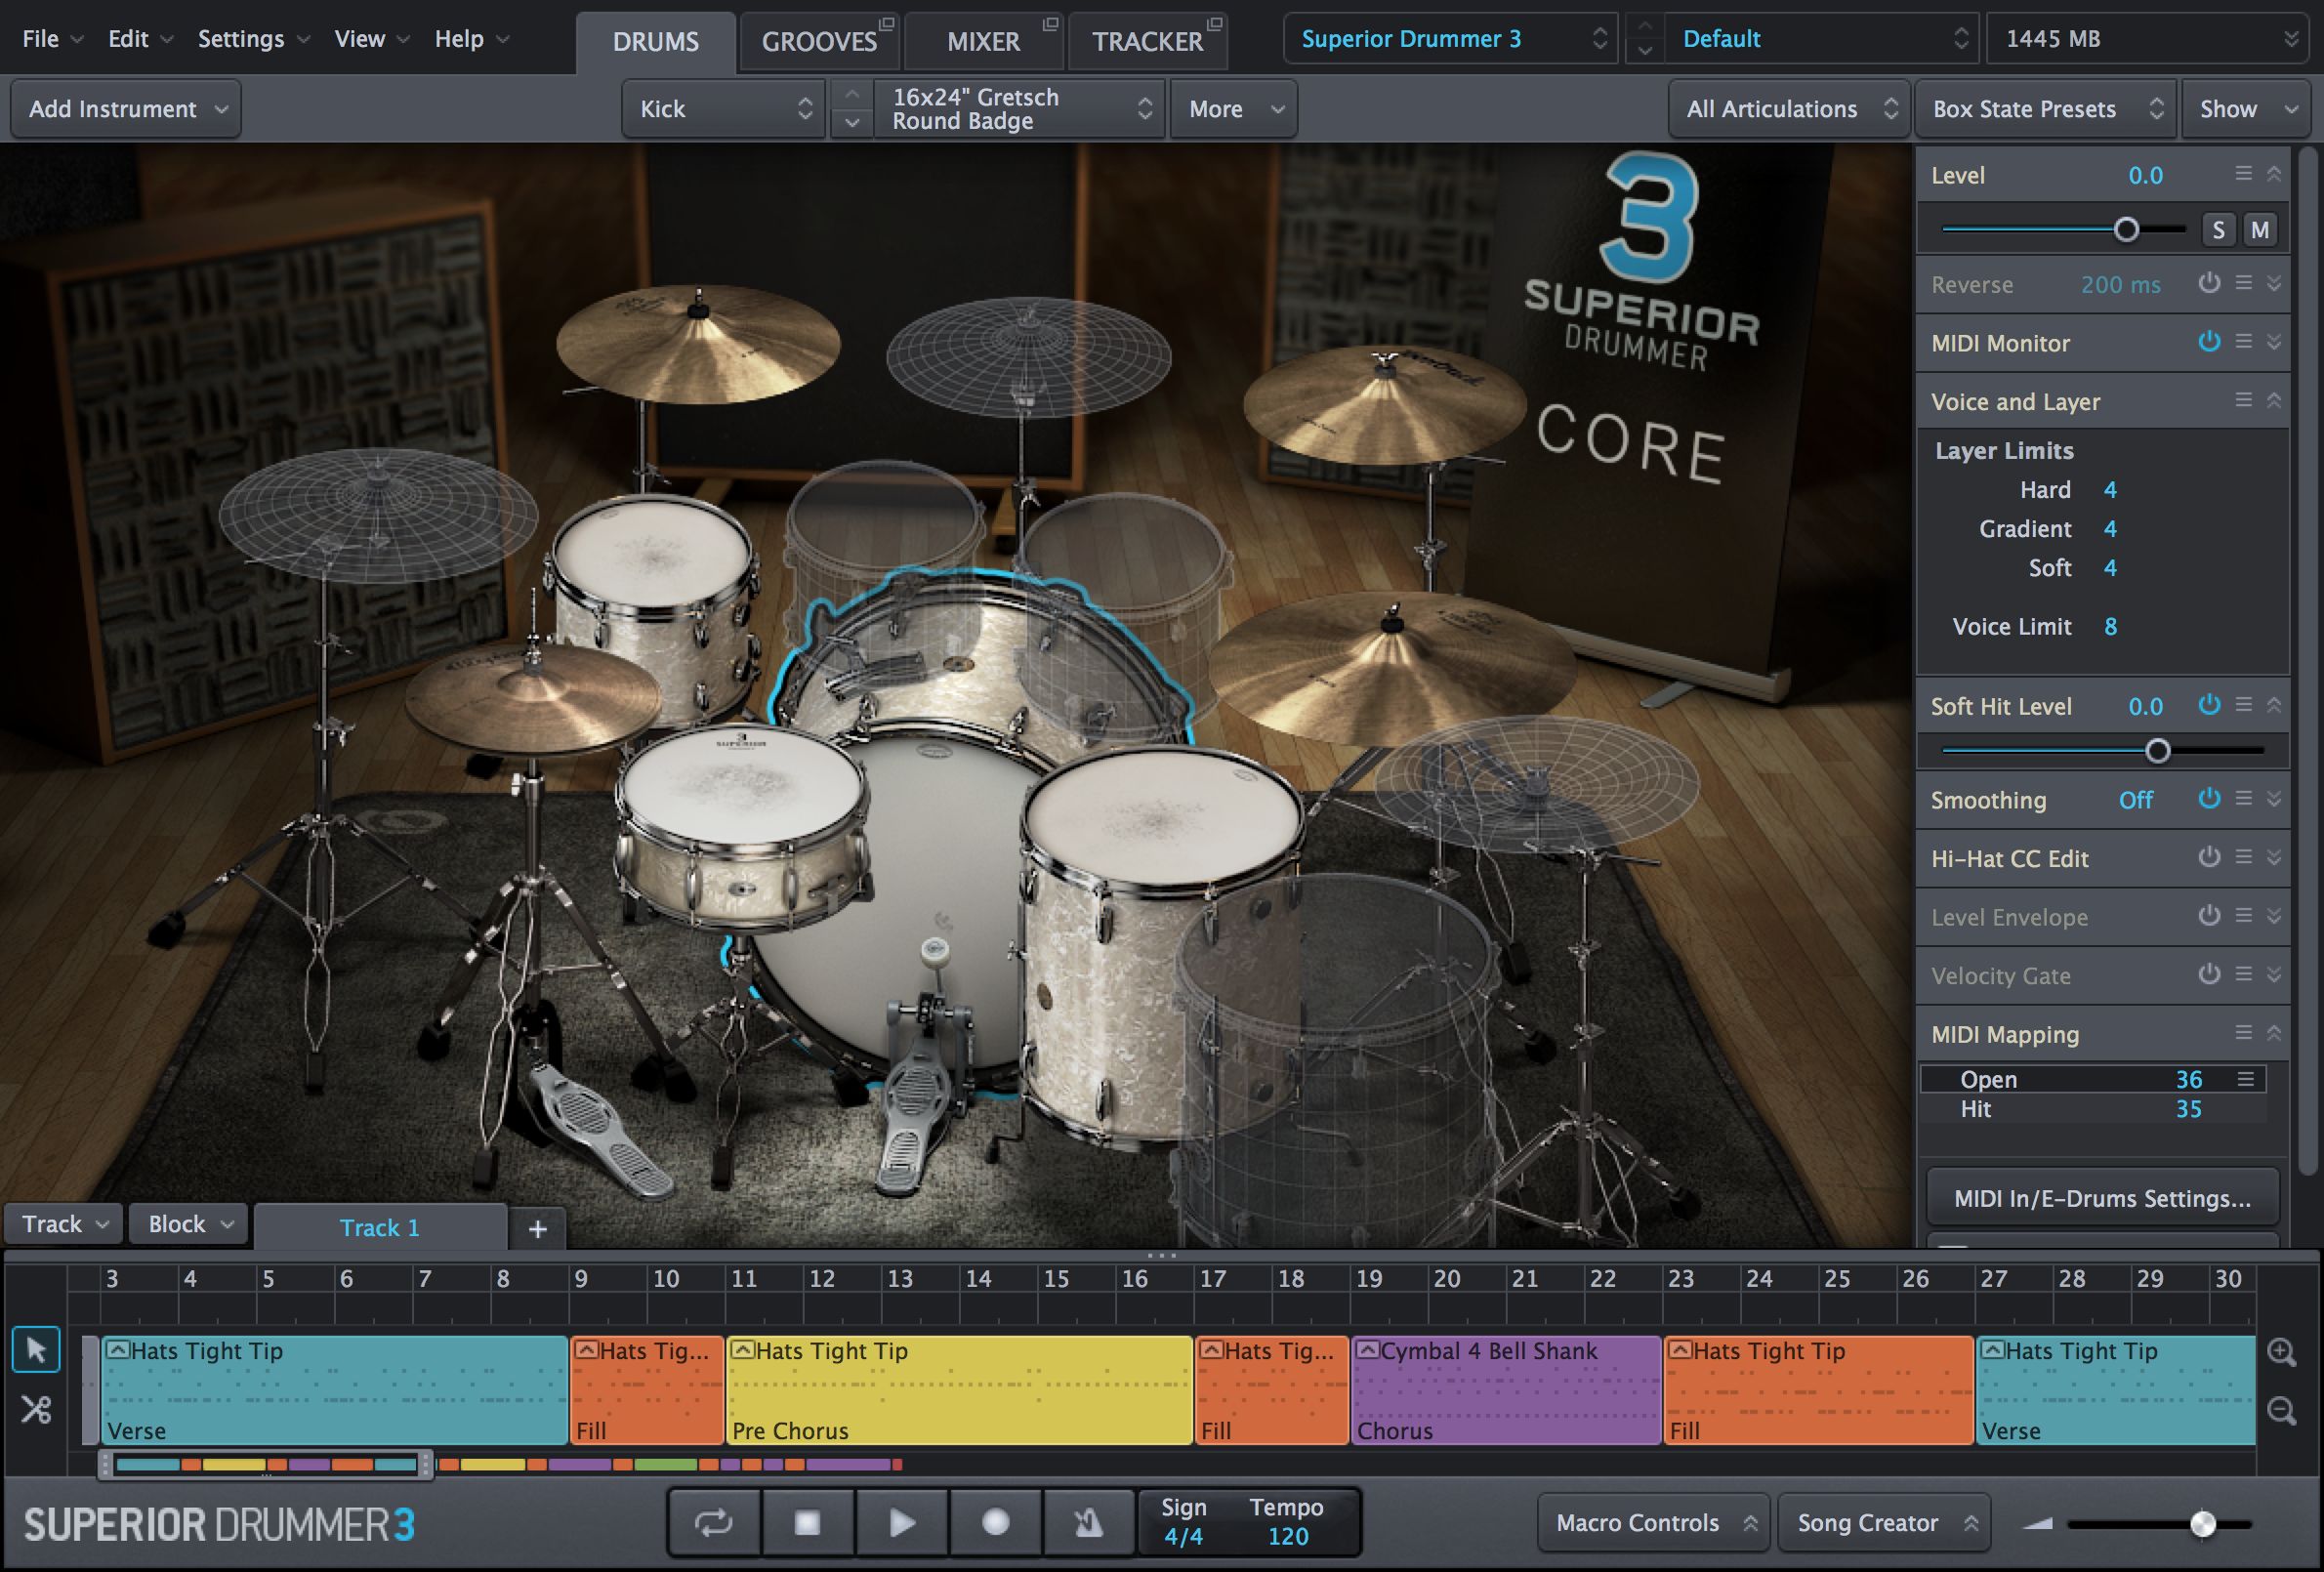
Other small improvements make a huge difference. Selecting a single drum no longer requires holding down the alt key. Simply clicking on any drum will outline it in blue and switch out all the property boxes on the right side of the drums tab for the selected drum. This allows quick access to a host of the usual editable functions such as level envelopes, MIDI mapping, velocity curves and so on.
In addition, If you press ctrl-alt, a velocity pad will open under your cursor wherever it happens to be hovering in the interface – even if it isn’t the main drum window – and this pad will trigger the currently selected drum.

Hold down ctrl-alt and an audition pad pops up wherever your cursor is in the interface.
This is a very thoughtful feature. It’s no longer necessary to mouse all the way to the bottom right corner of the interface every time you want to audition a drum’s velocities.
Drums
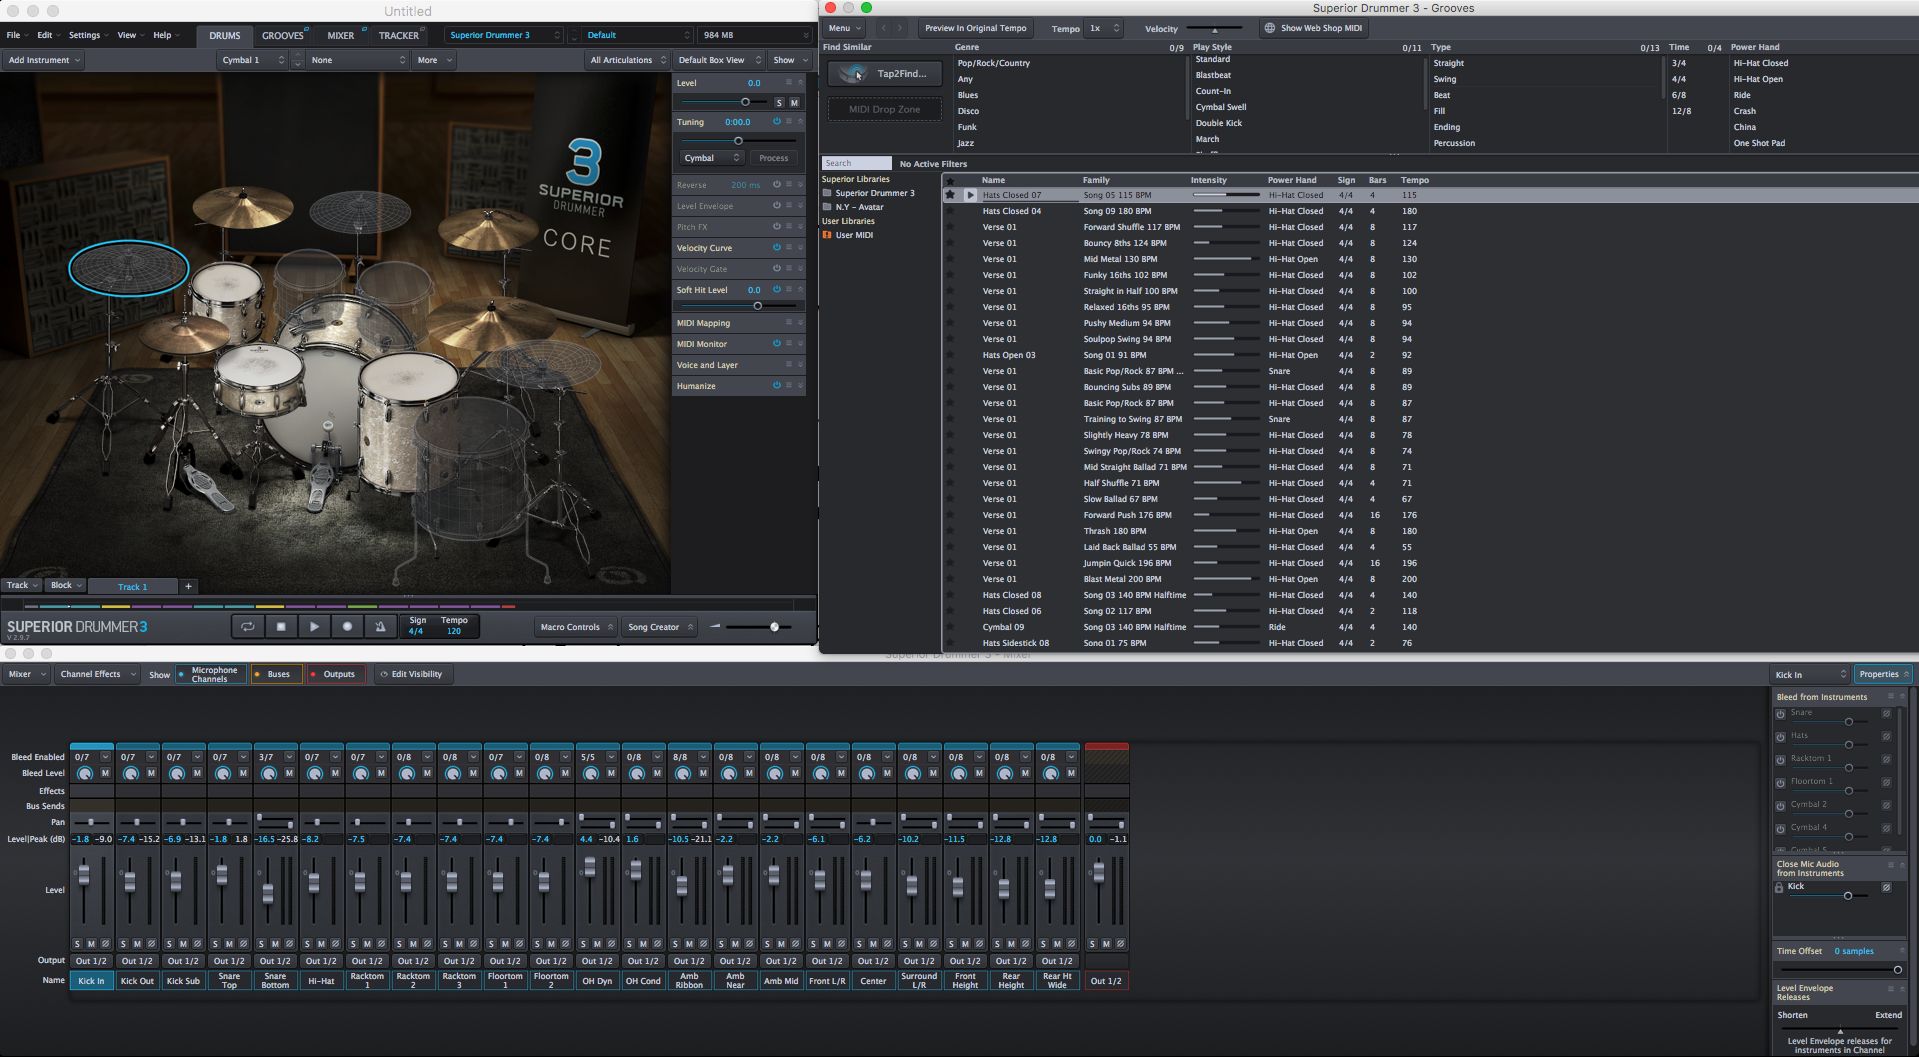
The drum library shipped for review included six full kits with fourteen total options like sticks, rods, brushes and mallets, all recorded in 11.1, enabling fully immersive mix capabilities, no surprises there given that Galaxy Studios is the home and flagship studio for Auro 3D technology.
Here’s how the default kits sound straight out of the box in stereo:
Ayotte:
Gretsch:
Pearl:
Premier:
Ludwig Classic:
Yamaha:
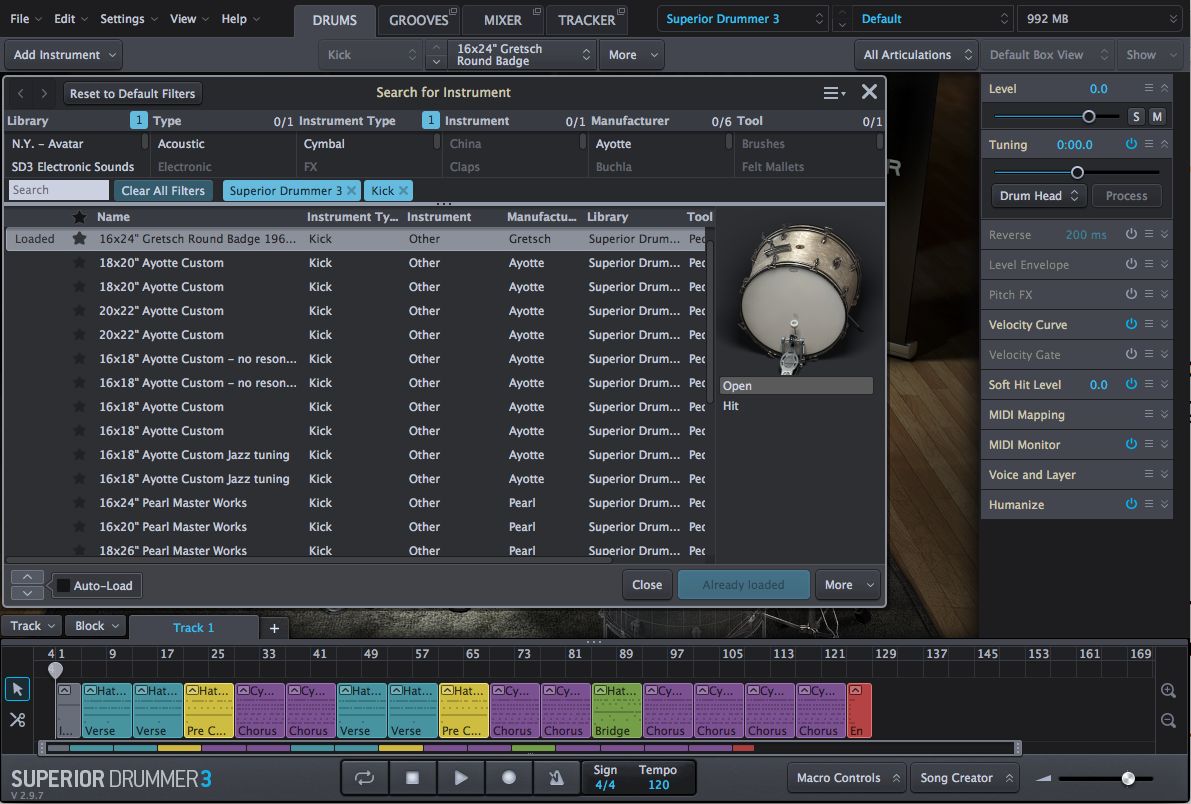
The six kits for review – Ayotte, Gretsch, Pearl, Premier, Ludwig, Yamaha – were specifically chosen by Toontrack and George Massenburg to cover a wide range of musical styles, but they only form the basis of what is possible. Any existing SD2 and EZ Drummer library kit or individual kit piece can be loaded into SD3. This is made all the more easy with the new Search Instrument window that enables filtered searching by library, drum type, kit piece and so on. The possibilities are endless already, but it doesn’t stop there.
Loading Custom Samples and Sound Design
SD3 now supports importing third party samples. You can replace an existing drum, add a custom sample as a new instrument (X-Drum), or add it to an existing instrument or Stack. With the Stacking feature in SD3 you can layer multiple sounds to play back at the same time and trigger them with the same MIDI note. (Stacks replace MIDI Nodes for power SD2 users out there.) I stacked over twenty samples onto one hi-hat and get the impression you could load a hell of a lot more. Later in this review I have some audio examples of what possibilities stacking brings to drum programming and sound design.
Speaking of sound design, a few new features in the property boxes bear quick mention: the ability to add a pitch envelope to any instrument and each of its articulations and the ability to do the same with a reverse function. What this means is that you can reverse the centre hit of the snare, but leave the edge hits playing forward while wildly pitching the rimshot of the same drum. Then just for hits and giggles you can mess around with the pitch envelope of a cymbal for good measure.
Pitch and Reverse example:
Tuning
Pitching the drums and tuning the drums are now separate functions. Tuning has been vastly improved with two separate algorithms optimised for cymbals and drum heads respectively. Once your instrument is tuned you can process it and SD3 will load the rest of the articulations for that instrument in the new tuning. It’s really musical and one can get away with some pretty heavy detuning before losing the feel of authenticity.
Here is the Yamaha Kit heavily pitched down with separate processing for the cymbals and drum heads. As an obsessive drum tuner, this a welcome improvement.
MIDI Mapping
One of the core features of Superior Drummer is the ability to edit and map MIDI for optimising realistic drum behaviour, so I was surprised to see that MIDI Mapping is no longer a main window. This is because MIDI Mapping is now integrated into the selected instrument via property boxes in the sidebar. MIDI info for each selected instrument and each instrument articulation can now be quickly and easily accessed based on the currently highlighted drum, articulation, or stack.
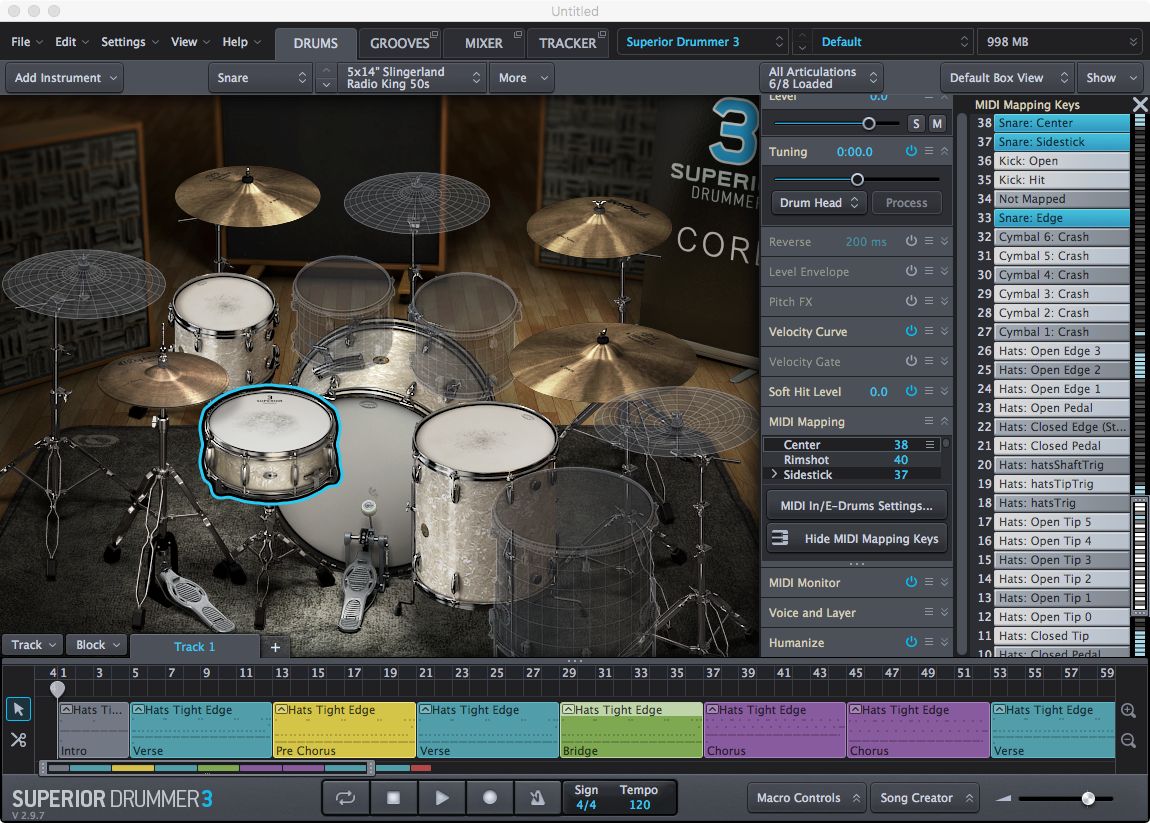
Personally, I love this attention to detail, and per-articulation level of control, but I do miss the more musical interface of the SD2 Piano Roll at the base of the GUI which also had a velocity bar for auditioning sounds. The new “piano roll” opens vertically on the right side of the GUI and displays MIDI values in numbers not note names such as C#1 etc, which is a touch disorienting to be honest. That said, once you get the hang of the new MIDI mapping, it is quick and focused and endlessly tweakable.
Some Creative Uses of MIDI Mapping in SD3
Mapping multiple articulations to a single drum pad and then having those articulations trigger at varying velocities is a cinch with the Stacking function. Each Stack and every instrument loaded into the stack has a dedicated velocity gate, meaning you can have certain articulations or sounds within a stack playing at very specific velocities making nuanced and realistic drumming even more achievable. Here is how that sounds.
The tight hi-hat is velocity gated to 1 - 126 and the open hat and kick are velocity gated to only 127. It allows for some pretty realistic drum playing from a single drum pad or keyboard note if you don’t have an e-kit on hand. It doesn’t have to sound realistic at all though, ostensibly you have 127 MIDI velocities at your disposal and heres a taste of what you can do by stacking some samples and instruments and assigning some of them a single velocity value.
In the following audio clip, nine custom samples are stacked onto a closed edge hi-hat articulation. Each sample is velocity gated to a specific range of velocity values so that the sample only plays when those velocities are hit. I also assigned a single macro knob to control the pitch effect of several samples in the stack and automated it.
So, keeping in mind that this pattern is only being triggered by one note – A#-1 for the closed edge articulation on this kit – that means the rest of kit is still available for playing, including the hi-hats! That’s because this set of samples is only stacked onto a single articulation. The other hi-hat articulations (tight edge, open edge, etc.) are assigned to other MIDI notes and openly available.
The following clip shows how the rest of the drums can still be played around the stacked pattern. It starts with the Stacked hi-hat pattern from above and every few bars drums from the rest of the kit are added and then taken away:
There really is no hyperbole in saying that the possibilities are endless.
Bouncing
Bounce has been streamlined and moved to a drop down menu on the new Song Track bar running along the bottom of the GUI. It’s no longer necessary to buffer the MIDI first before offline bouncing, now a direct bounce out is possible with all the features available from the SD2 bounce menu; Bounce Through Mixer, Bounce Channels, All Bleed On, Split Stereo Microphones etc.
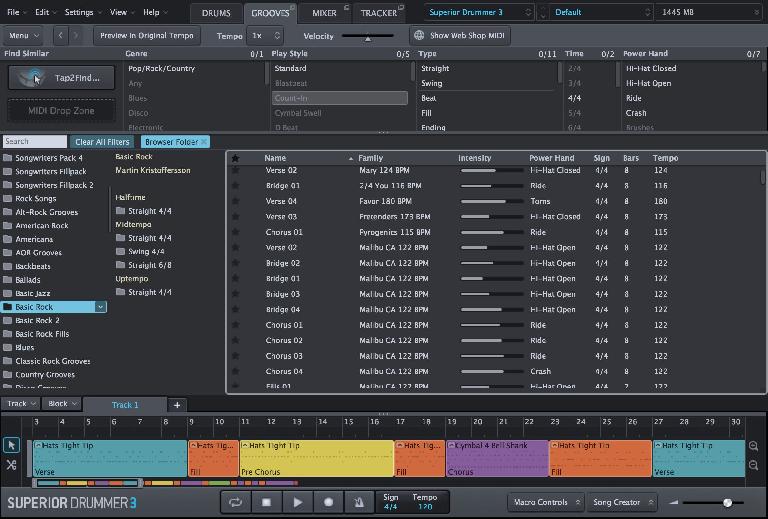
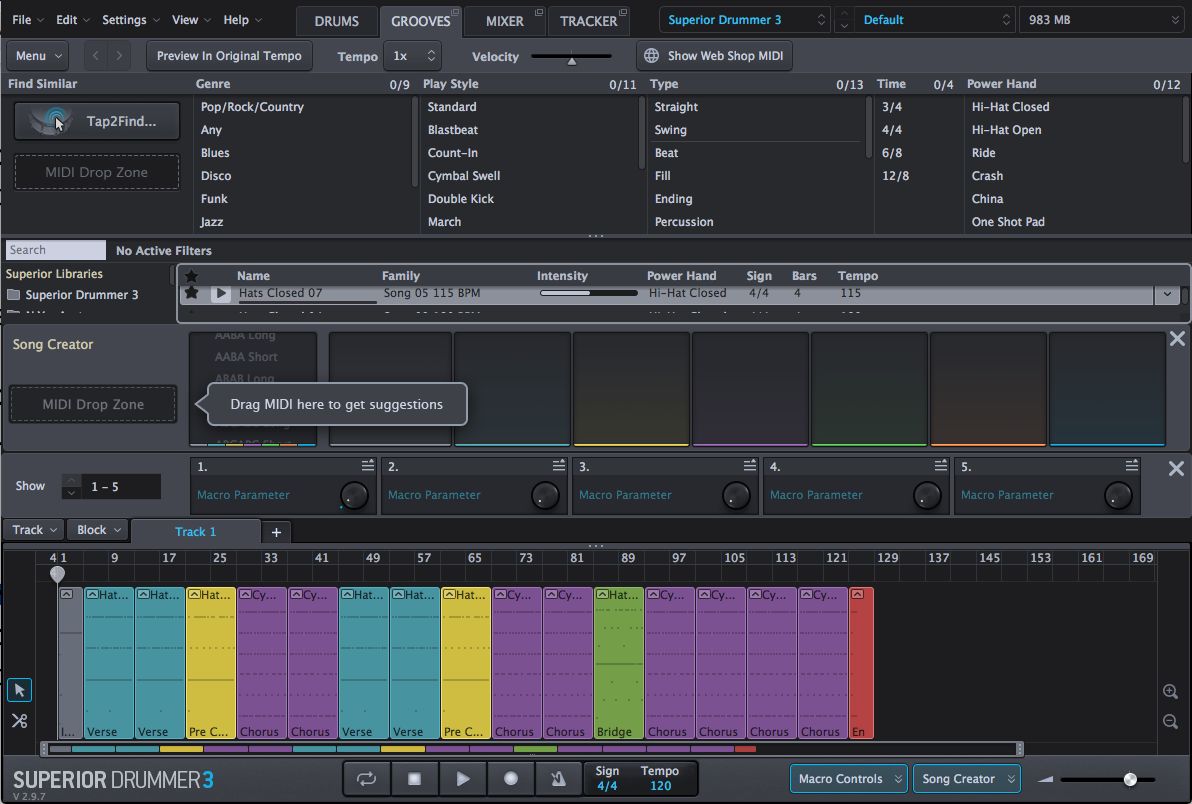
Grooves
The groove page retains all of the songwriting features from SD2, but the search functionality is greatly improved making it much easier to find a particular groove.Toontrack introduces its Tap2Find function to SD3. With it, you can manually tap in a beat and have SD3 search your libraries for grooves that match. Very handy, if somewhat hit and miss on occasion, especially with more sophisticated rhythms.
Grid Editor
SD3 supports multiple Song Tracks in a single project, and it is possible to edit tempo and time signatures in each. Furthermore, individual grooves in the Song Track can be edited down to the note level with the addition of a MIDI grid editor. This is just mind blowingly useful for commercial music production, as it gives us ready made song templates to kick a project off the ground, but they can be further modified to a project’s needs as it progresses.

From a creative and learning perspective this is incredible, as a beginner or non-drummer can load up hundreds of grooves and explore how a professional drummer would work a kit, while a more experienced user can find the appropriate grooves and instantly start manipulating them further to suit the creative needs of a song.
Mixer
At the press event, Toontrack said their aim with SD3 was to build a drum workstation environment that you didn’t have to leave. I was very skeptical of this statement. I am a bit of a fanatic when it comes to routing virtual drums in a DAW, and I almost always work in multichannel mode with a drum sampler, but I never feel like this is necessary with SD3. This is the first drum workstation I have used where staying inside the plug-in is far more beneficial than routing out of it.
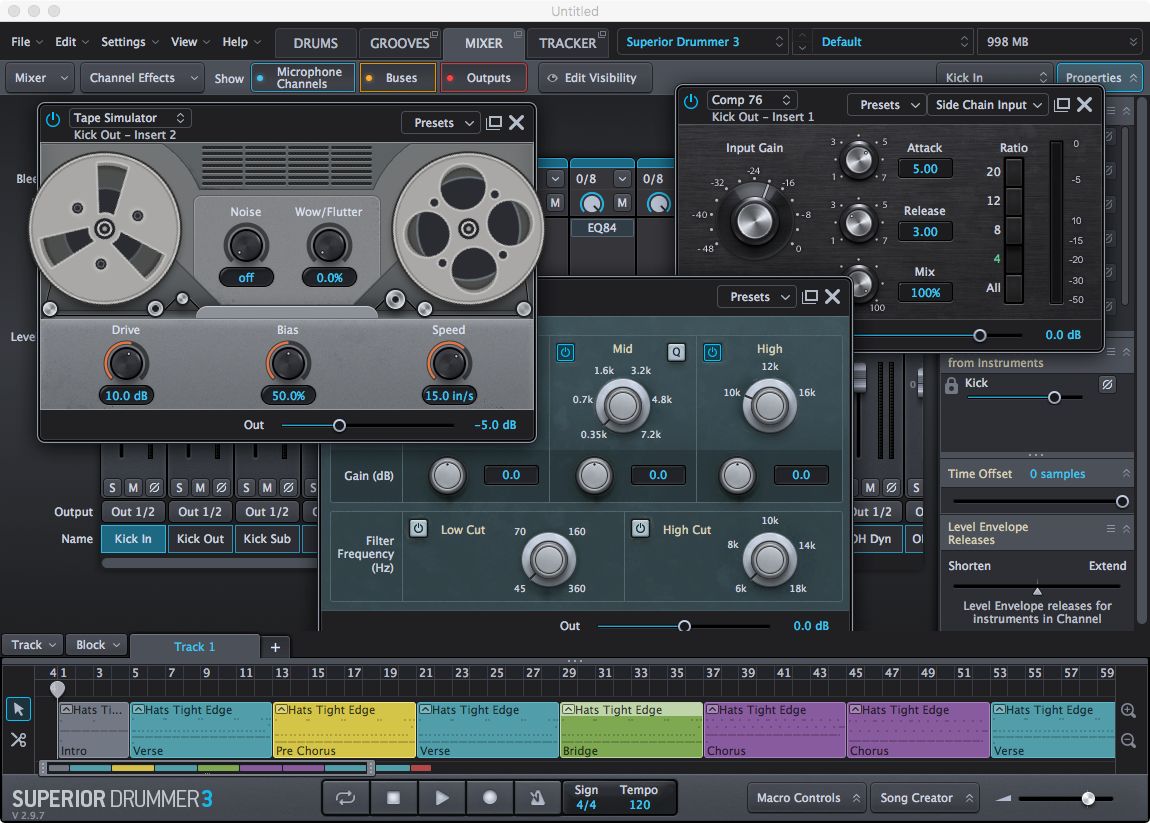
The 35 plug-in effects designed by Overloud are fantastic, and they cover the full gamut of essential efx and dynamic processors. The mixer itself is a welcome extension to the DAW. Automation is a breeze because all the necessary plug-in and mixer parameters are assignable to the Macro controls.
Speaking of mixing. At first I was bemused at the 11.1 mix capabilities of SD3. It’s a bold nod to the future of audio production for sure, but let’s be honest, a significant portion of SD3 users will never come close to working on full immersive rigs, and one can be forgiven for wondering what happens to all those extra channels of audio when working in plain old stereo. But there is an amazing upside to this – in stereo, all those surround channels effectively become different colored room mics! Once again SD3 just boggles the mind. You have the option to add a variety of distant mics to the whole kit, or even to just single parts, and it’s even possible to offset the distant mics to fix any potential phasing issues.
Such flexibility opens up a world of drum sound design and realism that I have never heard before. For example, in many cases when shortening a drum sample one ends up truncating the room sound recorded along with it and the sense of realism is lost. In SD3 however it is possible to shorten the envelopes of the whole kit (or a single kit piece of course) but still have it ‘bleed” into a room mic to regain the room sound.
Extending Ambience for Realism on a shortened snare hit
In this file the original length snare hit plays for a bar. Using SD3 macro controls I’ve automated the snare length to shorten until it sounds a little strange, too dry. Using another macro I slowly automate the length of the envelope in the ambient mic channel the snare is bleeding into and at the end of the clip it sounds like a tight hit playing in the room again.
Tracker
The star of the show, and deserving of its very own window on the interface is Tracker.
It’s a drum to MIDI conversion AI that can automatically detect the kind of drum instrument being imported into it, and then replace that live drum audio with a similar sound from the SD3 library. It also converts the whole drum performance, and each individual instrument, into MIDI which you can then save and move down onto the Song Track window for further manipulation with the Grid Editor.
The full capabilities of Tracker are far, far beyond the scope of this review, but take my word for it, it goes deep. Among many other things, you can further train Tracker to ignore bleed from surrounding multitrack files (especially useful on Tom multitracks for example), and once the files are analyzed you can fine tune in minute detail any hits that Tracker may have missed or added by mistake. Tracker is a miracle that shaves hours off drum replacing and ensures getting back to more creative tasks in a fraction (seriously a fraction) of the time.
At the press event in Belgium, Toontrack demonstrated how it is even possible to extract drum parts from a stereo recording by loading the stereo, drums-only file into Tracker and telling it to look for kicks on one track, hi-hats on another, and so on. The result is unbelievable at first – given the amount of time taken – not more than 45 minutes to extract a full drum performance into individual parts from a stereo file. I did a much simpler version of that demo here.
First, I took a stereo drum file and loaded it several times over into Tracker. I then told Tracker to find a specific instrument for each loaded track. i.e. find all the kicks in this file, all the hats in this file etc.
After less than 5 minutes and minimal tweaking, this is what I was able to extract from that stereo file:
It’s not perfect, but here is the walkaway: it took me under five minutes. I now have the drum parts converted to a reasonably close MIDI file of that performance. I can now replace any or all the drums at will and edit the new files down to the note value. Did I mention this is from single stereo drum file…? Tracker is really designed to work with individual close mic drum multi tracks so let’s see how it does on that front. Spoiler alert! Much, much better.
Here is an original RAW live drum multirack loaded into and playing back from Tracker:
Here is that multitrack drum replaced in less than 3 minutes with a minimal tweak on the Cymbal/OH tracks to get a crash triggered:
Here is a 50/50 blend of the two:
Tracker is scary good at what it does. One can only imagine with further supervised machine learning from Toontrack, Tracker will probably guess what tracks are being loaded into it before you even record them.
Summary
Superior Drummer 3 is extraordinary: a game changer on all fronts. If you are serious about your drum sound and programming then this has to go to the top of your to-do list right now. The mixer is a powerhouse of possibilities. The new effects run with the best. The grooves and song creator section are endlessly tweakable and the new interface is a pleasure to work with.
Tracker is the real revolution though. The ability to enhance (or completely and easily replace) an existing live drum performance with drums recorded by one of the greatest audio engineers of all time, in one of the most impressive facilities on earth, played by a living, breathing superior drummer, and assisted by a powerful Artificial Intelligence, is proof positive we are living in the future, and that the future of drum workstations is SD3.
Superior Drummer 3 is released worldwide on September 12, 2017. Upon release, the previous version of Superior Drummer will be discontinued and no longer sold online. It may however remain in some retail outlets as long as stocks last.
Price: Full version: RRP: £305 / SRP: £287
Upgrade RRP: £155 List / SRP: £147
Crossgrade RRP: £235 / SRP: £217
Pros: Tedious drum replacement and triggering has been replaced. Rejoice! You get a 200 GB+ library of drums recorded by George Massenburg in one of the best recording spaces on earth. The ability to get a realistic drum sound without having to own a real kit or pay for a studio and drummer every time you need some “real” drums in a track is really useful for many obvious reasons.
Cons: Power users of SD2 may find the new MIDI mapping workflow a bit disorienting at first.

Discussion
1. It does not use standard Mac keyboard shortcuts that every other program has been using for the past 20 years or more!
2. In SD 2 you could drill down to the individual kit piece in the goove section. This does not seem to still be the case in SD 3.
3. In the midi grid view there needs to be right click to add an instrument at that point, RT click on a track and mute / unmute it etc.
My overall personal feeling is that while it is a solid upgrade, it lacks simple features that is needed to make it really user friendly.
Want to join the discussion?
Create an account or login to get started!