
There are times when you're working on a song and you've laid down some really killer percussion, but you're missing some melody. Granted, with today's sound, melody isn't always necessary. But, if you think you need a small amount of melody (maybe a cool bassline or a lead) and you've exhausted a lot of your other options, well I may have a trick that will really help using your own voice.
The Mouth, by Native Instruments, is an extremely overlooked device within the Komplete line-up, in my opinion. I think this is largely due to the fact that it hasn't really been marketed in a way that cuts through to its actual purpose. I mean, it is a vocoder, and it is a harmonizer, but it's also a synthesizer. And, in this tutorial, I'd like to show you how to access the synthesizer within, with your voice.
Step 1 - Get Some Audio Together...
Technically, you can throw any audio into the Mouth and it will do something with it. It doesn't really care. For my tutorial, I'm going to throw the most basic drum beat in the world into the Mouth and then decide what it spits out. Here have a listen to the most boring beat in the world...
Step 2 - Make Some Settings...
It's sort of annoying that there are no INIT patches for the Mouth, but the very first preset loaded is Spread Duet and it works fine as a starting point.

I'll switch the Mouth to Beat mode. This tells the Mouth to stop following the pitch of the incoming audio and only follow transients... Like beats, mouth movements, etc.
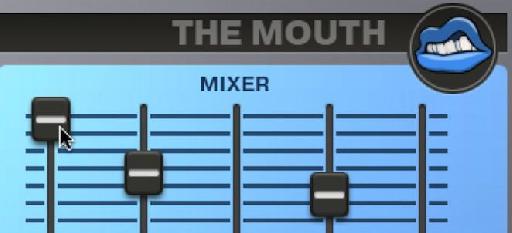
At this point, I'll also turn down all the other sliders except for the Synth slider. This is the fader for the Mouth's built-in synth which is actually always running, it's just not always audible. Let's tweak it a bit...

Step 3 - Synth Tweaking the Mouth
The Synth sub-preset menu can be accessed by pressing the small synth button at the bottom of the Synth fader. This is a great place to choose how the basic synth part is going to sound. I'll go with the Classic preset.

There are also a few more ways to tweak the synth that give it much more personality. I'll go in to the Harmony Edit View (by clicking in the quarter note at the top) and set the synth to 4 Voice Polyphony. This gives me the ability to technically work with two oscillators within the Mouth. I can have the parts play in harmonies by adjusting the envelopes, as I've done in the figure below...

Now, if I raise up the Input fader, I can hear what my synth settings sound like with the original drum beat. I'll even raise the Bass and the FX, to add that extra punch. Let's hear it!

There you go! An easy, simple melodic/bass part that adds a lot to the beat. And, what's even better is it's not just playing one note, if you listen. It's moving around a bit. At this point, you can isolate the synth and bass, and bounce them to an audio track. And your audience will be none the wiser!

Discussion
Want to join the discussion?
Create an account or login to get started!