
Many artists these days are using Mainstage for their rack of tones and to play backing tracks to support the band. There are others, however, that have started using Mainstage as a live looping machine. Live looping is essentially recording a live take, and then overdubbing more takes as the previous take loops in the background.
Live looping is an interesting art form when done well, and can be annoying when an artist doesn't know how to perform in a compelling way. When pieces are looped, the endless repetition can be grating. We are going to explore some ways to use Mainstage live to add some flexibility to live looping.
Getting the Concert Ready - Creating the Controls
To start off, we are going to want to put all the controllers that we want to use in the Layout Screen. In this case, I am going to create a Layout with buttons that correspond to my Axiom Pro. The buttons will still work in the Mainstage window, so you can follow along.
Step 1:
Create a new Concert (using 'Keyboard Starter' from the template chooser works nicely), name it 'Live Looping', and open the Layout Screen.

Step 2:
Add 9 buttons to the screen in a telephone layout simply drag them in from the Screen Controls Palette below the layout screen:

Step 3:
Assign the buttons so that they correspond to the buttons on your controller. If you have no controller, then skip this step. We simply select a button, select 'Assign' in the inspector, and touch the button we would like to use on our controller. Make sure to turn the 'Assign' button off when all the buttons have been assigned.

Step 4:
Now bring in 3 waveform controls from the Screen Controls Palette.

This is a good place to start. We may add more later.
Getting the Edit Window Ready
Now we need to start getting our Edit window ready. We will create Loopback plugins at the concert level first, then try them out at the patch level.
Step 1:
Select the edit tab, then select the 'Live Looper' concert.

Step 2:
In the channel strips area, create 3 auxiliaries by clicking the '+' in the upper right of the channel strips.

Step 3:
Go to the channel strip settings for each auxiliary and choose 'Reset Channel Strip'. Use Bus 3-5 for their inputs, and place a Loopback plugin on each Auxiliary. Turn the channel strip volumes up to '0db'

Step 4:
On each Loopback, choose the gear in the upper right hand corner of the loopback, and choose 'Set Concert Tempo After First Take'.

This is a way to determine how fast our concert is by the length of our first take.
Step 5:
Turn the 'Snap' controls of all the Loopbacks to 'off' and make sure Sync is set to'On'
Step 6:
Click on a waveform control in the Workspace. In the Screen Control inspector below, assign a waveform to each looper.

Step 8:
Now we are going to assign the top row of buttons in the workspace to the first Loopback. Assign the buttons as follows:
Leftmost button: Aux 3 > Loopback > Transport > Record
Middle Button: Aux 3 > Loopback > Transport > Clear
Rightmost Button: unassigned
Repeat this for the other Loopback plugins as well.
Go ahead and rename the auxiliaries to Loop 1, 2, and 3.

Step 9:
Go to the first patch below the Live Looper Concert, and create three new audio channel strips.
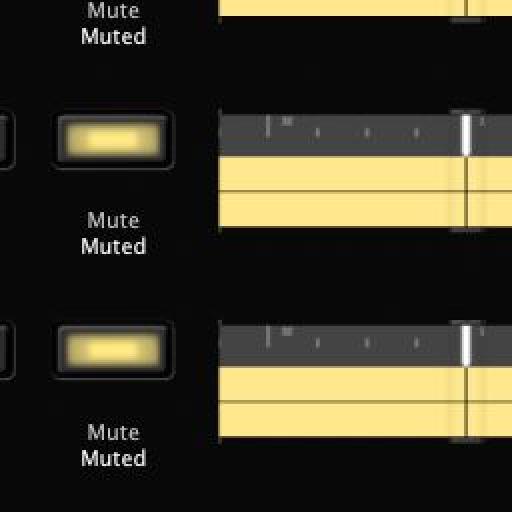
Step 10:
Set outputs to the busses that correlate to Loop 1, 2, and 3, and Mute them.

Be sure to double-click the bottom of the audio channels and rename them Loop 1, 2, and 3.
Step 11:
Click on the rightmost buttons in our workspace, and assign them to mute each channel strip we have in our patch. This will be the gate that feeds our hungry Loopers.

The Big Test
The way this looper works is for the serious live looper. This technique works best if there is a grooving sound happening through the UN-muted first looper and the record is triggered exactly at the downbeat.
The groove continues until we hit the record button again, which turns the record function off, but leaves the loop playing. This sets the tempo of the concert, which keeps our other loopers in lock step.
With the first channel UN-muted with the record disabled, a musician can still feed the channel strip without recording on top of the previously recorded layer.
Overdubbed layers can then be added on the other two loopers by UN-muting the channel, then hitting record when the time is right. Hitting record again will create the next individual loop, and everything will still be in time.
On Loop 2 and 3, try creating longer loops by waiting to turn the record button back off after engaging it. This will make the live piece seem less repetitive.
To clear the loops and reset the tempo value of the concert, hit spacebar on the computer keyboard while the workspace is selected. It's a good idea to have basic transport controls set up to control Mainstage for this purpose.
Adding Effects
To add reverb to the looped material, be sure to send from the auxiliary, not the channel strip that's in the patch. This way, the looped material will be processed regardless of the artist using the channel strip to solo or loop. When Loopback is set up like this, Loopback monitors incoming signal while looping what it has recorded as well.
Effects that are applied as an insert on the patch's channel strips will go to Loopback, but sends will not be looped. One clever way to achieve an interesting looped effect is to have the signal sending to a reverb at the channel strip, where it sounds lush, then looping that material. When the loop is engaged and the signal stops going through the channel strip, it can then be processed differently at the Aux.
Next time we'll explore using Loopback with instruments, tempo, and fixed loops!
*bows*

Discussion
Great stuff. Thanks! Looking forward to more.
forgive the long post.
I've been following all of your available videos -
pyramind, youtube, and macPro.
I have downloaded macPro Mainstage 2 (not by you) etc... and still can't get my head around controlling mainstage to do free form looping improvisation.
I want to be able to use a mic, guitar and keys to input sounds for looping improv.
I work with kids in a music class setting and I think it would be cool for them to be able to watch a creation and take part in it.
(They already are using Garage Band and have watched me sequence...etc.) I also know that looping several tracks can achieve the same effect.
I just like the idea of doing it live and away from the computer.
Thanks to you and your videos I do understand it better.
I appreciate the way you do projects instead of just explaining the functions and organization.
As far as this example,,,,
I'd still like to see how you set up basic transport controls set up to control the Mainstage setup and how you move from first loop to the next ones and back w/out touching the computer.
ie how do I set up a command / button press to do that? So far none of the tutorials/ teachers have gone that far.
BTW. I have Oxygen 61, Roland XP60, Uno and FCB1010 controllers. I'm trying to set up using Oxygen 61 and Apogee Uno at this time.
I understand that I might not be the sharpest tool in the shed. I've been trying to use Mainstage since Mainstage 1. I can really only spend large amounts of time during the summer since school days use up most of my creative and learning energy.
I will probably throw in the towel if I don't get it this summer.
Therefore help if you can.
Go to the edit button on the Axiom Pro, and choose 'hypercontrol'
Change Hypercontrol to transport instead of normal. I think you'll find that the controllers will map more easily. Let me know if this works!
Want to join the discussion?
Create an account or login to get started!