With Logic Pro X's new Modulator MIDI FX, you now have a simple way to modulate software instrument parameters. If your synths allow you to assign MIDI Continuous Controller numbers to parameters like the ES2 does, or if they have MIDI learn functionality like many third-party instruments, Modulator can be easily assigned to control nearly anything within them. Its tempo-synchronized LFO and long ENV can each send independent MIDI CC numbers to control parameters like Filter cutoff, resonance, pitch, volume, envelope attack/release, distortion and more. In this article, I'll show you how to use Modulator with Logic's own ES and with third-party instruments.
Modulator Overview
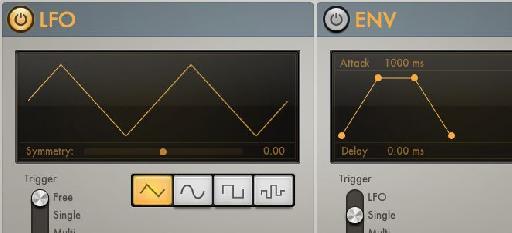
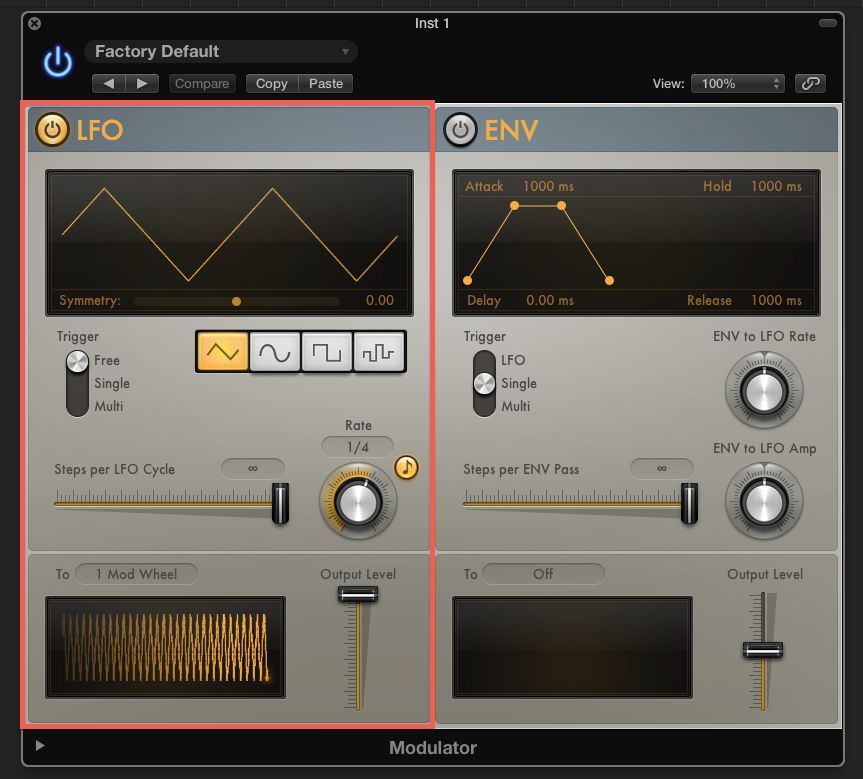
First, let's take a look at Modulator's interface. It has two main areas, an LFO and a ENV generator. In the LFO section, you can choose from familiar waveforms like Sine and Triangle, but here you have a Symmetry slider that alters the shape of the waves.
You can adjust the rate with synchronized and non-synchronized values, and even adjust the “resolution” of the data with the “Steps per LFO Cycle” slider. The trigger selector allows you to choose a “Free” setting where the LFO is not triggered by incoming notes, a “Single” option so consecutively held notes don't restart the LFO, and a Multi mode, so that every new note received will restart the LFO cycle.
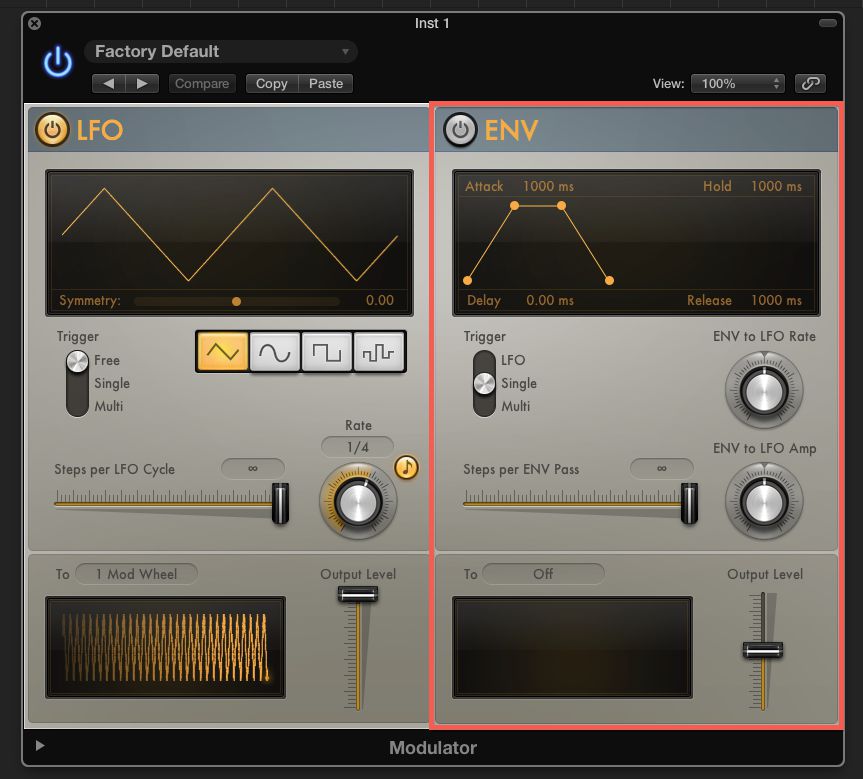
The Envelope section can be used alone to modulate parameters, in conjunction with the LFO, or can be used to modulate the LFO itself. You can adjust its Delay, Attack, Hold and Release settings much like you would a standard synthesizer envelope. These settings can be set much longer though than a standard envelope... each parameter can be set up to 10 seconds in length.
Once you've set these, you have the option of modifying the LFO's rate or intensity, and/or using it to shape another parameter via a separately assignable MIDI CC. Like the LFO, you can adjust the resolution of the output data so it's not a perfect slope, but “stair-stepped” via the '“Steps” slider. You also have a Trigger selector much like the LFO's, with the exception of an “LFO” option that starts the envelope via the LFO's peak value.
Step 1: Automatically Modulating ES2's Vibrato
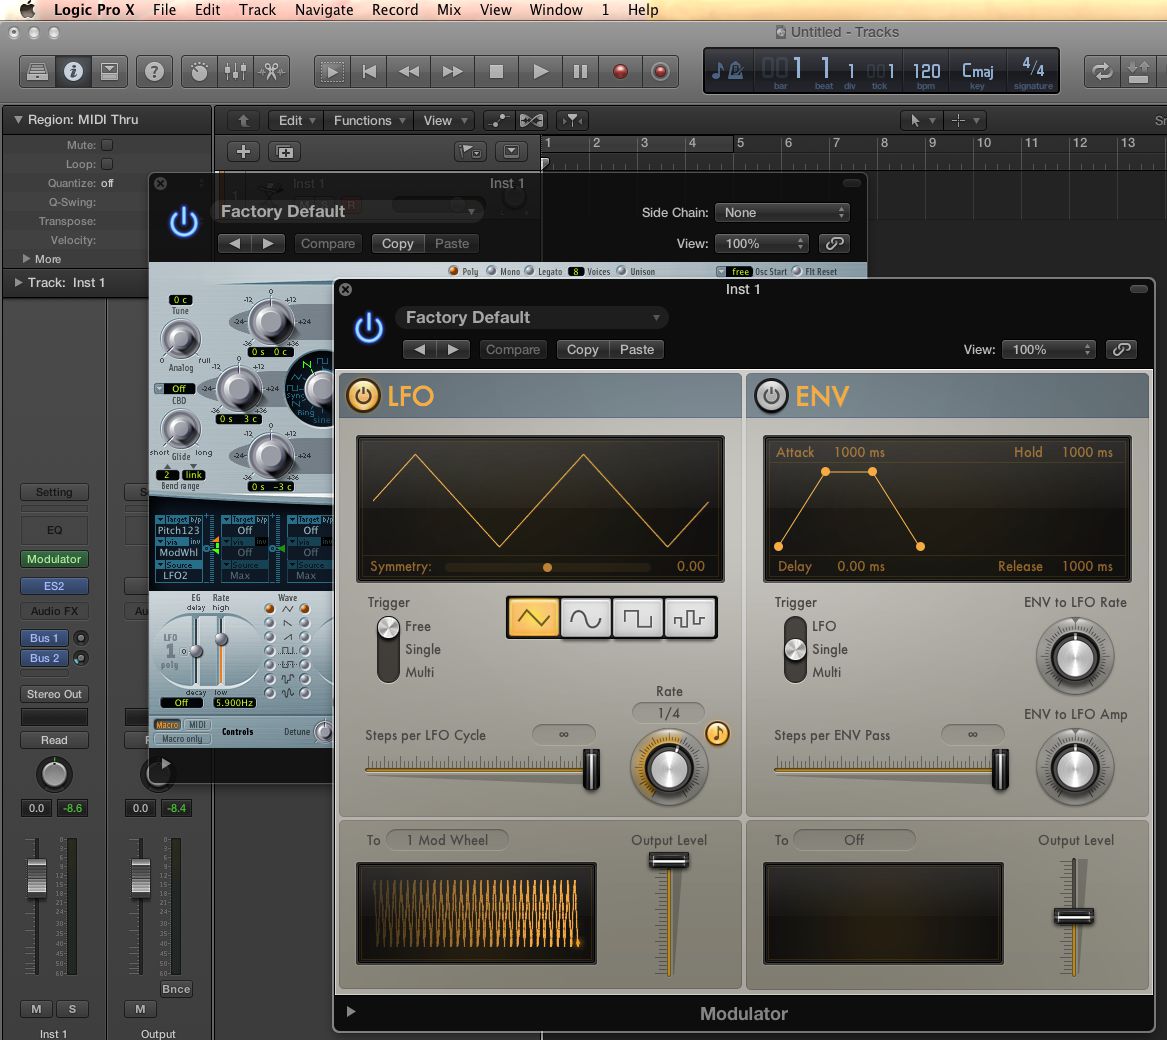
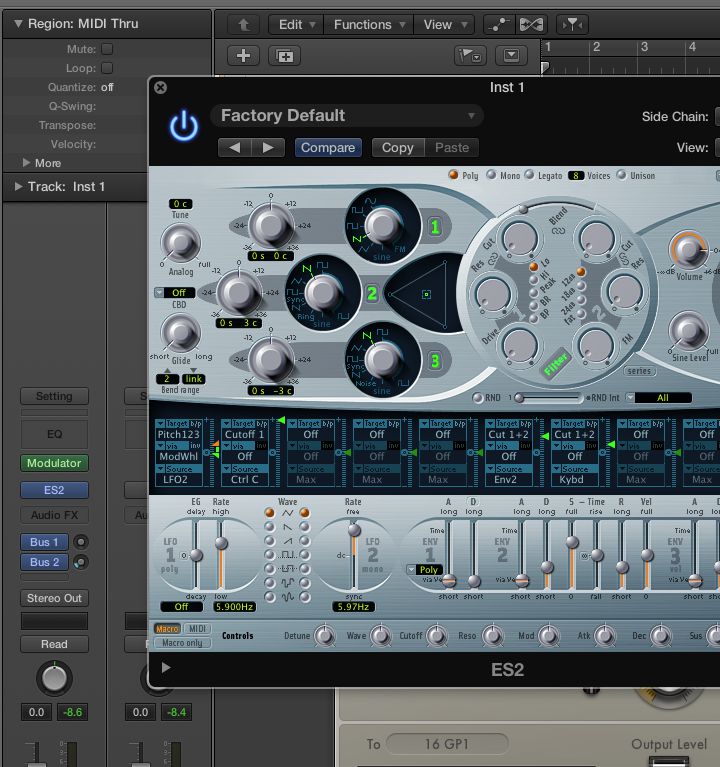
Open an ES2 synthesizer and leave it set to the default patch. Look at the far left slot of ES2's router (the dark strip)... the Mod Wheel is set to open and close the intensity of LFO2 on the pitch (It adds vibrato). It's common to control vibrato via the Mod Wheel, so many of ES2's patches are already set this way. Click the new MIDI FX slot on the channel strip and select Modulator. Play some notes. It should immediately add vibrato to the ES2 sound since its LFO's “To” setting is already set to Mod Wheel.
Step 2: Sweep ES2's Filter Cutoff
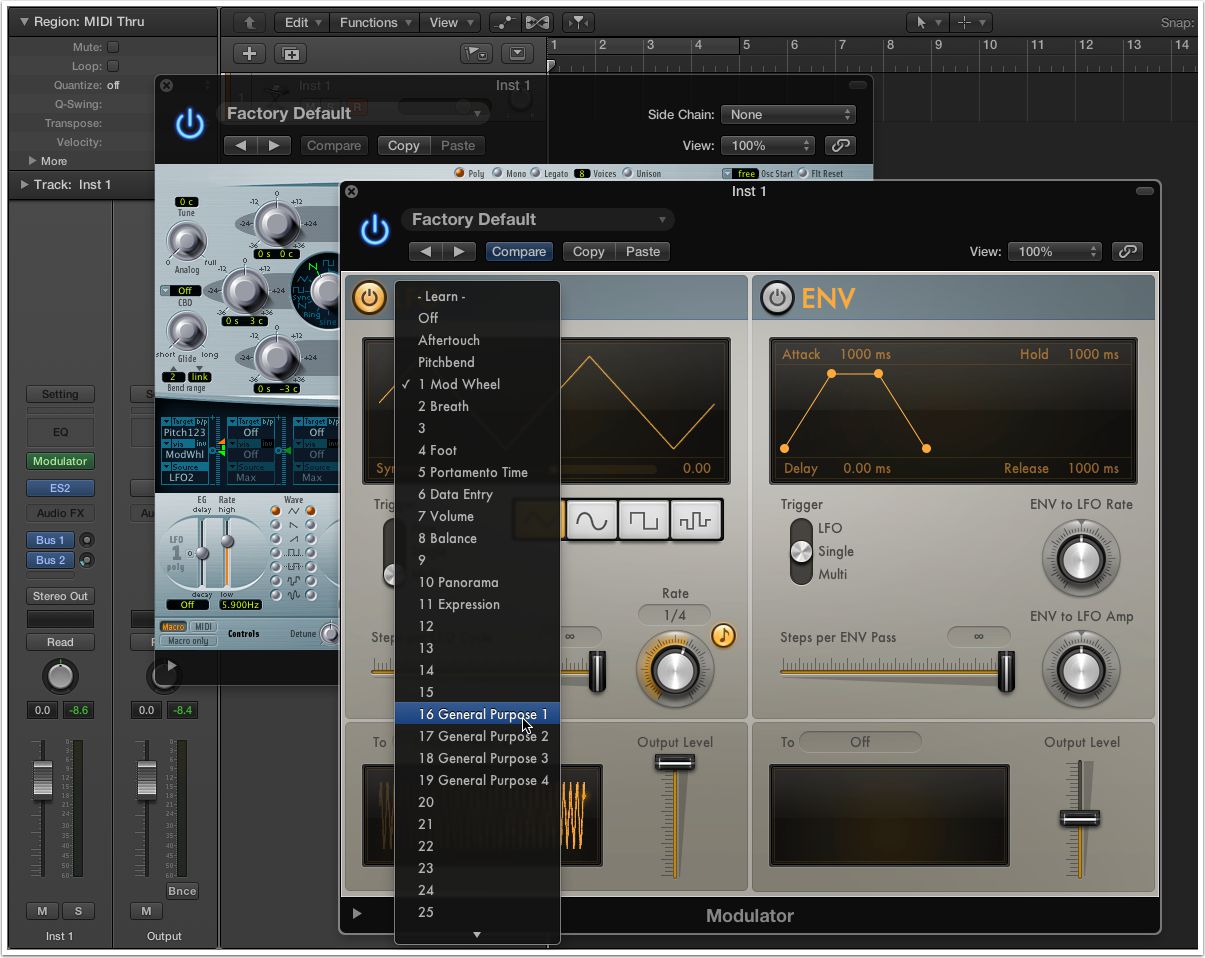
For this sound though, I want to be able to add vibrato via the actual ModWheel on my MIDI controller, and use Modulator to automatically sweep ES2's filter cutoff. Let's go back to Modulator. Change its Trigger to Multi so every new note coming in will restart the LFO, then change its “To” value to “16 General Purpose 1” from the menu. This is a standard (normally unused) MIDI CC number. Modulator is now no longer controlling modulation, so I can use my MIDI controller as normal now.
Go back to ES2, and in its second router slot, choose “Cutoff 1” as the Target and “Ctrl C (16 GP1)” as the source. Push the bright green triangle all the way up, then pull the Cutoff 1 value all the way down, and play some notes. You should now hear Modulator's LFO sweeping the cutoff. Try different settings on Modulator's waveforms, and rate knob while you play, but return the Rate value back to 1/4 and the wave to a sine wave.
Step 3: Control LFO's Rate With the Envelope
First, enable the envelope by pressing its power button. Set its Delay to 0.00 ms, its Attack, Hold and Release settings to around 2000 ms. Set the Trigger to Multi and raise the “ENV to LFO Rate” knob all the way up. Hold a note down on your controller and you should hear a cool “spinning coin” type of effect.
Step 4: Modulator with Instruments that have MIDI Learn
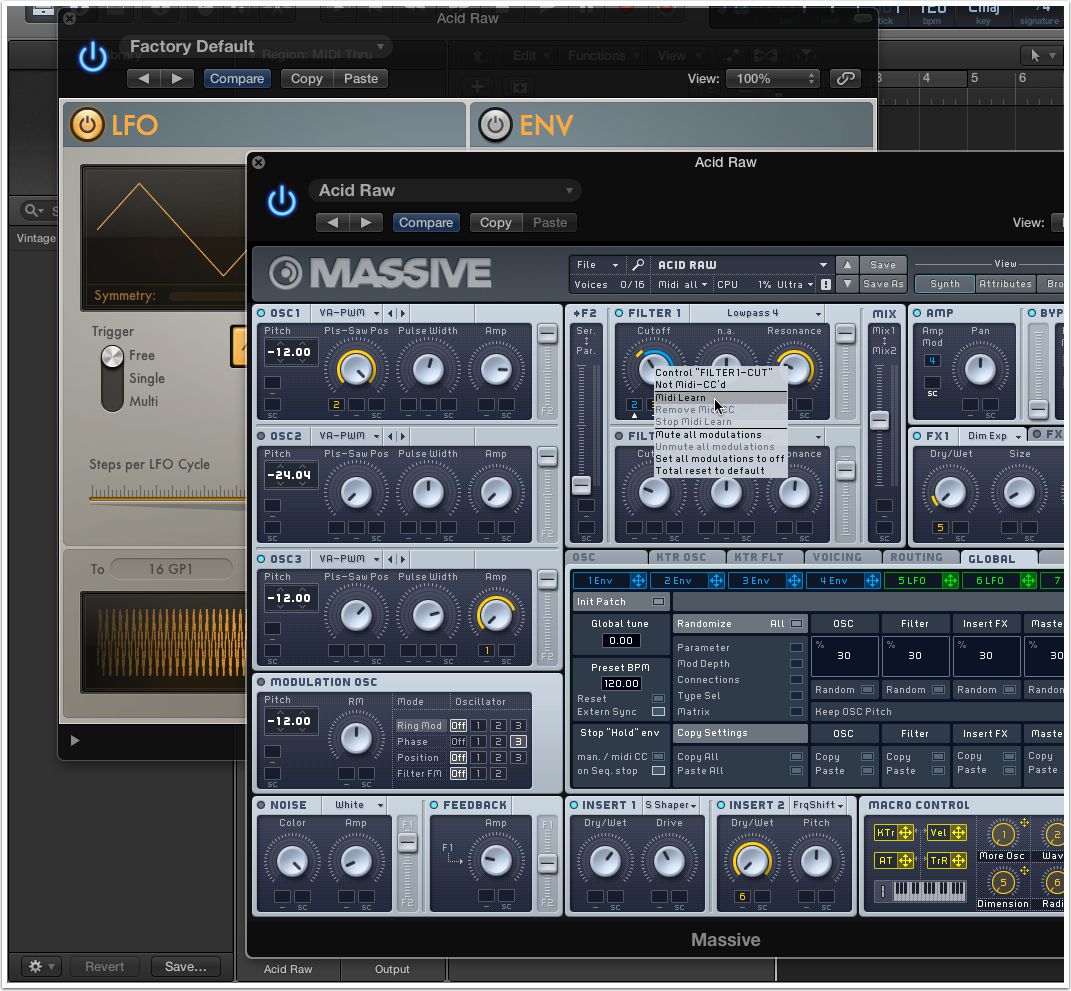
If you own a third-party instrument with MIDI learn, you can follow along with this last step. Create a new software instrument track, and add an instrument with MIDI learn functionality. Now add a MIDI FX Modulator, and change its “LFOs To” parameter to an open MIDI CC number like 16 or 17 as we did above. Find the parameter you'd like to modulate, then right-click and choose Learn. Since Modulator's LFO is already sending out data the number will be learned, and Modulator will immediately start modulating the parameter.
Thanks for reading!



 © 2024 Ask.Audio
A NonLinear Educating Company
Discussion
Is there a way to record (learn/latch) the effect of the modulator. I have this really complex modulation on the filter cutoff on Massive and I want to be able to time this exactly in sync with the music. But if I latch/touch activate my Massive channel, it does not record the automation of the Modulator.
Directly to the right of the large Orange/Yellow colored play button there's a little rectangle with a stack of notes inside it. That's a MIDI Drag! Hold the first chords you chose, and while your holding it, drag *from the button* out and onto the track in the arrange window. Do the same thing for each of the chords you play. If they sustain, simply loop each of the regions you drag out by pressing the L button. This should do it! :)
Open Audio MIDI Setup. From it’s Window menu, select “Show MIDI Window.†Make sure that IAC Driver is enabled; double click it and make sure “Device is Online†is checked off. Double click also on the Network icon. You should have one “session†enabled under the “My Sessions†field. If not, then press the + button to create a new session. Leave the default name as “Session 1.†Now, still in the Network screen, select “IAC Driver†from the TOP Live Routings menu (the one pointing into the globe). Your done in AMS, so close it out.
Duplicate the Channel the MIDI Modulator is on, then swap out the instrument from a NI Massive to Logic's "External Instrument." Open External Instrument and select IAC Driver as the MIDI Destination. Press the record button to capture the data!
The data is “MIDI Draw†data ...not Automation. Take note of the MIDI CC number or type you sent from the MIDI FX Modulator. Click the local View Menu, then the MIDI Draw menu, then onto the specific MIDI CC (you may have to choose “other†and pick the specific number you sent). Once it’s displayed, click the Mix Menu, then the Convert Automation menu, and select “Convert Visible MIDI Draw to Automation.†Once you’ve done this press “A†to show the automation.
Last two steps! Select the automation (with the automation select tool) and copy it with Command - C. Go back to the Massive track, pick the automation parameter you’re wanting to control and use Command - V to paste it!
That’s it LOL ...see what I meant now about being somewhat of a creativity killer? Still amazing and cool that pretty much anything you can think of can be done in this amazing application wether Apple let you do it directly or not! Remember to bypass the External Instrument or the MIDI data will continue to send! Also, if you do this a lot, consider building this stuff into a template. Enjoy!
1. I somehow linked 16 GP 1 to the mute button of the channel. So it goes on and off. How do I reset this?
2. I'm following you up until the last step: “Convert Visible MIDI Draw to Automation.†Once you’ve done this press “A†to show the automation. This is the problem: I don't see this automation. I can move the midi section around etc, but if I press A and don't see it in one of the parameter automation sections. I can still reach it if I press view midi etc. I would like to copy the "curve" so to say that I made with the modulator and then past that curve onto various parameters, not only 16 GP 1. I hope this makes sense.
Pretty hard questions, but you seem like the right guy for the job! I'll send a recommendation to MPV HQ!
Still have trouble with my 16 GP 1 which triggers muting of a channel :-S
Problem 1:
If I modulate my 16 General Purpose Midi, it switches the mute button of my channel on and of once it reaches 50%. I don't know how I did this, but do you maybe know how to reset the this?
Problem 2:
When selecting "Convert Visible MIDI Draw to Automation.†nothing happens for 17 General Purpose Midi (I moved to 17 since 16 switched mute on and off).
Pretty hard questions, but you seem like the right man for the job! Thanx again for your help! I'll write a recommendation to MPV HQ! Thanx!
Want to join the discussion?
Create an account or login to get started!