
Fades are an integral part of the music-making process, but you may think of them mainly in terms of fades in and out at the start and end of a track. They are commonly used of course, not least to chop off any nasty clips or clicks. Fades within a project can be used to make your life easier too, whether it's to save time automating or to create transitions without having to actually render any audio files down to disk. Cubase is really good at fades and they're easy to understand, so let's have a look at how they work and how they can help your workflow.
Step 1 '" Audio clip fades
Audio clips in Cubase have their own fade and volume handles and these are fundamentally the main things you work with when creating volume transitions. Select an audio clip and move your mouse to the top left corner of the clip. You will see a tiny triangle appear and this can be dragged to the right to create a realtime volume fade. The same is possible by dragging from the top right corner to create a fade out.

Step 2 '" Clip-based volume
The left and right fade handles create ramps, but to set the overall volume of a clip you need to find the middle point in its duration. Then you will see a small handle in the centre that can be dragged up or down to set the clip's volume. This works separately from the track's fader and is nondestructive.

Step 3 '" Creating smaller variations
Fades and handles really come into their own when you are mixing and matching material on a track. Let's say you have several takes or clips on a track and some need to be slightly louder or quieter than others. You could automate the volume fader but this can be fiddly and time-consuming. Instead, simply use the volume handles on each clip to adjust their volumes independently of each other. You'll see the waveform displays adjust themselves as well.

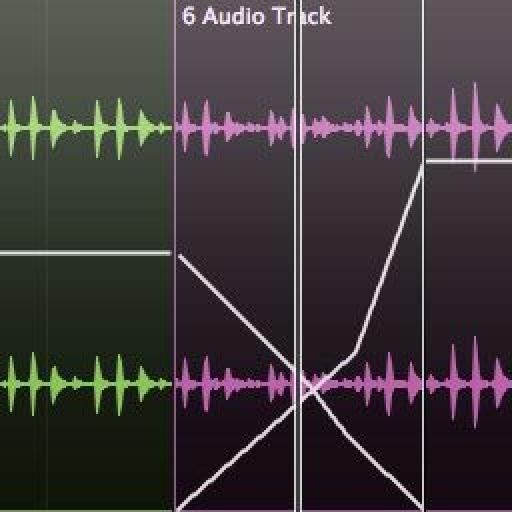
Step 4 '" Creating crossfades
When clips overlap you can sometimes get unwanted clips or clicks, or a situation where they do not transition smoothly into each other. To get around this, select one or more clips that overlap (by holding the Shift key while clicking) and then press the X key or choose Audio > Crossfade. Cubase will automatically crossfade them and you will notice that it has compensated for the higher volume of one of the tracks.

Step 5 '" Edit the fades
You can control the way fades are performed or edit existing ones by choosing Audio > Open Fade Editors. Using the two windows you can edit the way each fade is shaped and also play the fade in isolation to see if and where any problems are arising.

If you have to spend some time working on a fade, you can even store it as a preset and then use this in the future to save time.

Discussion
Want to join the discussion?
Create an account or login to get started!