
The Beat Detective window in Pro Tools brings together in one convenient location a range of tools and processes that lend themselves extremely well to working with drums. Groove quantising, that is the borrowing of the groove from one source and applying it as a quantising template to other material, is something you can achieve in most DAWs, but Beat Detective makes the process particularly straightforward.
Identify Your Source Material
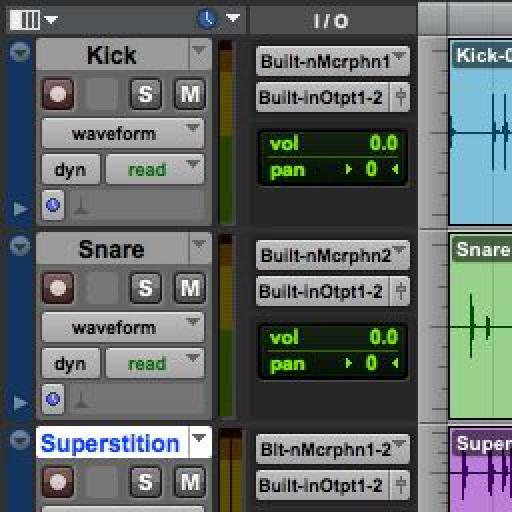
In this example we are going to apply the opening drum groove from Stevie Wonder's Superstition to some rather sterile sounding drum recordings. Listening to Stevie (always a treat) you will hear that there are two clear bars of drum groove with no other instruments playing at the top. With the Superstition region solo'd use 'Tab to Transient' to place the Edit Cursor at the start of two bars, then holding the shift button down Press the Tab key repeatedly to select up to the end of the two bar section. Check you have selected exactly 2 bars by auditioning in Loop Playback mode (Options > Loop Playback or Shift-Command-L).

2 bars of groove selected; auditioned in Loop Playback mode.
Then open Beat Detective from the Event menu and choose Groove Template Extraction in the 'Operation' section. In the 'Selection' section enter 1 1 for the Start Bar | Beat and 3 1 for the end Bar | Beat. In the Detection section check the Sub-Beats radio button and then click 'Analyse'. Move the sensitivity slider so that all sub-beats are recognised. If some are missed you can click them in with the Grabber tool, or click with Option-Grabber to delete rogue markers, but this step shouldn't be necessary of you are using an audio file with a strong rhythmic feel.

Analysis of beat markers by Beat Detective.
Finally, click 'Extract'.The dialog window that opens allows you to enter the name of the groove (if you save it) as well as further notes if necessary. You can add the groove to the groove clipboard, or you can Save it for further use in other sessions.
As in previous tutorials on Beat Detective, it s highly recommended that you divide the session to be quantised up into meaningful (i.e. verse, chorus,etc.) and manageable sections (4 or 8 bars for example), and to align these sections to the timing grid by finding the exact tempo of each one. In my previous tutorial, 'Fixing Drums with Beat Detective in Pro Tools', I described how to do this using Beat Detective, so here is an alternative method:
- Used Tab to Transient to identify the start of each section.
- Ensure the Edit cursor is flashing in all drum tracks to be divided by shift+ clicking in each one.
- Use Command-E to divide the regions.
- Select all the regions in the section using the Object Grabber.
- From the event menu choose 'Identify beat…' (Command-I).
- Enter appropriate start and end locations (1|1|000 and 5|1|000 for a four-part section starting on the first beat of the first bar, for example).
- Click OK – a tempo will be entered in the tempo ruler at the start of the section.
- Repeat this process for each section in the session.

Entering the Start and end locations into the 'Identify Beat' dialog.
Groove Quantising with Beat Detective: Step 1 - Separation
- Select the region to be quantised,
- Open Beat Detective from the Event menu (Command+8 on the numeric keypad).
- Cheese Region Separation in the Operation section.
- Enter appropriate values for Start and End bars and beats.
- Ensure that Sub-beats is selected in the Detection section and click Analyse.
- Again when you are happy that the analysis is correct click 'Separate” as before.

Selection separated into regions at transients.
Step 2 - Conform
- In the Operation section choose 'Regions Conform'.
- Over in the Conform section choose 'Groove' from the drop-down menu.
- A further drop-down menu will then appear - from this one choose 'Groove Clipboard'.
If you tick 'Timing', you will also have access to a potentially useful feature called 'Pre-Process using Standard Conform'. This will quantise the separated regions firstly with your choice of subdivision (and optional triplet) in the Selection section, then with the contents of the Groove clipboard. This can be very useful if the audio you are processing would benefit from tidying up before changing its feel. A combination of trial and error and experience is however the only way to assess whether this is necessary in each case.
Choose conform.
.")
Regions conformed to Groove Clipboard quantisation template, with pre-processing enabled (to 16th note triplets).
Step 3 - Smoothing Gaps
Gaps will doubtless have appeared between the separated audio regions as a result of conforming, which may cause audible clicking. Edit Smoothing can be used to fill these gaps and add cross fades if required.
- Click 'Edit Smoothing' in the Operation section.
- In the 'Smoothing' section choose 'Fill gaps' or “Fill and Crossfade' (and the crossfade length).
- Click 'Smooth'.
- Don't panic if you can't see the crossfades. The default 5 ms crossfades won't show up at normal levels of zoom!

Gaps filled and crossfades of 5ms applied.
Now sit back and enjoy the timing of Stevie Wonder as played by a 15 year old kid in the school band you have just recorded!
Learn more about Beat Detective in macProVideo.com's Pro Tools 204 - Beat Detective Video Tutorial.

Discussion
Want to join the discussion?
Create an account or login to get started!