
Ableton's Push is an amazingly versatile controller, efficacious in controlling both software and hardware alike. Being a huge fan of outboard gear, I have spent countless enjoyable hours discovering new ways to incorporate Push into my workflow, searching for inventive methods to maximize its potential.
Ableton Live makes controlling external hardware nearly effortless. Enabling an External Instrument Rack in Note Mode, allows for controlling outboard modules almost as easily as navigating Live's built in devices or other third-party software instruments. Readily record in notes and chords on the fly and, with the semi-recent Live 9.1 update, even step sequence melodically (hit Note Mode twice to access).
Laid out a bit differently than the melodic sequencer, Push's Drum Rack step sequencer is an equally powerful tool built for mapping out rhythmic content. Although it is entirely possible to use the melodic sequencer for charting out drum patterns, I longed to program hardware drum modules in the same fashion as I work with Live's Drum Racks. Using multiple instances of external racks within Drum Racks, I've discovered a few techniques for controlling multiple sounds across numerous hardware devices all on a single track.
The Setup
The first step to getting this working is to bridge connection between Ableton Live, your Audio/MIDI interface and your outboard gear. For those unfamiliar with this procedure, Ableton has published some very comprehensive videos explaining this process in detail.
Push: Playing Hardware Synthesizers:
https://www.ableton.com/en/blog/push-playing-hardware-instruments/
Once you have connected your setup properly, let's work through a couple scenarios starting with the basics. The first example works well for drum machines that use one MIDI channel to control all voices, where each sound is triggered by a different note value.
For example:
- Global MIDI Channel 3
- Kick= C1
- Snare= C#1
- Low Tom= D1
- High Tom= D#1
- CL HH= E1
- OP HH= F1
... and so on. You might need to check your specific product's documentation for particulars or reprogram the assignments yourself.
Then... in Live, instantiate a blank Drum Rack onto a MIDI Track.

Selecting Drum Racks.
Drag in as many instances of external racks as you require into each drum cell.
| Tip: Once you load one instance, Option/Alt-drag to other cells to speed up the process. |
In regards to functionality, it matters very little where you place these in the Drum Rack but I prefer to start at C1 and work my way up, following the same specifications as it relates to my hardware's note assignments (C1=C1, C#1=C#1, D1=D1).

Additionally, to avoid confusion and to assist in keeping things organized and manageable, I'll rename each of the Drum Rack pads by right-clicking and choosing rename.

The Rack Named.
MIDI Connection
Moving forward, assign all of the external instruments' MIDI To parameters to the Global channel your hardware is receiving. In this example, I'm using my RME Fireface 400 to route MIDI out to a drum synthesizer. Whenever possible, I avoid using CH1 as many other devices default to being set to the same MIDI channel and this may cause conflicts with other hardware set to the same channel. As a precaution, I have chosen to set my gear to CH 3 instead.

Audio Connection
Next, on all of the external Instrument Racks, choose the correct Audio From channels to which your audio interface is receiving the module's output signals. If you have only two outputs from your drum module, select the same for all instances. In this example, I have selected channels 1/2. If you have a module with more than two physical outputs, you may want to divide the voices across several different sets of outputs so that you have more flexibility, discretely processing the incoming signals.
Assigning Pads to Notes
At this point, on Push, select the track that your Drum Rack resides and hit Notes Mode. You'll be able to trigger each of the Drum Rack's pads. There is only one issue though, all of the pads are triggering the same sound or possibly even no sound at all. We can solve this by simply changing in the default routing of each pad in the chain list.
Select the Show/Hide Input/Output Radio button (I-O) on the left-hand side of the Drum Rack to access the chain list. Here we can see how each of our pads are being routed. By default all the MIDI OUT (Play drop-down menu) notes are set to C3.

Chain List Default - Default MIDI TO Assignments.
I'll change each of these settings to correspond to the note values that my drum hits are assigned to on my hardware... now we're cooking with fire. From here you can start sequencing just as you would with standard Drum Racks.

Customized MIDI To Assignments.
Multitimbral Methods
To take this a step further, you may want to use a multitimbral synthesizer that allows you to trigger several instrument voices across multiple programs. Many multitimbral synths contain programs dedicated to specific sounds, which can be played across the keyboard at pitched increments. For example, the kick may be assigned to program 101, snare program 107, low tom program 113, etc. To take advantage of using Drum Racks with this type of setup, you can assign each of the programs (instruments) to individual MIDI channels from the MIDI To drop-down menu. On your hardware, assign each of the programs its own MIDI channel.
Kick — CH 2
Snare — CH 3
Tom — CH 4
CL HH — CH 5

The Kick on CH2.

The snare on CH3.

The Tom on CH4.
Now go back to the Drum Rack's I-O section and assign the note you want to trigger for each chain list. Since you are able to play different pitches on each instrument voice, find the note that best suits your needs. It's rewarding at times to have several instances of the same program assigned to different notes to create riffs such as melodic tom or kick drum passages.
A Rack To Rule Them All
One of my all time favourite approaches is to combine several pieces of my gear into a single Drum Rack and use the best bits of each. To illustrate, I could use a kick from a Maschine Drum, a snare from an SP1200, and a high hat from my Volca Beats.
To do this, start by setting each of your hardware units to their own MIDI channels and then dial in the corresponding values into each External Instrument's MIDI To drop-down menu. Follow up by setting each instance's AUDIO From section to receive the correct audio input. For more elaborate configurations, you might consider using a MIDI interface with multiple outputs otherwise you can always try daisy-chaining.
As a special tip, this paradigm isn't just useful for programming drums. Try it with other instruments as well. I've created some beguiling basslines that fuse together voices from different synths. It can lead to some very compelling and inspired results.
Modulate, Automate, Manipulate, Annihilate
To fully extend functionality and to modulate your hardware device's parameters in real time, there's an amazingly helpful free Max for Live device, 8ccs. This handy dandy little unit allows you to assign Live dials to any of your hardware parameters that receive continuous control messages.
You can download the Max for Live MIDI Effect (8ccs) here:
https://www.ableton.com/en/blog/push-playing-hardware-instruments/

*8ccs in action.
If you need more than 8 assignments just add more instances of the device. Additionally, you can group these into a MIDI effect rack and assign dials to Macro Controls. Add some MIDI LFOs, arpeggiators, or any other MIDI effects... chances are you'll be so enthralled that you won't surface from your studio for months. Please notify loved ones beforehand to let them know that you're diving in!

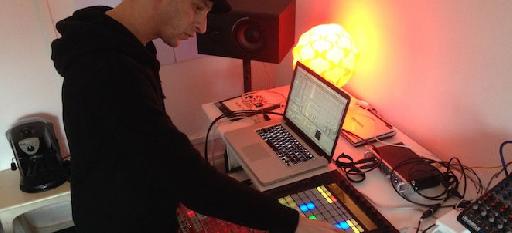
Timo Preece in action.

Discussion
Want to join the discussion?
Create an account or login to get started!