

As wonderful as Push is for both Studio Production and Live Performance, it is fair to say that it's not tailored to those who want to use a traditional DJing setup within Live. Controllers like the Novation Twitch (which has the traditional DJing layout along with a Live Mapping Template) is much more suited to this purpose. However, with a little bit of outside-the-box thinking, there are many ways to turn Push into an adequate controller for the modern day DJ.
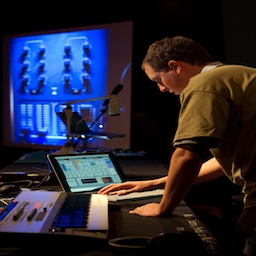
Basic DJ Setup using Push's User Mode
Push's Session mode will obviously come in very useful when DJing, however you may also want to make use of its User mode to map some traditional DJ Parameters to Push, for instance EQ controls. Let's take a closer look.
The first thing you need to be aware of is how to configure the MIDI settings in Live correctly when using the User Mode on Push. In the MIDI sync tab in Live preferences, switch both the Remote and Track buttons for the In and Out User ports for Push on.

Create a DJ template to suit your type of performance. As I want to replicate the traditional DJ layout I have created three audio tracks or 'Decks' and placed an EQ plug-in on each one. Start of by mapping these EQ parameters to Push. Luckily there are nine rotary controls on the top of Push to map the three EQs of each of the three decks to. Perfect! Enter User mode on Push by pressing the User button. Now map the first three knobs on the row to the low, mid and high of Deck A while in Lives mapping mode.

Continue by mapping the next three knobs to Deck B's EQ and the final three knobs to Deck C's. You can now access the EQ parameters of the three decks simultaneously by simply pressing User mode. Otherwise you would have to trawl through each tracks' devices separately to find the EQ parameters.
Another parameter that you will need control over is of course a crossfader. Unfortunately Push doesn't have any faders to act as one. However, its touchstrip can be mapped to any parameter in Live. Enter mapping mode in Live, select the crossfader and move the touchstrip while still in User mode on Push. You now have an excellent way of fading between your tracks while DJing. One important thing to note is that because the touchstrip usually controls pitch bend so it will snap back to the middle position when let go. The way to get around this is simple, however. When you are about to let go off the touchstrip/crossfader press the User button to exit User mode and the crossfade position will remain in the same position when you take your finger off.

You now have the foundations in place for turning Push into a controller to rival those that are specifically designed for DJing.
Follow us on Facebook and stay tuned for part 2 in this series on DJing with Ableton Push only on AskAudioMag.com!
Discussion
Want to join the discussion?
Create an account or login to get started!