
Most of us use send / return effects in our projects and they are an excellent way of adding spatial effects to numerous different parts in our mix. Most of the time these effects busses consist of a single delay or reverb plug-in, but there are a few things we can do to spice up proceedings.
This tutorial looks at a few different techniques you can use to make your effects returns live and breathe. I'm using Logic Pro here but you will be able to translate every technique used to your favourite DAW with very little hassle.
01 - Setting up the Standard Effects Return
Before we get into any new processing techniques we'll need a traditional send / return set up. Due to the fact we are using Logic this process is really straight forward, thanks to the application's 'Dynamic allocation' system.
As soon as a new send is added to a channel strip Logic automatically creates a corresponding return channel. This makes the whole process nice and painless. All that is needed now is a reverb or delay effect to be inserted into the return channel.

Setting up the initial send / return
For the purposes of this tutorial I have created an exaggerated reverb-based return set up, hopefully this will help demonstrate the effects I'm using. I have immediately filtered the low end from both the guitar loop used and the reverb to keep things as clear as possible.

The VERY big reverb we'll be using
The dry guitar we'll be using as a sound source:
The same guitar treated with our large reverb:
02 - Adding Some Side-Chain Compression
One of the simplest ways to get your reverb or delay effects to interact with your other mix elements is to use some side chain compression. This technique allows you to choose any element in your mix to be the trigger for gain reduction on your return channel.
To achieve this effect you simply need to insert a compressor on your return channel, directly after the main effects insert. Any element in your mix can then be used as the side chain input. Percussion sounds tend to work very well here as they have clearly defined dynamic signatures.

A compressor is instated and routed for side chaining
In this case I have used a kick drum to create the ducking effect and you can clearly hear the difference in the before and after examples below. Not only does this create a dynamic link between your return effect and other elements in your project but it can actually create a more coherent and focused mix.
A kick drum triggering some gain reduction on the reverb return:
The same effect without the kick in the mix:
03 - Using Modulation Effects
Another great way to introduce movement into your effects returns is to use some sort of modulation based effect. Favourites here include phasers and flangers. These feedback capable processors create the most diverse sounds and when mixed with a heavy Reverb, pretty special things can happen!
Again simply insert one of these plug-ins directly after your return effect and dial in some nice intense settings. If the plug-in has a wet/dry mix you can always claw back some of the pure reverberated signal using this.
This also works very well with delay effects that have reasonably high feedback settings. A delay line of this sort treated with an intense phaser can be extremely psychedelic in nature and great for use on guitar and synth sequences.

Logic's phaser adding some intense modulation to the reverb buss
Once you are happy with your modulated effects return, experiment with automating some of the key parameters. If this automation is synced with your project the effect will again become undeniably linked with the musical elements in your mix.
You can hear the movement created by a high feedback phaser in the example below...
The phaser springs into action:
04 - Filtering and Automation
For this step try adding a resonant filter straight after the return effect. This is obviously a little more destructive than anything else we have looked at so far but the results can be very cool.
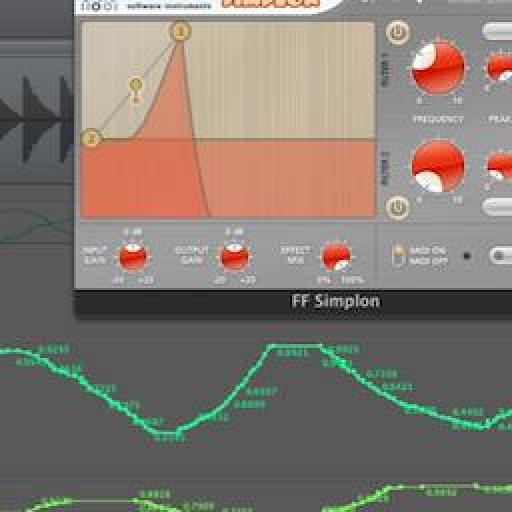
Once of my favourite filters is Fabfilter's Simplon plug-in. A dose of this after a reverb or delay can send things into space. Try automating the cut-off frequency and resonance for some movement and also try to make your movements match the music. I have created a small clip of some filtering in action, which you can hear below...

Fabfilter's Simplon is automated to generate a dynamic filter effect
The automated Fabfilter doing it's thing:
Sometimes, if the results of filtering your effects becomes a little bit too subtractive you can always export the results alone and bring them back into their own independent audio track. This audio can then be edited to create a whole new sound scape.
05 - Using Dynamic Gating
A technique similar to using side chain compression on your effects returns is using dynamic gating. This is not really gating in the traditional sense but actually side chain activated gating.
As with the side chain compression, the gate can be fed with literally any element in your mix. This will cause the gate to open and close rhythmically and will produce a choppy, sometimes stuttered sequence.

Logic's noise gate is triggered by a percussion loop
The gating with the triggering percussion loop in the mix:
The same effect without the triggering loop:
This works well with both reverb and delay and I often find that fast percussion parts such as bongos or sticks are the best side chain sources. Remember that you can always make a custom part to trigger your side chain activated effects returns. This part can then be muted leaving you with a rhythmic, dynamic effects return.

Discussion
For example, say I had a drum break with a great feel, but I want my FX to breathe with just the kick. I could use the full drum break as the sidechain input, but activate the lowpass filter on the sidechain input, and put the cutoff around 80 HZ. That way, the comp would ignore everything but the KK.
Want to join the discussion?
Create an account or login to get started!