

One DAW that I've not had the luxury of spending time with yet, while also being a DAW that has garnered considerable attention over the last several years is Reaper. I've heard people talk about it again and again with comments like, "It's so stable!", "It sounds awesome!", "The support is so much better than
Reaper is very similar to many of the major DAWs that you'll find out there in that it has multiple audio tracks, supports AU, and VST/VSTi plug-ins (DX, DXi on PC). There's also automation, network processing, and more.
There are a couple of things that really set Reaper apart from the rest, though....
Different From the Rest
First off, Reaper is programmed and maintained by a very slim, and lean programming group that is dedicated to Reaper only. This may sound less desirable than, for example, a large company with many, many programmers. However, let me illuminate you as to why this actually doesn't work to your advantage. We all know what happens when there are too many cooks in the kitchen, right? Things get muddied up, no one knows how a certain bug appears... It can get ugly.
Secondly, the user base of Reaper (on their forums) is not just an afterthought for the developers to host a bitch-fest regarding their product in an attempt to make people think they 'listen'. The user base, as a matter of fact, is what the developer defines as a feature in buying their product. These are active people that help mold the future of Reaper as it moves forward, and at the same time help the newbies to Reaper as they appear.
Thirdly, Cockos (The developer of Reaper) offers a form of Fair Pricing that is, in fact, very fair. You have two ways of purchasing Reaper - If you are a business who's gross revenue exceeds more than 20k a year, you can purchase Reaper for the full price ($150). This is actually pretty cheap, if you consider all of the others are generally around $500. But, wait, it gets better!
If you are an individual using Reaper for personal use, it will only cost you $40 dollars. This is $40 dollars for a program that does everything that the others do, and then some. This is like buying a custom DAW with a dedicated team of developers for only $40! This is serious.
With this in mind, you are most likely considering Reaper as a valid solution now. And, after you download it for free, here (granted, unless you purchase an authorization, you don't get full access) you will probably want to know more about setting it up, etc.
Well, that's actually the purpose of the article. In this first in a series of Reaper tutorials let's go through setting Reaper up! I, like you (well, maybe, I can't see who's reading this) am new to Reaper, so this is a chance for both of us to see how easy it is to set up.
Step 1
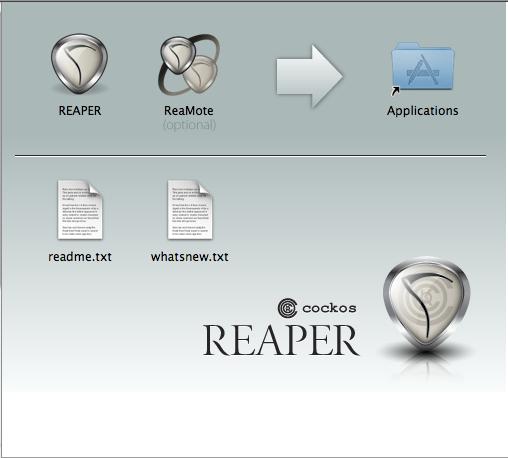
Like for most Mac apps, drag the Reaper and Reamote application files in to your Applications folder. Cockos does not have some massive installer, they keep it simple... And quick. You'll see more quickness once you launch Reaper... It's blazing fast, even on my somewhat antiquated Macbook Pro.
Step 2
Now, go ahead and launch Reaper. Btw, here's a trick: My favorite way of launching an application isn't to go in to Applications and double-click. This is old school! Try this out:
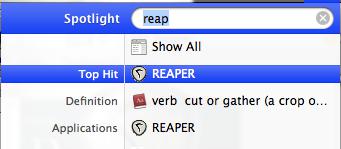
Command+Space will reveal Spotlight in the top-right corner of your screen. Type Reaper and hit Return. Really, you can type 'Rea' and it will pop up.
Step 3
Next, Reaper will start scanning for plug-ins like every good, little DAW should. If there are no problems, it will go on to the next step. In some cases (for example you have a bunch of demo plug-ins on your machine) you will get notices to run in demo mode, authorize, etc. This does not come from Reaper though, do what you need to do and move on.
Step 4
Next, Reaper will indicate that you need to set up an audio interface. This is good! Some DAWs don't mention the need for an audio interface, they just default to your built-in audio device while your several thousand dollar audio interface languishes in the rack next to you. I'll go ahead and press 'Yes' to set it up. Next, I'll choose the only choice I have whilst sitting in a coffee shop, while my several thousand dollar audio device languishes at home. I'll choose my built-in audio device!
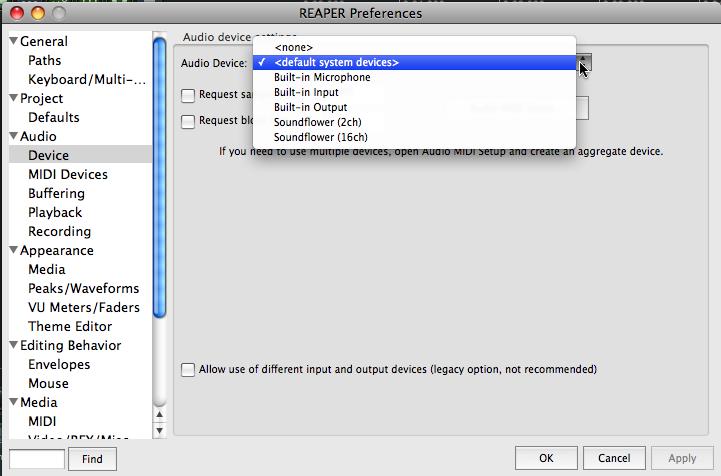
Note: Unlike most audio applications out there, Reaper does not require you to set up your hardware buffer size for latency, etc. It's taken care of automatically by taking cues directly from your audio device, and the audio buffer size set up for the hardware itself. Very cool, because you don't have to agonize over these settings. Also, the latency is amazing right off the bat, in my experience.
Step 5
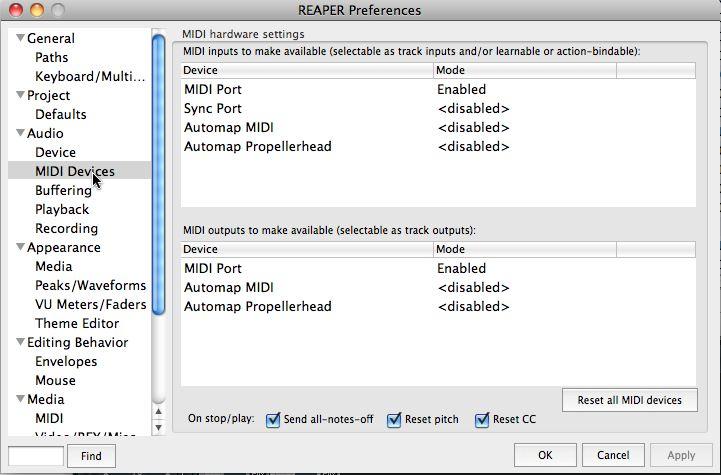
While you are still in Reaper's preferences, go ahead and select MIDI Devices on the side. Here you can set up your MIDI devices. Double-click on the MIDI input you want to set up and then select 'Enable MIDI input for this device.' If your device has a MIDI output, double-click on it's MIDI output and select 'Enable MIDI output for this device'.
Okay, we've gotten through the basic part of the setup. Granted, some hardware may require additional steps, so check your manual, or the Reaper forums. As mentioned before, they are very, very active.
In the next tutorial, we're going to go through setting up audio, MIDI, and virtual instrument tracks! See you there!

Discussion
So, anyway I’ll be using this a lot; thanks again.
Want to join the discussion?
Create an account or login to get started!