The last article should have given you a big mouthful of what you've been missing by not incorporating Ableton Live in to your workflow. We covered the Session View and Envelopes, which are a really big part of Ableton Live. But, of course, there's so much more!
In this next article, I'd like to start focusing on one of the similarities Ableton shares with other DAWs, but was also something many other DAWs have 'borrowed' from Ableton.
What is Warping?
At this point, every DAW out there has some form of real-time time stretching. You know what I mean! Where audio is automatically following the host tempo, regardless of what its original tempo was. Logic Pro has Flex Time, Pro Tools has Elastic Audio, Cubase has Audio Warp. Everyone of them has a feature like this now.
The funny thing is, Ableton has always had a Warp feature from day one. In fact, it's what the whole DAW is based off of! Sadly, the DAWs listed above actually used Ableton as the inspiration for their own brand of 'warping'. But, I've got news for you, none of them, still, are even close.
You see, where Flex Time, Elastic Audio, and so on have to be enabled, Ableton Live warping is always on. Anything you record is automatically warped, in the sense that you can instantly change the tempo and it will follow. And, this also goes for any audio that you import in to Ableton. If you drag an MP3 in to Ableton's Session, or Arrangement View, Ableton will automatically analyze it and make it Warp-able.
Of course, Warping can be turned off on any clip that is within your session by deselecting the Warp button...
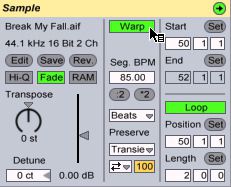
But, for the most part, you'll always want Warping enabled.
Warp Points
Warp Points are the points at the beginning and ending of either a section of an audio file, or the beginning and end of an audio file, itself. By having a section of audio between two points, you can rest assured that when the tempo changes, so will the speed of the audio file with the warp points. Take a look at the audio file below, notice the green dots at the beginning and end of the audio waveform...
The example shown is of a recorded song that is already in beat with the grid lines, which means that when the tempo changes, this song or audio file will change tempo automatically as well. But, keep in mind, not all warping goes smooth all the time. Sometimes Ableton, or yourself may decide that one area of a recording is throwing off the timing of the audio file in relation to your host tempo. When this happens, additional warp markers will be inserted to lightly chisel the audio file back in to a timing that works with the host clock.
Applying Warp Markers is actually quite easy, just double-click in the grey area above the wave form in the Sample Editor. A green, warp marker will appear...
Warp Markers for Good and Evil
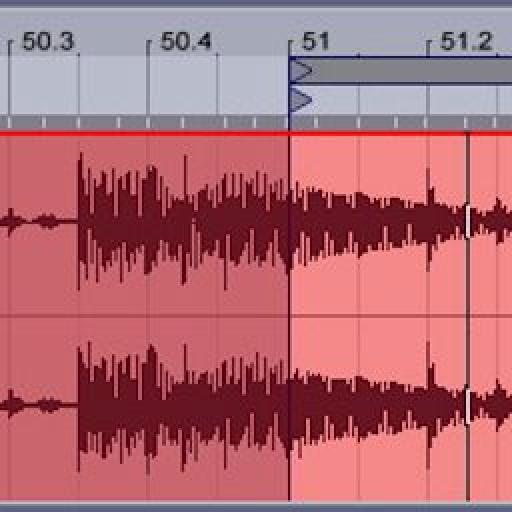
And now I need to reiterate that anything between two Warp Markers will be stretched, either by the host clock, or by you, if you want. By dragging a warp marker right or left, all the audio between the marker you're moving and the marker on the other side of the waveform will be stretched...
Notice how I dragged several Warp Markers over to the right. Notice how the audio file isn't as 'brick walled' like it was before. Now, I can see hits, inside. This is only because I stretched it with Warp Markers. And, yes, you can do this within other DAWs, but remember all the steps you have to do to get to the point where you can add Transient Markers, Flex, Markers, etc. In Ableton, this function is always on, and available because, like I said, it's been in since day one.
The above example should immediately clue you in that Warp Markers can be used for their intended purpose of keeping audio in time. Or, that you can use Warp Markers to deeply and sonically damage sound and create these crazy effects by just slowing things down, or speeding it up. There's no rendering to do this in Ableton, either. It's always realtime.
Mixing Envelopes and Warp Markers for Some Crazy Sound Design
Okay, so we know about Warping, and in the last tutorial we learned about envelopes. Now it's time to show you what kind of mayhem you can achieve when you use envelopes and warp markers together for more... nefarious purposes.
I currently have a regular drum loop...
I'll draw in some warp markers and then drag the ending marker to the left…
So, as you can see, one beat of my loop has become very long! To make it sound more natural, I put loop in a warp mode of Texture...
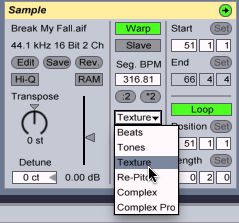
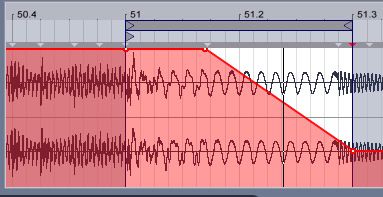
Now, I'll go in to Envelope mode and draw a nice fade out for this new sound I've designed from a single drum beat.
And, I'll add in a Pan envelope as well…
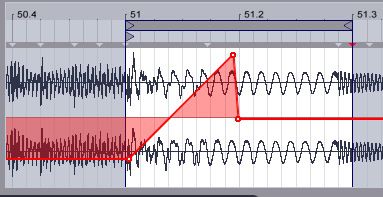
Suddenly, I have an entirely new sound, made from existing audio... And, I didn't even apply any effects. This is sound design using the basic audio engine, and feature set of Ableton. No, bells, or whistles! Now, imagine what you could do if you added effects? If I spent more than 1 minutes designing this one sound!
Conclusion
As you can see, on a basic level, Ableton has functionality that is amazingly smooth and easy to access, and make active within your projects. This makes it an easy choice for audio destruction, djing, remixing, song creation and so much more. In the next article, we're going to continue with envelopes, as well as take a look at options you might need if you used to use your DAW for scoring.




 © 2024 Ask.Audio
A NonLinear Educating Company
Discussion
Want to join the discussion?
Create an account or login to get started!