
If you’ve been in the production game for any length of time you have undoubtedly run into the term “stems” and you have a good idea of what it means. Just in case you aren’t entirely sure, stems are used in stem mixing and stem mastering. The Wikipedia page states that they are “method[s] of mixing audio material based on creating groups of audio tracks and processing them separately prior to combining them into a final master mix. Stems are also sometimes referred to as submixes, subgroups, or busses.”
Essentially, it’s each channel or group or buss from your audio project bounced or rendered into an audio file to be used later. Like your MIDI & VSTi-driven synth lead turned into a WAV file or other lossless audio format. It could also be all of your drums rendered into one file, or perhaps just the percussion mixed together with the bass and snare drums each getting to be their own stems.
There are many methods and reasons why you might make any one stem be a certain way, but that is not what I am going to talk about here. I want to talk about the best way to get your track’s stems organized and prepared to be archived, sent to a mixing / mastering engineer, or ready for a remix pack.
These will be concentrated in Ableton Live, but there will be a lot of crossover information that will be applicable in any other professional DAW.
1. Name your channels with something appropriate
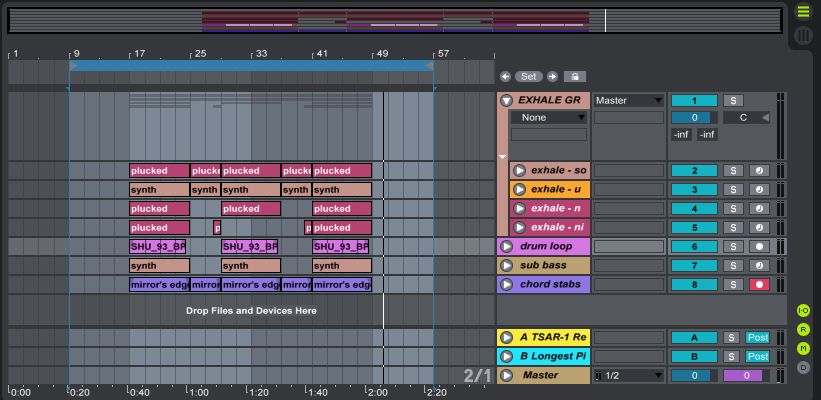
SERIOUSLY. You should be doing that anyway, but so many people don’t and it just adds to the confusion and frustration later whether for a mixing technician, remixer or collaborator. Also, make sure to label the BPM and key of the project. This can be done once in the project’s name / title or on each of the stems.
2. All of your stems should be the same length
I’m going to show you how to do this easily in Ableton Live, but there is no reason a mixing engineer should have to go in and spend time trying to sync your audio. If everything is the same length syncing is done in seconds.
3. No audio clipping on individual channels or groups
You don’t want to see any red before you export your track. If you see any red, select all channels and drop the volumes down relatively for each. Easy. Also, leave the master channel clean so it can be used as a reference track.
4. Leave an intro and outro of 1 bar of silence
This is really important. Most of us start our tracks at the very beginning of the timeline, and that’s ok. However, when you render the track some transient clipping might occur for a number of reasons. Also, you don’t want that reverb tail at the end of your track being unceremoniously cut off. The best practice is to leave a 1 bar lead in and out to make sure none of that happens. Your engineers, remixers and collaborators will be happy if it’s exactly 1 bar too. Again, easier to sync later on.
5. Render settings
You will want to make sure that you are rendering the best quality audio files. At a minimum follow these guidelines.
Bit Depth - 32 bit (if file size is going to be a problem you can go to 24 bit, but I wouldn’t recommend going below that.)

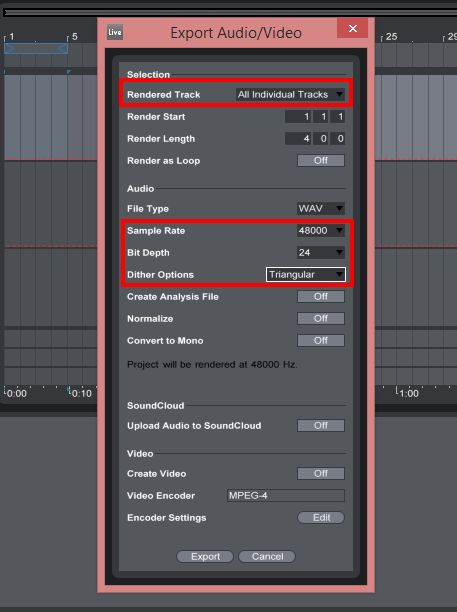
Sample Rate – 48k (you should be producing at that rate or more, if you’re only using 44.1k then you can leave it at that, upping the sample rate just for rendering won’t add anything.)
Dithering – None (dithering should only be done once and that is when you are decreasing the bit depth at the final stage when getting the project ready for public consumption [44.1k / 16 bit].) So if you are going to render the stems at 32-bit you don’t need to dither. In fact, if you choose 32-bit in the render settings the option to dither isn’t available. If you need to go to 24-bit because of file size, Ableton recommends you use the Triangle dither option, as these stems are generally going to be used again.
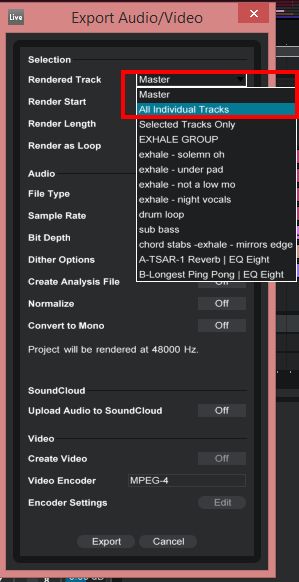
6. Render All Individual Tracks
When you go to export use this option. That way Live will export each track (stem) automatically. You will also get stems for the groups, the return tracks, and the master channel. Once that is completed you may need to go in and do a bit more housekeeping with the files.
- If your project had groups, you will have the group audio and each of the tracks that made up the group. You need to decide which audio to keep. If the group had effects on it that are integral to the project you might keep the group audio and delete the components, and if the group buss was empty, you might do the opposite.
Pro Tip – Label your group audio in all caps or with the word “group” somewhere in the title to speed up this process.
- You can leave the master channel bounce in the folder as a reference, but label it as such.
- Essentially you want to only keep the audio that when combined will make up the project perfectly without any doubling up of audio.
- It’s a good idea to import all the stems back into Live to make sure you haven’t forgotten to delete something or deleted a necessary element by accident.
7. Compressing the files
There are two ways of doing this.
- Zip / RAR – This is the method you will want to use if the person you are sending the stems to doesn’t use Ableton Live
- ALP – This is the best method if the person you are sending the files to uses Live, or if you are just making backup archives for your future self. This method also has the added benefit of being able to preview the tracks to make sure everything is as it should be.
To make an ALP (Ableton Live Pack), first import the stems into the project. Change the BPM to the correct value, making sure warping is off and the starter position is all the way to the left for all of the stems. If you want to be super awesome you can rename each of the channels in the project to reflect the name of their respective stems.
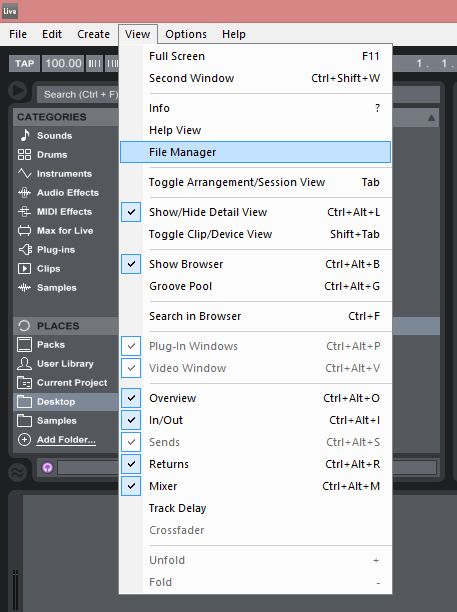
Next, In Live’s menu bar, go to View > File Manager. In the File Manager panel, go to Manage Project.
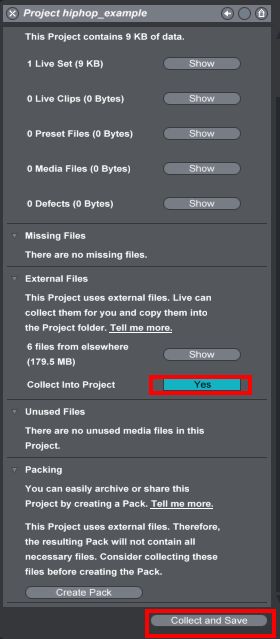
Once there, if you haven’t yet, use the Collect and Save option the External Files module. This will collect the stems into the Live project file.
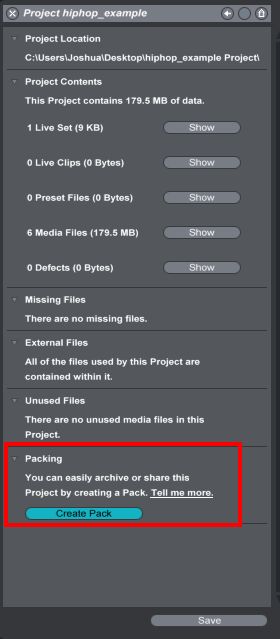
Then go back into the Manage Project panel. At the very bottom, there is the option to Create Pack in the Packing module. Hit that button. Choose the right location and give the project the right name. Remember to include the BPM and Key at this stage.
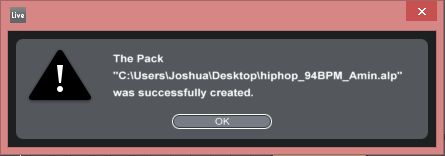
Live will do its thing and you should get a message that everything was packed successfully.
That’s all for now. Using these guidelines will make you a happier and more productive producers and collaborator. Abiding by these standards will make you a more pleasant producer to work with, whether it’s as a mixing or mastering client, a collaborator, or for any other reason.

Discussion
Want to join the discussion?
Create an account or login to get started!