The art of Mixing is about pulling together all the elements of an arrangement, but each instrument brings its own special set of concerns and challenges. In this article—the first of a series—we'll take a look at some aspects of mixing what's often the most prominent musical component of all, the Drums.
Mixing Drums.
The drumkit is where many mixers start out a mix—using the rhythm section to anchor the rest of the parts of a busy arrangement. The drums do more than just provide the rhythmic underpinning of the tune—the sound of the kit is a major element in establishing the style and genre of music, and even identifying the artist. How many time have you heard the first couple of beats of a song, and immediately recognized the band, just from the drum sound? As one of the most complex instruments in any arrangement, more time is probably spent massaging and fine-tuning the drum sound than any other individual instrument. But where to start?
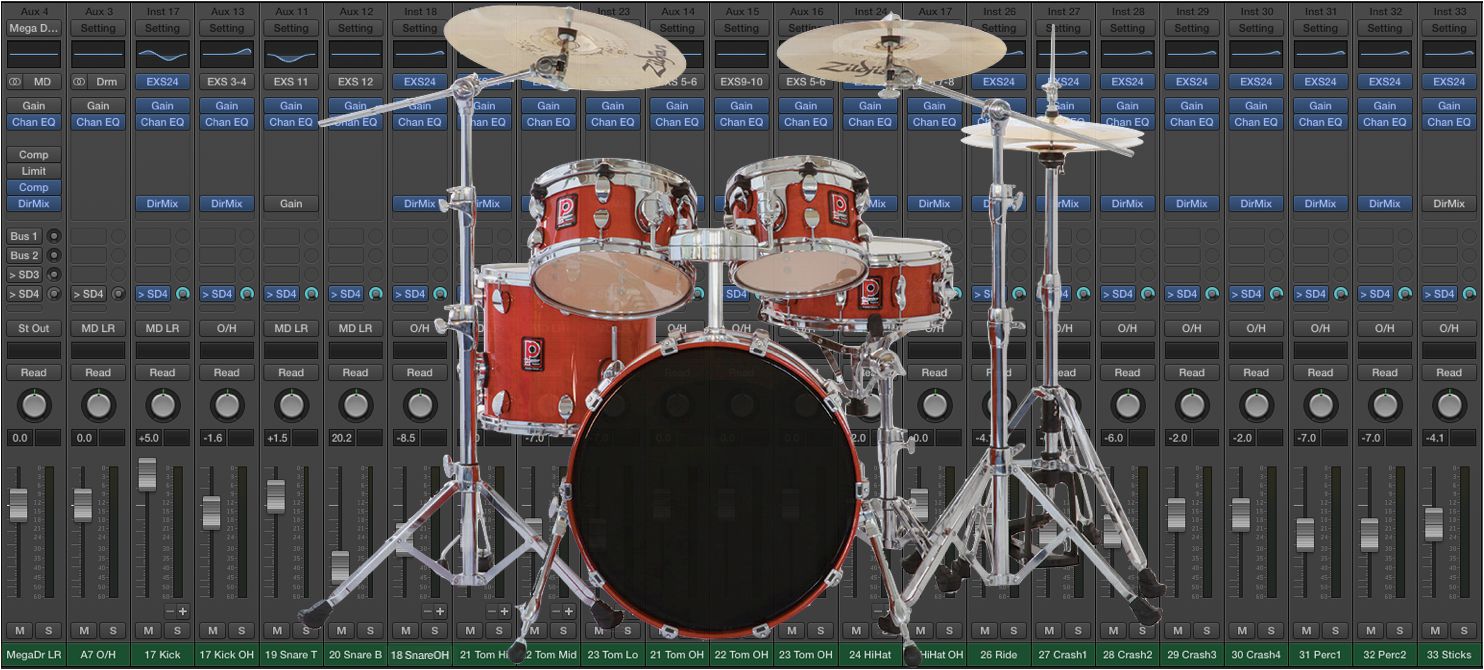
Whether the drum part in a particular song consists of a sampled loop, a programmed beat, or a full multi-track recording of a live performance, there are a lot of components in the kit that are usually tweaked both individually, to bring out the best from each element, and as a group, to fuse the entire kit together for maximum impact. Out of the usual collection of individual drums tracks—kick, snare, toms, hi-hat, and the overhead mics that bring in the cymbals as well as a more ambient version of the entire kit—the kick and snare, as the primary conveyers of the beat, probably get the most care lavished on them. Many people jump right in with EQ or compression, obviously the two most critical types of drum processing, but it might be a good idea to first give some consideration to Panning.
A place on the mix
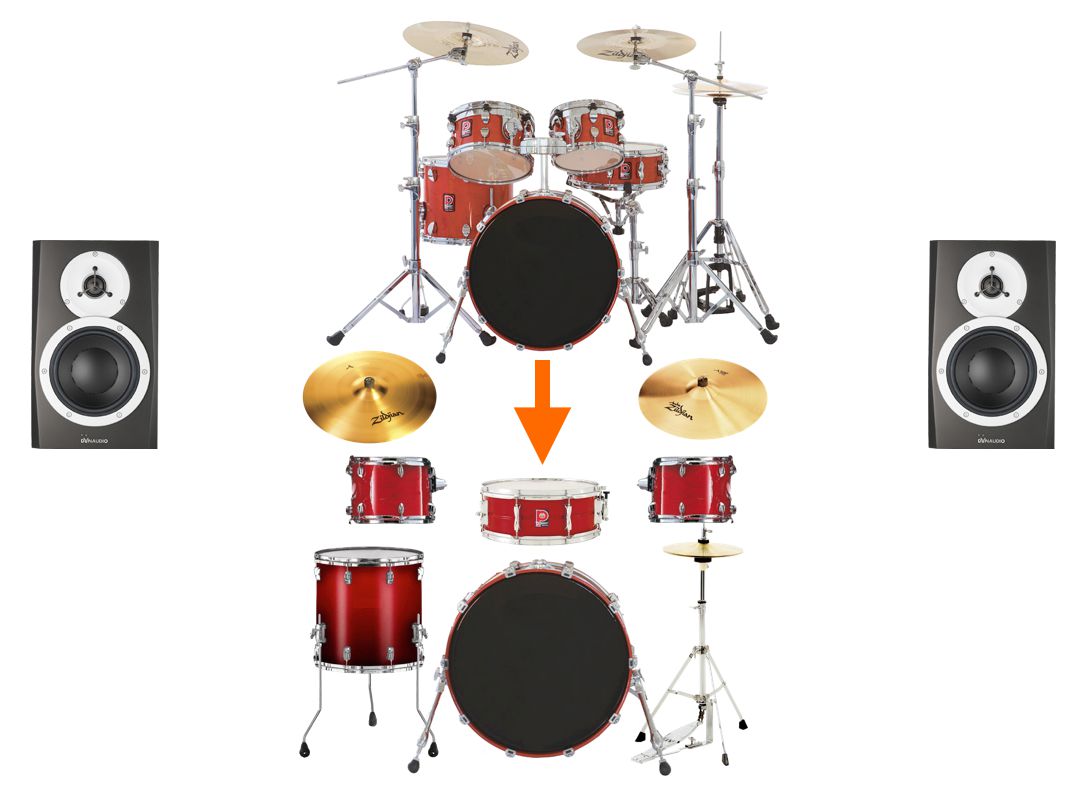
By convention, ever since the advent of multitrack recording, the drums have enjoyed a prominent place at the center of the mix, panning-wise. But a drum kit is not a single instrument, and the components that make it up tend to occupy a wider field than, say a vocal or bass recording, the other tracks that usually find themselves panned front & center. The width of drums can range from mono or near-mono, all the way to a wide stereo, where the elements extend all the way from one speaker to the other. However, that kind of ultra-wide stereo panning is perceived by many as dated, and it's more common for the drums to occupy a stereo field that extends from the center to about half-way left and right, preserving some natural width, but still leaving room for other elements of the mix. Visualizing the kit is a good guideline for this, but there is one aspect where the positioning of drums in a recording usually deviates from the way they're actually arranged. In a real kit, the snare and hi-hat are slightly to one side, but in a mix, both the kick drum and snare are typically panned dead center, with the hi-hat slightly to the side (the rest of the drums are positioned as they'd be in real life—toms and cymbals on either side of the center). This is done to anchor the heavier elements of the beat in the center of the arrangement—bass guitar is also usually panned center, along with the bass drum, to help link them musically.
Typical Drum Panning: Kick & Snare dead center; other drums & cymbals around halfway left & right.
The rest of the kit can be panned in either Drummer's Perspective—the drum & cymbal positions as they'd appear from the drummer's throne—or in reverse—Audience Perspective. Either option is equally fine—since the hi-hat, which keeps time, is usually off to one side a little, the choice may come down to where other high-frequency elements in the mix are panned, balancing them off against the bright, busy hats. Just remember, the stereo overhead mics, which have the same drums as the individual mic tracks, need to be positioned to the same perspective, Drummer's or Audience, matching the positioning of the individual elements.
Tweaking Tone
EQ is, of course, a critical aspect of sculpting a good drum sound. What's done here will depend on what you're starting with. With a drum part that uses samples, you may find that the samples are already pre-EQ'd, and only minor adjustments are required, to make them sit well in the overall mix. While this might also be the case with a recording of live drums, in that situation it's more likely that the sound will be more raw, and will need to be shaped more aggressively with EQ.
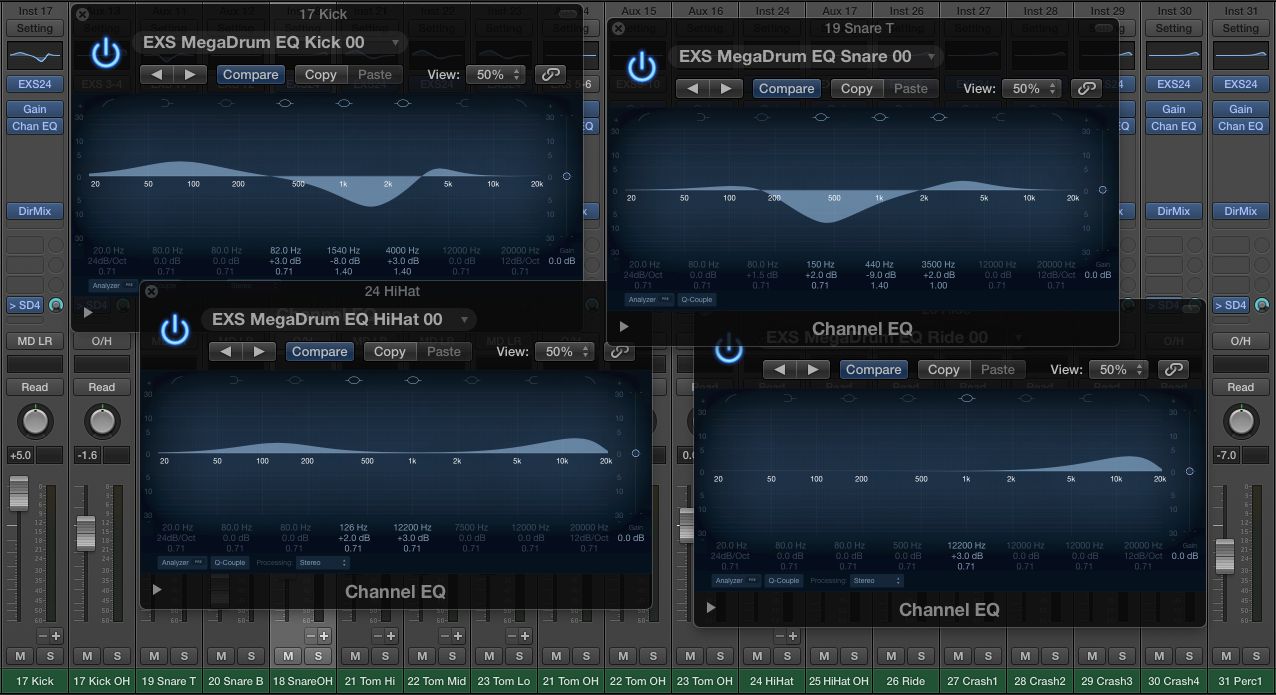
In a typical multitrack recording, the sound coming off the close mics on the individual drums will probably be a lot more boxy and midrangey than the deep, polished tone we're all used to on modern drum recordings. A common element in EQing individual close-miked drum tracks is a midrange cut, which can be fairly deep, somewhere between 300 Hz–1 kHz, depending on the sound of the particular track. Kick drum might also feature a slight bump (boost of a dB or so) in the lows, down around 60–100 Hz, and another bump in the mids, around 3–5 kHz—this higher boost will bring out the “slap” of the beater on the drumskin, and will help to better articulate the rhythm. (In certain styles—like speed metal— which feature busy, intricate kick drum rhythms, this slap is made very prominent, for maximum clarity, and is an established component of the drum sound in that genre).
Snare may also get slight bumps, in addition to a mid cut, but at slightly different frequencies. The low-end for a snare is more like 100–200 Hz, and a slight high-mid boost around 3 kHz or so can be used to bring out the rattle of the snares, if desired (and that's not always the case). Toms get a similar treatment, while hi-hat typically has a little added to the highs (8–12 kHz). Some mixers like to roll off the lows on the hats, for a tight, thin sound, while others might even push the lows a bit, for a chunkier hi-hat sound—it all depends on the part and the arrangement.
Typical Drum EQ.
Drums with & without EQ: No EQ; then with EQ; No EQ again; then with EQ
The overheads are a combination of the cymbals (including the hi-hat) and the drums, although, depending on the placement of the overhead mics, the drums here are often thinner versions of the fuller sounds from the close mics. Some people like to roll off the midrange and bass (below around 1 kHz or so), leaving only the highs, reducing the overhead tracks to primarily cymbals, and minimizing their contribution to the sound of the drums themselves. Others take a very different approach—they might use the overheads as the primary signal for the entire kit, EQing as above for a full sound, and then lightly augment this with the individual drum mics. The latter approach will provide a more vintage drum sound, and might be appropriate for certain musical styles—for example, one that emulates the drum sound on older, classic R&B albums. Most people split the difference, and combine the drums from both close and overhead mics, making subtle adjustments to the balance and EQ of each, until they achieve the best, and most appropriate, sound for the particular track.
Squeezing the skins
Of all the processing done to drums, compression can be key. Whether it's used subtly, or as a prominent effect, compression, in many ways, has defined the sound of drums on modern pop & rock recordings. It's not uncommon for a single drum kit to have multiple compressors—a typical drum mix might feature individual compressors on the kick and snare, stereo compression on the overheads, and then all the drum tracks running through another unit strapped across a stereo drum master aux (compression can even be added in parallel—see below). And those compressors can be set for anything from light, subtle thickening, to heavy use as an effect that substantially alters the attack and decay of the drum, as an effect.
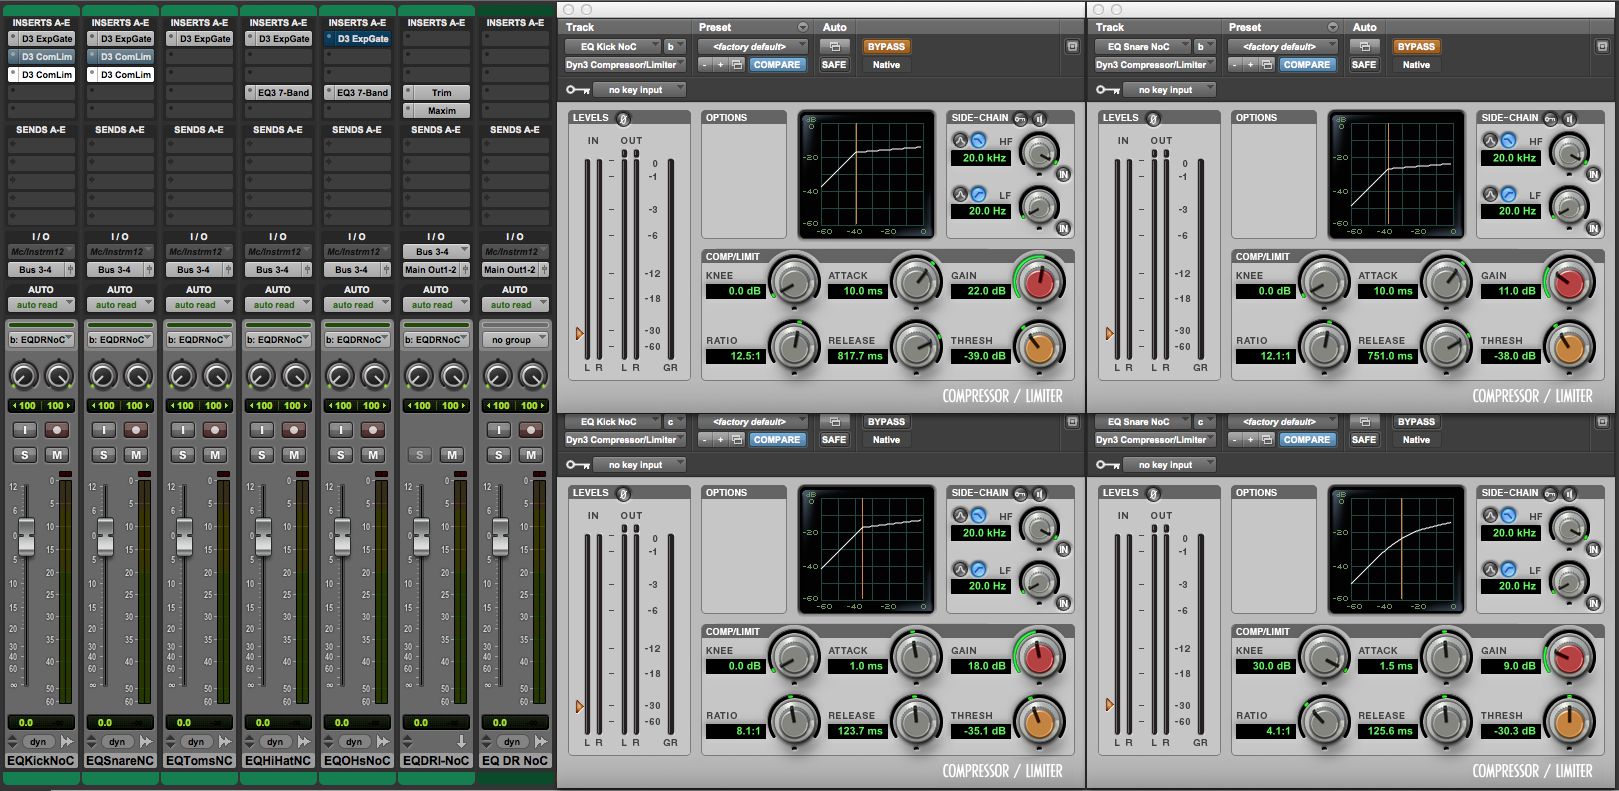
The use of compression as an effect is often applied to the individual kick and snare tracks (there's no space here to go over the controls of a compressor—you can review that, if needed, in any one of dozens of articles and videos on the site). Applying compression with a fast attack & release can accentuate the boominess, and the ring, of a drum, to the degree that it sounds like you removed all damping from the drum, regardless of how it was originally recorded. To the other extreme, compression with a slower attack & release can appear to add more damping to the drum, for a tighter, punchier sound—like adding damping after the fact.
Drum Compression as Effect: L->R: No Comp; Slower Attack & Release (tight drum sound); Fast Attack & Release (looser, ringy sound).
Figure 4B Drum Compression for Effect on Kick (L) & Snare (R): Top: Slower Attack & Release; Bottom: Fast Attack & Release.
Drums with Compression: No Compression; Slower Attack & Release; Fast Attack & Release
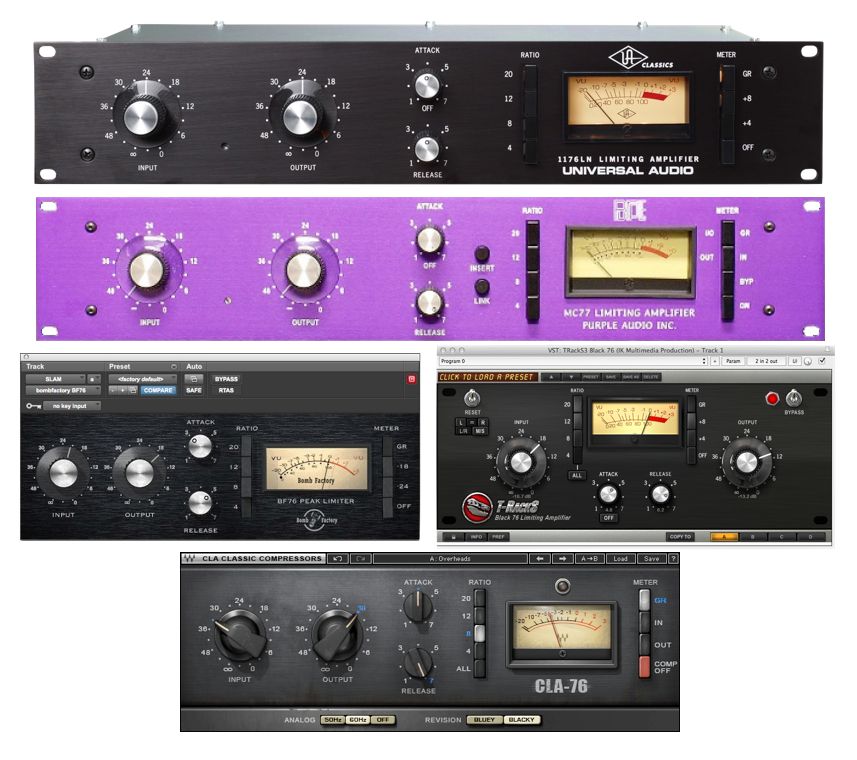
Certain compressors lend themselves particularly well to this kind of use, with a favorite being the classic Urei 1176, in one of its many hardware and software versions (too many to mention!).
Some hardware & software versions of the 1176, a popular compressor for drums.
Between those extremes, more subtle applications can lend a general thickness and punch to the drums, fine-tuned for the individual elements of the kit.
Compression is also often applied to the stereo overhead drum tracks. Since those tracks will have more “air”, thanks to the slightly greater distance of the mics, compression here can bring out a bit more of the ambience in the recording. For a more extreme version of this, if the recording also made use of additional “room” mics, these can be compressed as well, for an even more dramatic ambient sound (think Led Zeppelin). And of course, all the drum tracks (close mics and overheads) are commonly subgrouped through a stereo drum master, and compression can be applied there as well. This application can also range from a subtle thickening to a more dramatic, attack/release-altering effect, but it'll have to be applied more carefully, so cymbals and hi-hats don't get too squashed along with the drums. But if done well, overall drum-master compression can tie all the elements of the kit together, for a nice, dense, unified drum sound.
Another popular drum compression technique is the so-called “New York Compression”, otherwise (more technically) known as parallel compression. A compressor is inserted into an Aux, and an extra submix of the drums is sent, via Aux Sends, through this Aux compressor. Typically, heavy compression is applied—much more of an effect than you'd usually want—but this heavily-compressed drum submix is blended in with the main drum mix in just the right amount, for a unique compression quality. You can enjoy the effects of the heavy compression without losing the snap of the drum attacks, which will be preserved in the main drum mix—kind of a best-of-both-worlds scenario. The effect can range from subtle to not-so-subtle, and if you feed the Aux compressor from individual drum track Sends, you can control how much of this compression is blended in to the drums vs. the cymbals, allowing for even more flexibility.
Wet or Dry
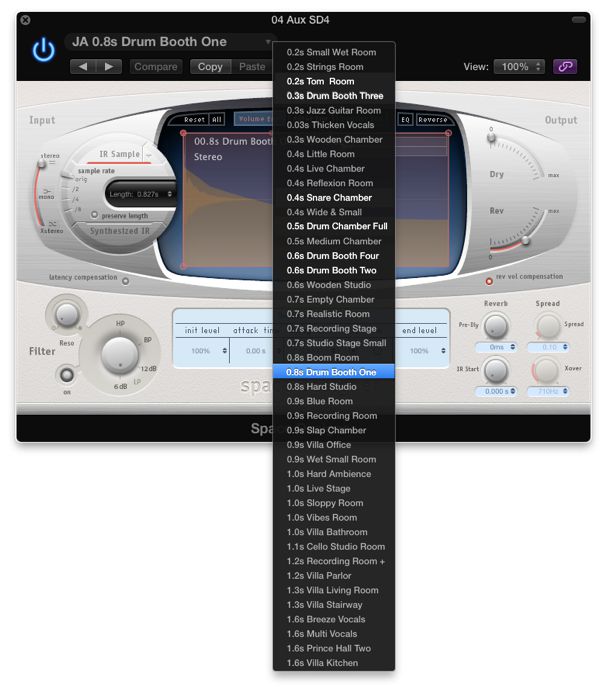
Another question that comes up in regard to drum mixing is “wet or dry?”—wet, naturally, means with reverb/ambience, while dry means with little or no room tone. The answer, of course, is yes. That is, either approach is valid, depending on the musical style. In a hip-hop or R&B arrangement, a drier, tighter drum sound would probably be most appropriate, while in a big pop or rock mix, a lot of ambience on the drums would often be the way to go. The ambience itself can be from the drum tracks themselves, by accentuating what's there with compression, as described above, or by incorporating room mics, if available (most of the high-end drum plug-ins provide extra ambience mics to mix in with the close mics and the overheads). And, of course, plug-in reverb can be used, especially Convolution reverbs, which make use of samples (IRs) of real rooms—many of them have IRs of popular studio drum rooms and other spaces ideal for drum verb, as well as samples of mechanical devices like plates, which are also a good choice for drums.
A Convolution Reverb with some Drum Rooms.
One thing to watch out for is to not overdo the reverb decay—a little goes a long way. A long reverb tail on a drum reverb—especially on the backbeat—can easily muddy up not only the drums, but the whole arrangement. Reverb decays of 1 second or less are often best, and will add more than enough ambience, while maintaining the overall clarity of the mix.
Drums with (Convolution) Reverb: Dry; Room with Longer decay; Dry again; Tight Room/Ambience with Short decay
Wrap-up
That's about all there's space for here. As to specific settings for things like EQ and compression, well, that will vary for every situation, but the general approaches I mentioned are a good way to get started. And listen to a lot a recordings for the specific aspects of drum sounds that catch your ear—no matter how long you've been mixing drums, there's always something new and interesting to be heard!
Other articles in this series are here: The Art of Mixing Rock, Part 2: Bass The Art of Mixing Rock, Part 3: Guitars |



 © 2024 Ask.Audio
A NonLinear Educating Company
Discussion
Want to join the discussion?
Create an account or login to get started!