Due to the recent profusion of hardware drum machines, analog synthesizers, and outboard sequencers, more Ableton users than ever are using Live as a hub to trigger and record external gear. With as many possible configurations as there are ports in your studio, it’s not always straightforward to get everything locked in accurately. Here’s a few key strategies for lining up your gear with Live.
Synchronizing External Sequencers
Whether you’re using an external drum machine or a dedicated sequencer, there’s a good chance you’ll want to take advantage of its onboard sequencing capabilities. In most cases, doing so without being synchronized to your DAW would, at the very least, make recording more complicated than it needs to be.
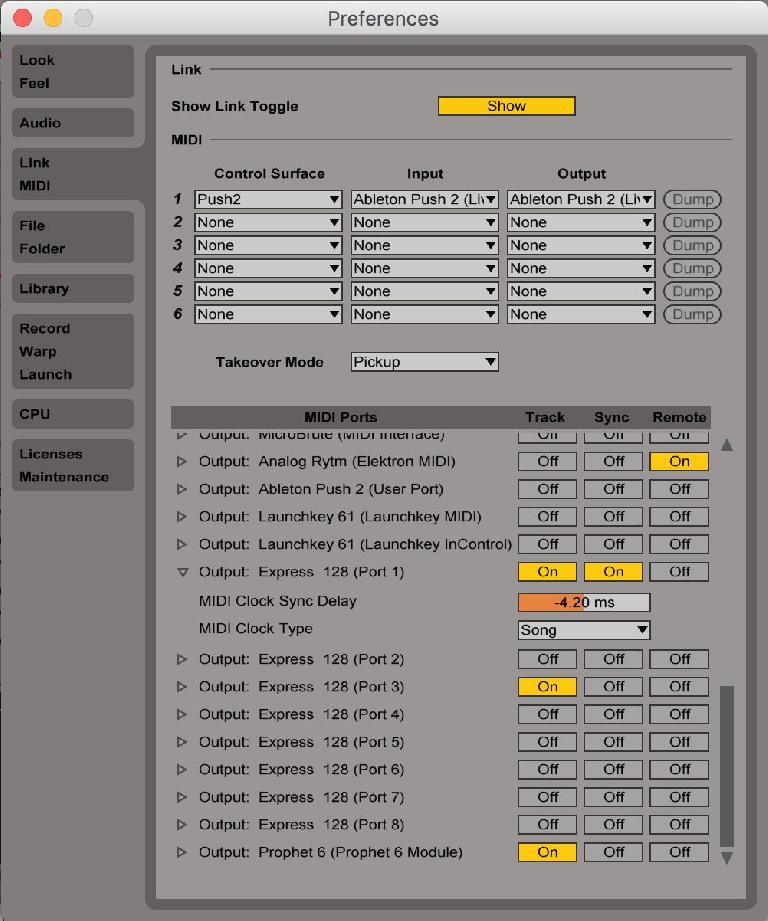
Now to line everything up via MIDI Clock, I’ll need to open Live’s preferences and click on the Link/MIDI pane. To use Live as the master clock—launching all connected clock devices when starting Live’s transport—I need to scroll down to the Output Port of the desired device in my MIDI Ports list.
In this case, I’ve got a sequencer connected to the first port of my MOTU MIDI Express 128, listed as “Output: Express 128 (Port 1)”. The first thing I need to do is click the middle button to the right of it, in the Sync column, so that it reads: On.
Next, I’ll click the reveal triangle to the left of the Port’s name to show its MIDI Clock settings. That’s right: each MIDI port can have its own discrete MIDI Clock timing and behavior. The MIDI Clock Sync Delay helps align playback by compensating for lag on either end, while the drop-down menu lets me specify whether devices receiving MIDI Clock on that port follow the arrangement position via Song mode, or strictly receive general clock synchronization in Pattern mode without advancing a song mode sequence.
Now I’d suggest using either Live’s metronome or another quarter-note MIDI clip with an emphasis on the first downbeat, along with a similar pattern on the drum machine or sequencer that includes notes on all four quarter notes and either an accent or a different note on the first beat to determine whatever timing difference there might be between the two.
Trigger your clock reference clip in Live and, if everything is set up correctly with the device set to receive MIDI clock, the onboard hardware pattern should be triggered too. Now go back to the corresponding Output Port in the Link/MIDI Preferences pane and adjust the MIDI Clock Sync Delay slider in either direction, positive or negative, until the two signals are in perfect alignment.
If you want to use an external sequencer as the master and Live as the slave—which could be the case if you feel the timing of your external gear is somehow more stable—then you would go through the same process outlined above, instead using the corresponding MIDI Input port rather than an Output, and finally enabling the “EXT” external clock toggle to the left of Live’s transport.
External Instrument
Not everyone using Live with hardware has a sequencer or drum machine—many producers only have synthesizers or external sound modules. While it’s advisable, if not inevitable, to set up a dedicated audio track for capturing the external sound source at some point, Ableton’s External Instrument device is exceptionally helpful in sending custom settings to each piece of hardware.
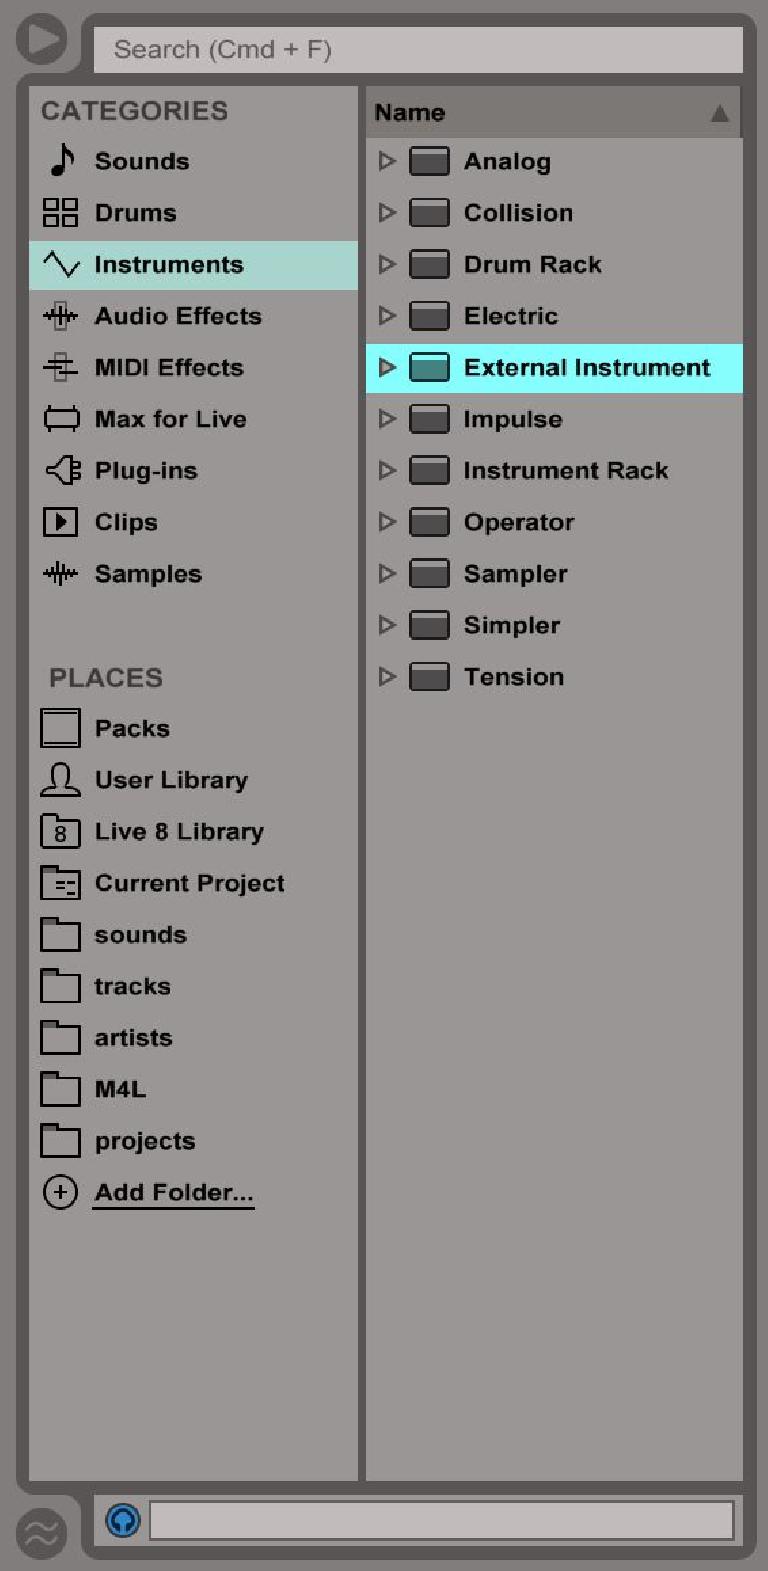
You can find the External Instrument in Live’s Instrument browser. Assuming your Audio and MIDI routings are configured correctly, just drag it onto a MIDI track, set the top MIDI To drop-down menu to the appropriate port, and the channel drop-down menu below that to whichever MIDI channel the target device is set to receive on. Below that, set the Audio From drop-down menu to whichever input(s) the hardware is plugged into on your audio interface.
Now you can trigger your external synths and sound modules via MIDI Clips in Live—programmed via MIDI controllers such as Push 2, Live’s Arpeggiator or even advanced Max for Live sequencers.
The beauty of the External Instrument device is the dedicated Hardware Latency control, which discretely adjusts the timing of your instrument to synchronize it with everything else in your set. The Gain control is also helpful for taming levels on their way in from the device.
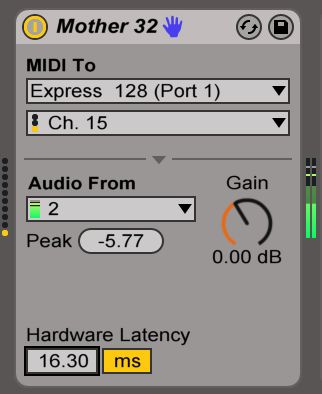
External Instrument configured for my Moog Mother 32, receiving MIDI on Channel 15 and delivering audio on Input 2 with a latency of 16.30 milliseconds.
To verify the accuracy of your latency setting, create an audio track and set it to record directly from the MIDI track with the External Instrument on it—not from the audio input your hardware is connected to. In this case, I’ve named that track Mother 32.
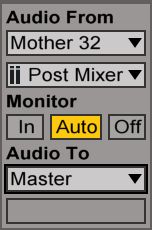
In/Out routing settings on the destination audio track.
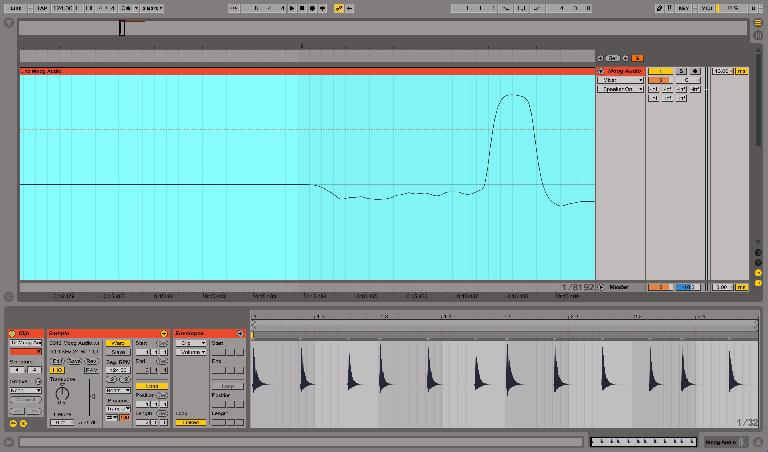
On my first recording test, with the External Instrument Hardware Latency set to 0ms, there was a visible delay in the resulting audio clip, so I could tell I’d have to increase the Hardware Latency amount.
On my second recording test, I had the Hardware Latency of the External Instrument set too high, around 23 ms, so the resulting audio was recorded early, falling before the beat.
After some trial and error, I determined 16.30 ms was the right amount of latency for this device. Remember, for this to work, you have to be receiving audio from the External Instrument track, not directly from your sound card’s input.
Track Delay
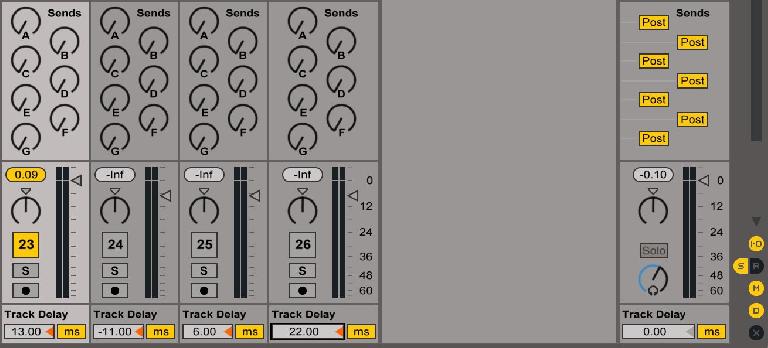
I know a few studios that have used Live’s Track Delay compensation to account for external hardware timing discrepancies. While this can be workable, it does leave users prone to a few potential issues.
First of all, Live’s Track Delay is applied after the audio input, so it won’t correct any timing on the way in whatsoever: any latency on the input signal will still be present in the recording. Secondly, it can’t be adjusted in real-time without a very real likelihood of clicks and pops, so I would advise against relying on it in any kind of performance situation.
Now, while it can safely align audio in the arrangement, I’m personally more comfortable with aligning the waveforms visually and moving them around the arrangement at increasingly meticulous intervals (or with the note ruler disabled) to ensure it not only plays back in time, but lines up logically with the arrangement.
Audio Clip Compensation
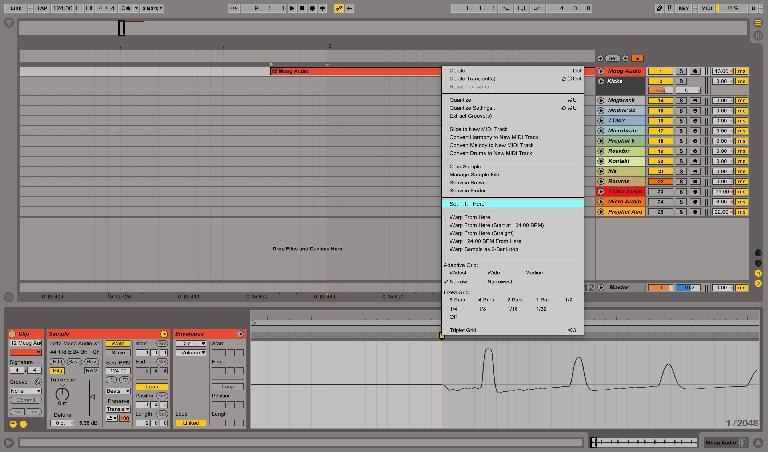
Superior in many ways to relying on Track Delay, another method to compensate for latency recorded into audio clips after the fact uses the Audio Clip Sample view. For those with storage concerns, recording mono inputs via an External Device track routed through Live’s I/O matrix as outlined above will render mono inputs as stereo files, taking up double the space on your hard-drive—making the following procedure a potentially preferable solution.
So if you happen to have a note on the first downbeat of a recorded clip, just zoom all the way down to that very first Transient, then Con- or right-click on the Pseudo Warp Marker that appears above it, and select “Set 1.1.1 here” from the context menu that appears. Done!
In the event your clip doesn’t have a note on the first downbeat, which may often be the case, you’ll need to find the location of a note that should be on a downbeat and zoom all the way in to find how many ticks it’s delayed at an adequately accurate resolution. Then, go back to the start of the clip at the same resolution by clicking the leftmost section of the Audio Clip Macro zoom below right of the sample view area. Finally, count the amount of ticks you noted earlier from the start of the recording, then Ctrl-click (or right-click) in the Transient/Pseudo Warp Marker area at that location, and again select “Set 1.1.1 here” from the context menu. Please note you may have to adjust Loop Length settings for intended playback.
Synchronize Your Life
With a bit of homework configuring MIDI Clock Sync Delay and External Instrument Hardware Latency while saving all presets and defaults along the way—and occasionally employing clip and timeline editing where needed—you should be able to get all the hardware in your studio lined up with Live like never before.







 © 2024 Ask.Audio
A NonLinear Educating Company
Discussion
Want to join the discussion?
Create an account or login to get started!