I'm sure a lot of readers are familiar with the process of producing stems for a track. Stems are bounces of component parts of a track and are made for a number of reasons. One of the obvious ones are when sending a track to be remixed.
Stems can be bounced for individual instruments or can be a collection of similar instruments consolidated together into a stereo track etc. A typical stem scenario would be to take a track and have stems for Vocal, Back Vox, Guitars, Bass, Keys, Brass and Drums.
One thing that can mess you up when doing stems is mix or bus compression. Here's a scenario I came across recently. I'm doing some music for a broadcast of a show in a live venue. My drums are mixed in the track and I've got some compression over the drum bus to fatten them up. Here's the raw drums with no compression (this is just a quick example using Superior Drummer 2).
Here's the drums with bus compression:
I need to supply some stems for these drums so they can be balanced inside the venue for the crowd. This is a separate mix to the one that's broadcast, a finished mix in Stereo and 5.1.
I need to imprint the stereo drum bus compression onto the individual drum stems. So how do I do that?
Step 1 - Raw Channels
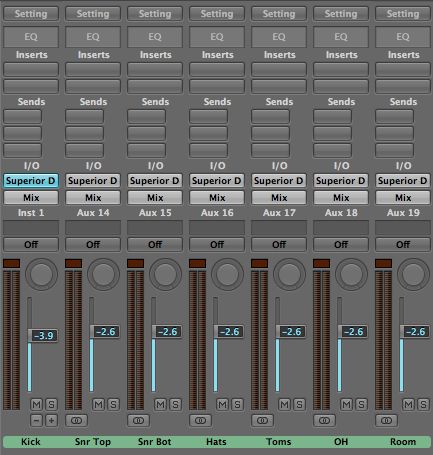
Here's my raw outputs from Superior Drummer think of these as recorded drum tracks. These are where I'd process my drums to get a basic sound with Compression and EQ.
Step 2 - Bus Compression
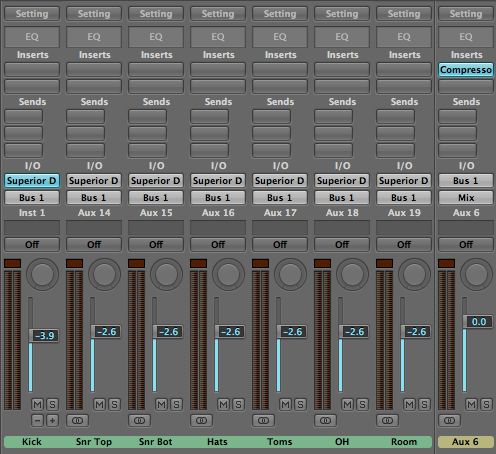
I'd then route these to a bus and compress the whole kit to finish it off.
Step 3 - Send Not Route
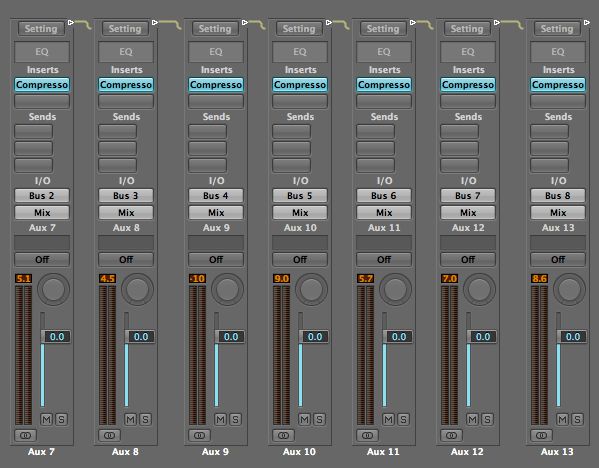
To achieve this effect I'm going to 'send' my channels to Bus 1 instead of routing them. I'll also bypass the compression.
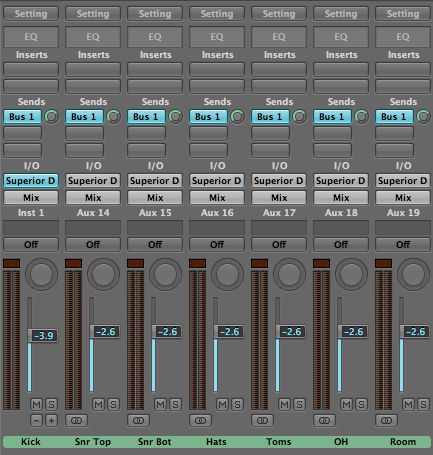
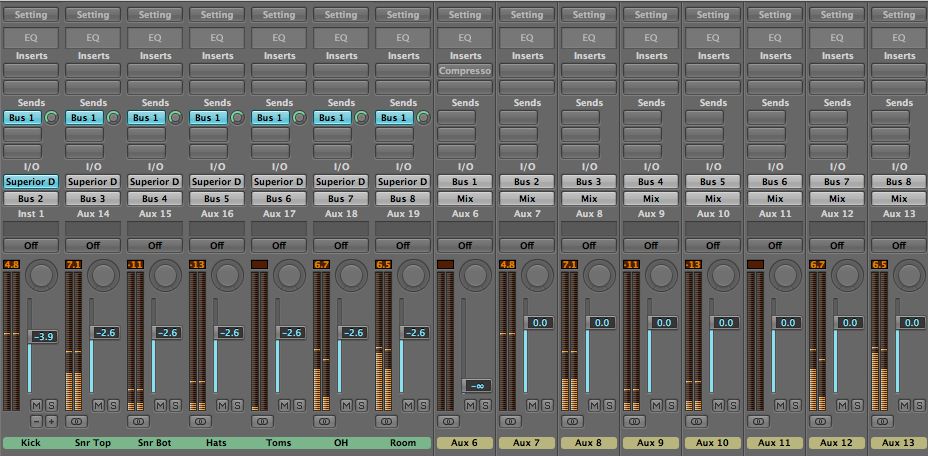
I'll then mute this as I don't need to hear it. I'm then going to route my drum tracks to a load of unique busses.
Step 4 - Copy The Compression
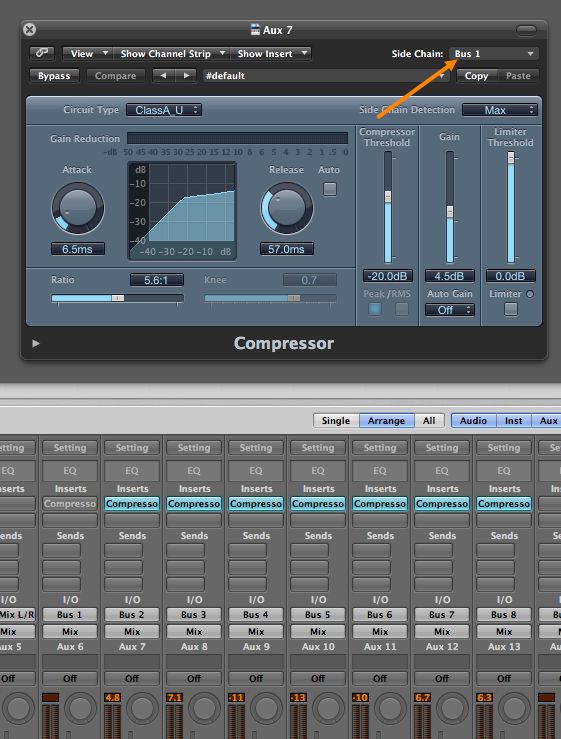
I'm now going to copy my bus compressor to all the other busses. Before I do this I'm going to choose 'Bus 1' (my full drum mix) for the Side Chain input. This is going to drive the compression on all the other busses.
In most DAW's changing the settings for all these compressors would be a pain. In Logic this is easy! Just connect all the busses in the Environment and change the settings on the first bus using track automation. These changes are reflected in all the subsequent compressors in the chain as long as they reside in the same FX slots.
Here's the result of all the compressors being driven by the master bus (Bus 1).
A > B This to the original master bus compression.
It's the same. I now have a bunch of pre-compressed stems that reflect my original drum mix.
Step 5 - Create Sub Mixes
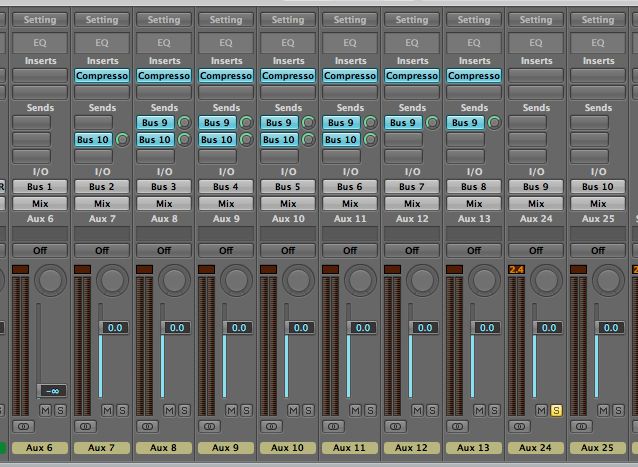
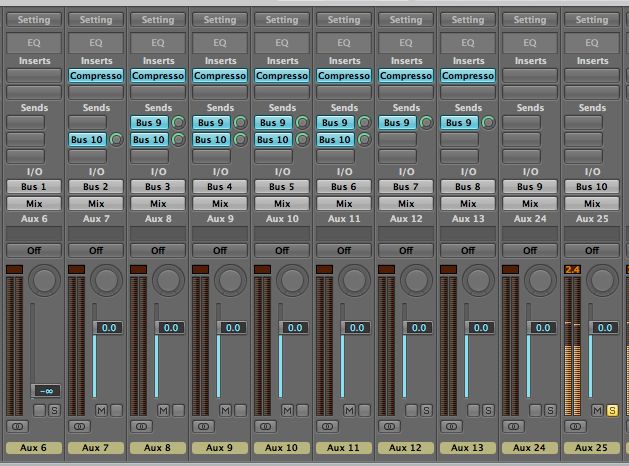
With this setup it's then very easy to create any kind of sub mix you like by sending the stems off to other busses. As an option I could provide a stem that includes everything but the Kick to Bus 9.
This could be balanced with just the Kick stem. I could also send just the close mics to Bus 10 which could be balanced with the OH and Room stems for ease.
This turns out to be a very flexible way of dealing with components of a track that are compressed as a whole without loosing the characteristics of the bus compression on the individual elements. Thanks Logic!


 © 2024 Ask.Audio
A NonLinear Educating Company
Discussion
Everything goes to the 'Mix' bus. This is then split in another bus using aux sends. One sends goes to the monitor outs (1-2) of a MOTU and another goes to output 5-6 which feeds the headphone bus in the MOTU.
This is basically due to the shortcomings of the MOTU monitoring/bus system. It provides independent level control over monitor/headphone levels.
This is only an issue when you feed your monitors directly from the MOTU without a desk.
Probably doesn't make much sense but that's what it does! :)
Took ages to figure out!! :P
Want to join the discussion?
Create an account or login to get started!