أشك كثيرا في أنه عند تصميم تاداو Kikumoto رولان السل - 303 في أوائل 80s ، عرف بأنه سيكون بدء الثورة الثقافية! عند صدوره عام 1981 المنتج ، ويهدف الى المربع باس بسيط مرافقة خط المطربين والمغنين ،
ثم في عام 1987 ، أصدرت جماعة مقرها شيكاغو دعا Phuture المسار دعا ولد المسارات وحمض حمض البيت. كان السل - 303 الصوت الذي يعرف أغنية! Squelchy ، الرنانة ، مشوهة والمتكررة.
منذ ذلك الحين قدمت لها ظهور له على عشرات حرفيا الآلاف من السجلات من موسيقى البوب إلى الهيب هوب ، روك الكهربائية إلى المحيط. وكان لا يزال قويا لها!
الاقتداء السل - 303 في Trilian
هناك بالطبع بعض ممتازة البرامج والأجهزة المخصصة للمحاكاة المتاحة 303 (إذا كنت لا تريد أن تنفق 2000 $ على الأصلي ، مع دليل اليابانية!!!).
ومع ذلك فمن السهل حقا لضرب واحد حتى في Spectrasonics 'قوة باس موالفة Trilian ، وأسهل كثيرا للبرنامج. وكان يبدو جيدا جدا ، جدا! دعونا نفعل ذلك!
الخطوة 1 -- الموجي
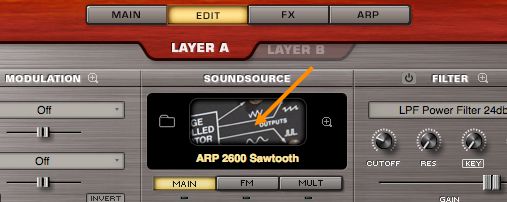
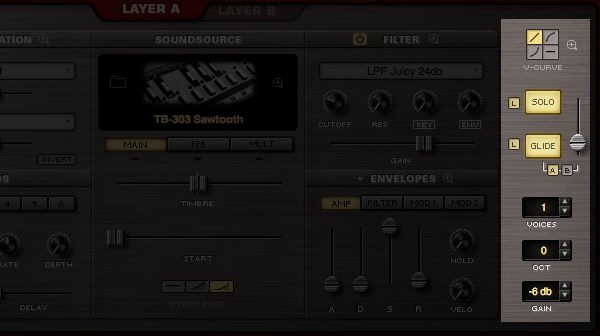
وحدد Trilian فتح نافذة تحرير. انقر على الصورة Soundsource في وسط لوحة لفتح المتصفح.
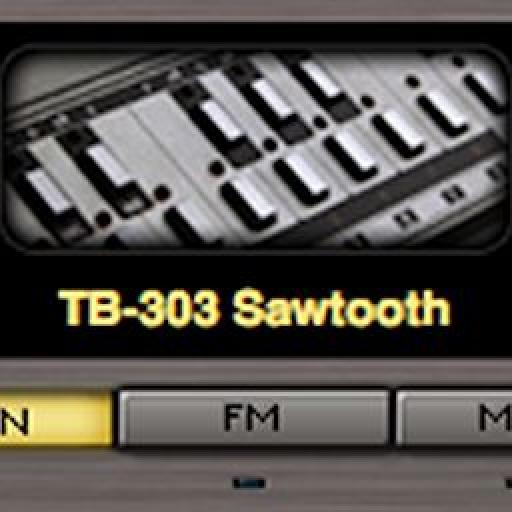
Navigate down the Source list to Roland TB-303 and select the waveform called TB-303 Sawtooth.
Half the battle is already won as Spectrasonics has lovingly sampled the waveforms from the original model, which does have quite a distinctive sound.
الخطوة 2 -- مغلفات
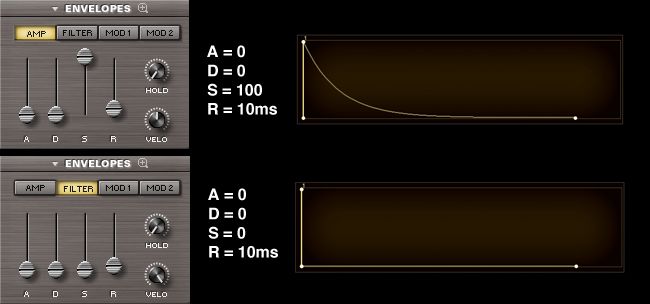
Go back to the Edit window and set the Amp and Filter envelopes like so:
On both envelopes, turn down the Velocity ('VELO') knob to 0%. Done!
الخطوة 3 -- فلتر
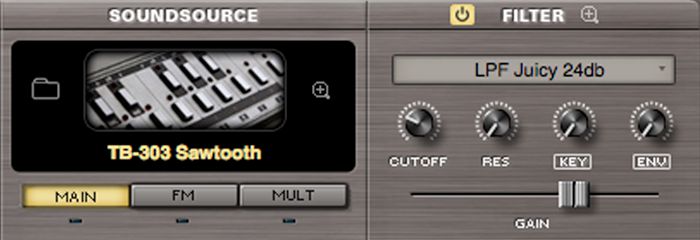
Turn the Filter section On and load in the 'LPF Juicy 24db' Lowpass from the drop down menu. Set the ENV amount to 0%.
الخطوة 4 -- التحكم في الصوت
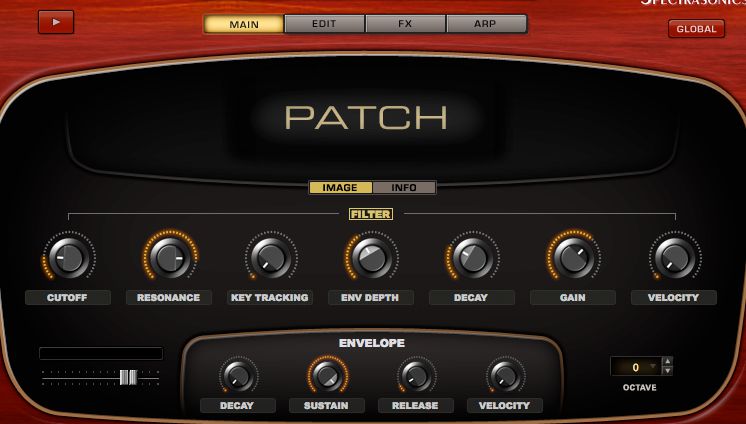
Now it’s time to set up the Voice Controls for the sound. These are on the right-hand side of the Edit window. Set them up like this:
The sound is monophonic so I’ve enabled Solo (in Legato mode, the tiny 'L' to the left of the Solo button) with 'Voices' set to 1 (to be on the safe side!). The 'Oct' is set to 0, and the 'Gain' to -6 db.
The Glide is on (again, in Legato mode) for Layer A with a time of 9ms. I found this to be the optimum time setting when comparing against other 303 clones.
Solo and Glide are very important as they affect how the Note triggering, Envelopes and Portamento effect work on overlapping notes.
الخطوة 5 -- برمجة تسلسل
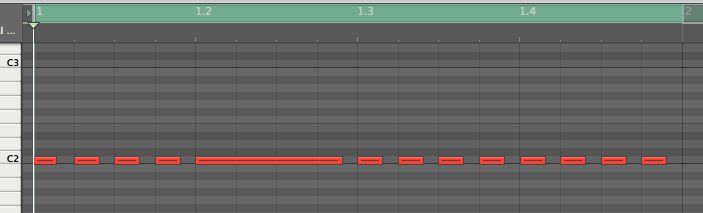
How you program your sequence will affect how the 303 sound will work. The TB-303 has two kinds or notes, short and tied.
Short notes I found have a length of about 2/3 of a 16th-note. The gap between them, apart from sounding right ensures that the sample is re-triggered, as well as the Filter envelope.
Any longer notes you program should have this gap at the end, too. Long notes on a 303 are made by putting two notes of the same value one after the other and enabling Glide to the first note. This ties them together to make one note.
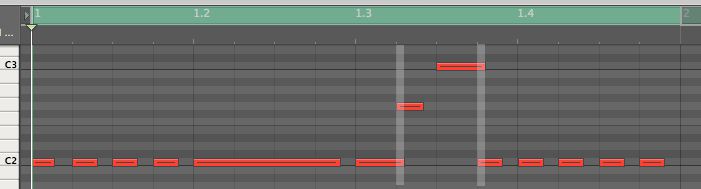
On the 303 you will only hear the Portamento Glide effect if the two ‘tied’ notes have different pitches. In a sequencer this is done by overlapping notes. You can hear this in the example below.
The time we set for the Glide (9ms) is constant so the farther away from each other the notes are, the more extreme the effect.
These overlapping notes also serve to prevent the sample re-triggering from the start (Solo mode) and also stop the Filter envelope from re-triggering. The Glide and Filter envelope are two trademark sounds of the 303.
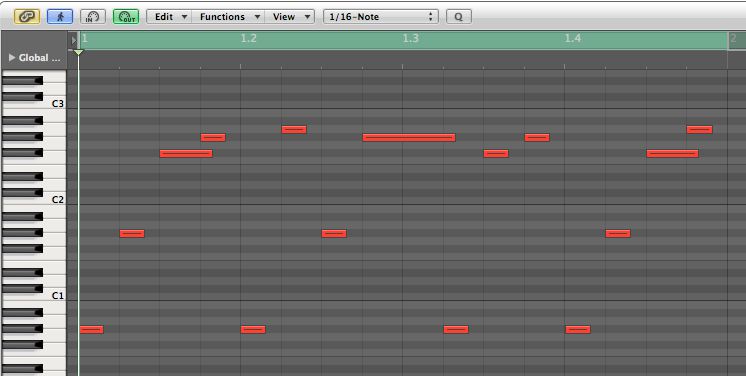
Here’s a sequence I’ve put together. It has short, long and overlapping notes. Here it is with the Filter set to 1370 kHz. You can copy it or make your own to test the sound.
Not bad, eh?
الخطوة 6 -- تعيين معلمات لعناصر الرئيسية
Before we start to tweak this sound I’m going to assign the parameters I need for the Patch to do its thing to the Macros in the Main Controls page. This just makes it easier to reuse the Patch later and looks cool as well!
If you switch to Main you’ll see the default Controls mapping. These are dead easy to change. First, I’m going to map the Filter's Cutoff.
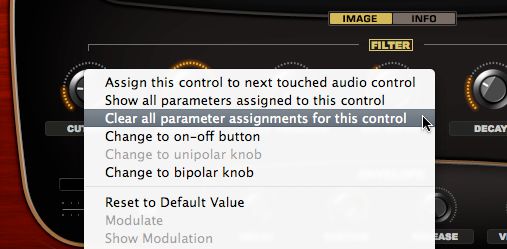
Before you assign a new parameter to the control it’s a good idea to clear it as it will already have parameters assigned to it. If you don't, your new parameter will be added to the list which could cause some problems later.
Control-Click on the Cutoff knob and choose 'Clear all parameter assignments for this control'.
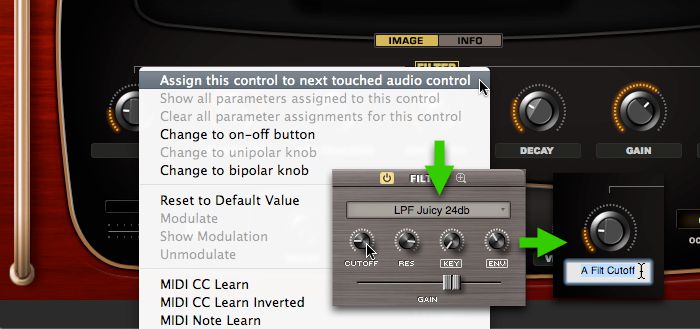
Now Control-Click again and choose 'Assign this control to the next touched audio control'. Go to the Edit page and click Cutoff in the Filter section.
Rename the new assignment CUTOFF.
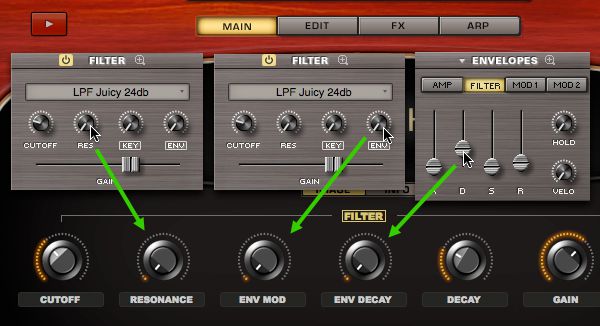
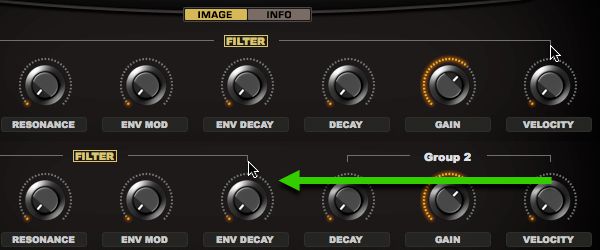
Repeat these steps with the Filter Resonance (RESONANCE), Envelope Depth (ENV MOD) and Filter Decay (ENV DECAY) parameters.
Now I’m going to assign these Controls to a Group. I do this by clicking and dragging left on the the far right corner of the separator bars. A new Group is created called 'Group 2'. We’ll use it later.
You can now assign these hardware MIDI faders by Control-Clicking on each knob and choosing 'MIDI CC Learn'. You could also use your host's automation assignments for these, too. In Logic, for example, it's the Controller Assignments window.
Now I’m all hooked up, and I'm ready to record some tweaking. Here’s a quick example. I’m just playing with CUTOFF, RESONANCE, ENV MOD and ENV DECAY parameters.
That’s about it for the basic setup. Save out your Patch. Don’t forget you can always use the TB-303 Square waveform by simply switching to it in the Soundsource window.
الخطوة 7 -- إضافة تأثيرات
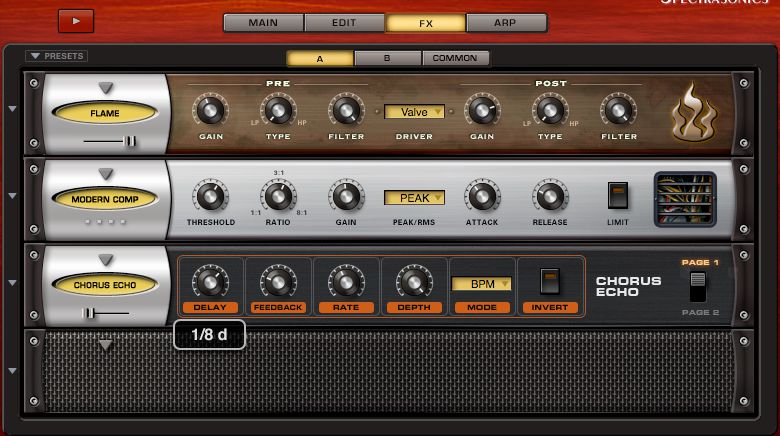
You can go a step further and add Distortion and Delay to make a more aggressive 303 Patch if you like. Here’s a setup I made for mine:
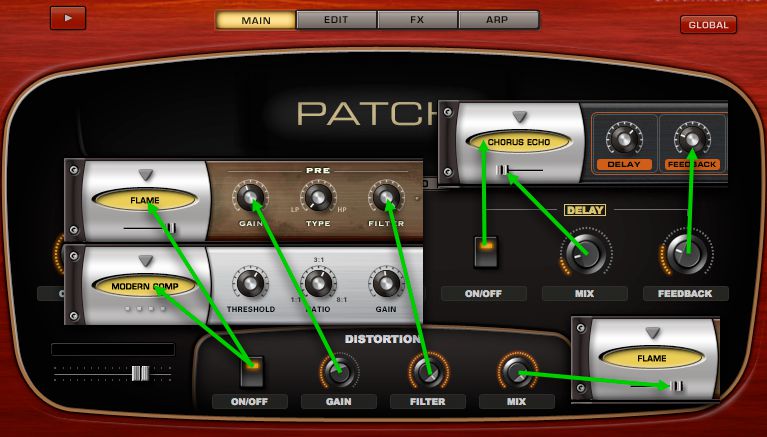
And here's how I’ve assigned the parameters to the Main Controls:
The result is pretty hardcore!
So that’s it! A TB-303 in Trilian. The only thing you need now is a large field to stand in and some glow sticks!


Discussion
=)
I've done 20 times exactly what its said on this tutorial but I've absolutely not the same sound at the end
Maybe someone can help me? does there is some stuff not explained here? or maybe with an update this tutorial is not functional anymore?
thanks if someone see this :)
Want to join the discussion?
Create an account or login to get started!