
There are many great artists out there in electronic music. But few have the history and fandom that one of the Godfathers of the whole genre command. Depeche Mode is back with a new single known as "Where’s the Revolution?" that not only says a lot about the state of the world, it also has some amazing arpeggiations and noise loops going on! In this tutorial, let’s take look at how The Mode is doing it!
Step 1. Preparations…
There are a few settings that I’d recommend putting in play before you get started. First, let’s adjust the Tempo to 140.
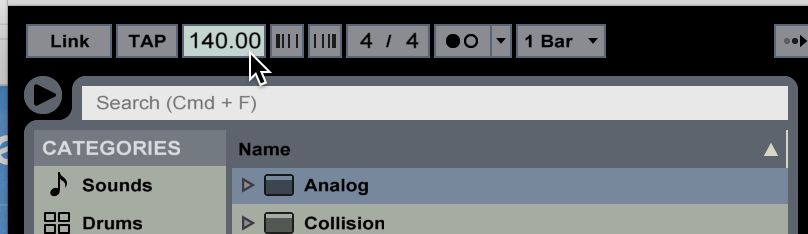
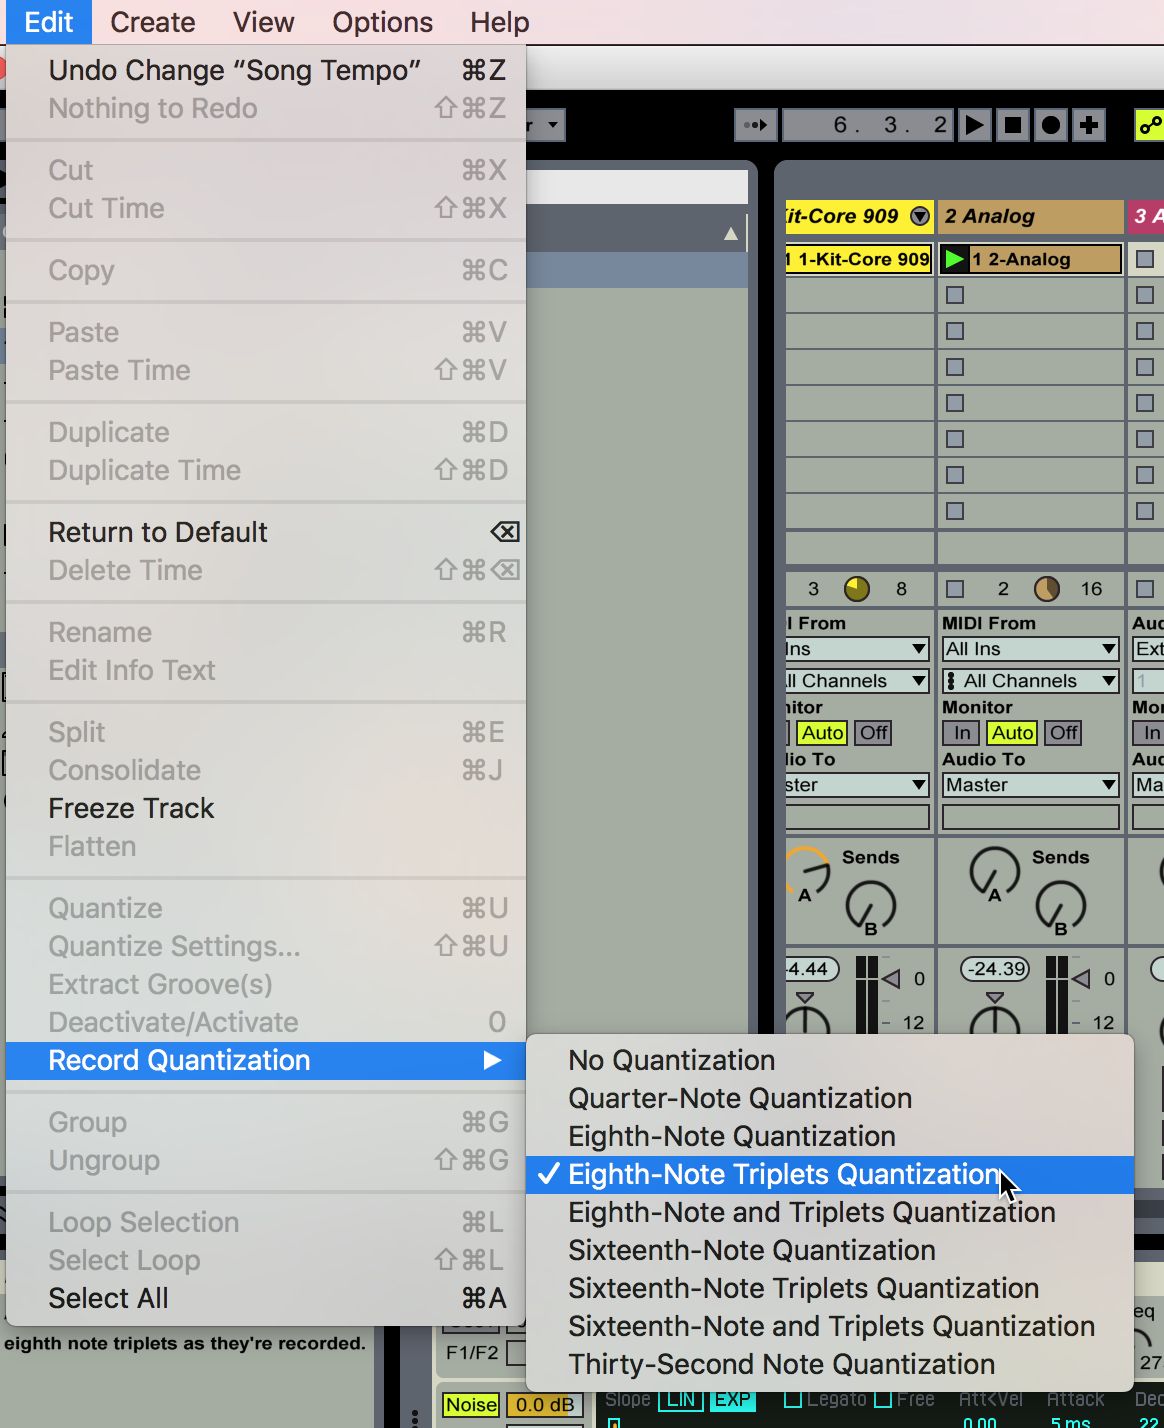
Set the Record Quantization to the Eight Note Triplet setting so that we’re tight. We also preserve some of the strange timings that go on during the original.
Step 2. Chirp Chirp
Where’s the Revolution relies a lot on a very simple mix that revolves a lot around a very basic noise loop that’s going on almost through the whole song, built up of mainly a very resonant filter chirp. If we knock that part out first, everything else falls in place pretty easily.
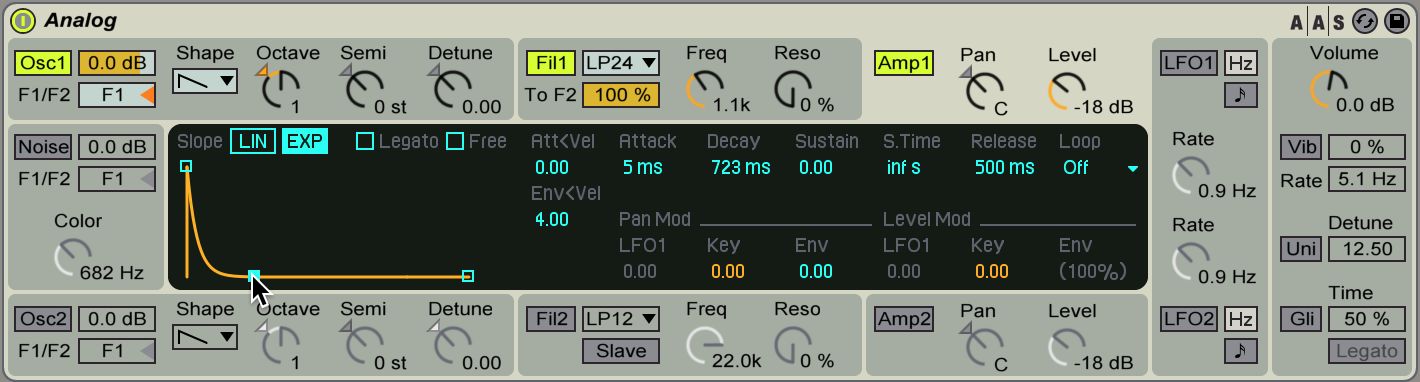
I’ll drop in an Analog in to my Ableton session and set Filter 1 to the High Pass 12/dB Octave setting. Then, lower my Filter Cutoff to 275 and raise the Resonance to 82%, giving us a healthy bit of squelch once we get the filter envelope dialed in.
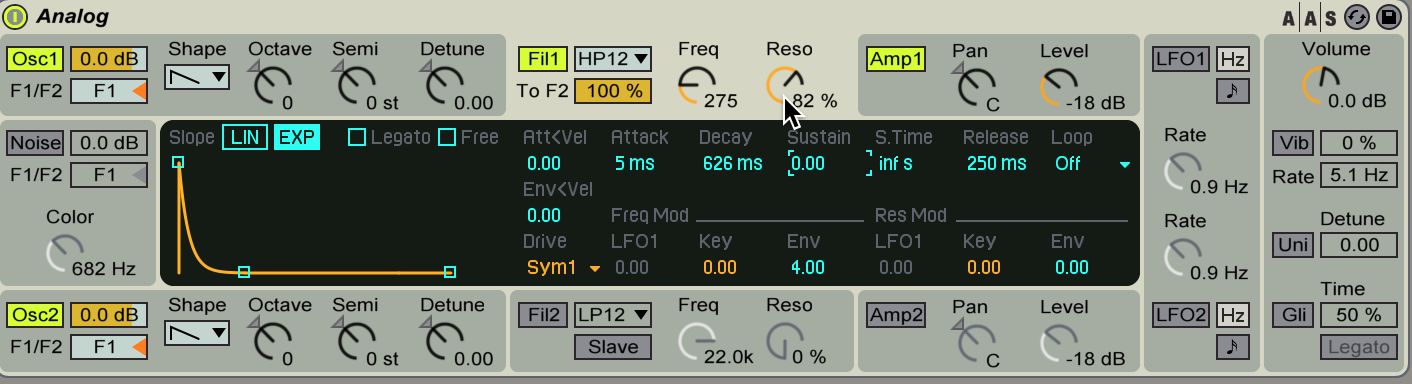
On Filter 1, I’ll drop the Filter Envelope Decay down to 70ms and reduce the Release and Sustain to 0. With the large amount of Resonance already happening on the filter, with this tight of a decay envelope you’ll notice instant chirp in the higher octaves if you play a key.

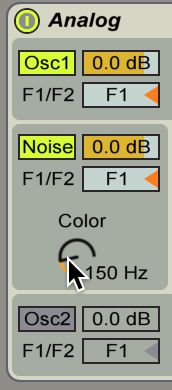
Now, I’ll enable the Noise Generator of Analog and set its color to 150. This will fill out our chirp and make it seem a little bigger than just the Sawtooth that was in by default. I’ll also disable Oscillator 2.
I’ll also zero the Release and Sustain of Analog’s Amplitude Envelope 1 and lower the Decay down to 22 ms. By keeping the Amplitude envelope nice and tight, we’ll also keep the chirp quick and small enough to really build up a noise pattern.

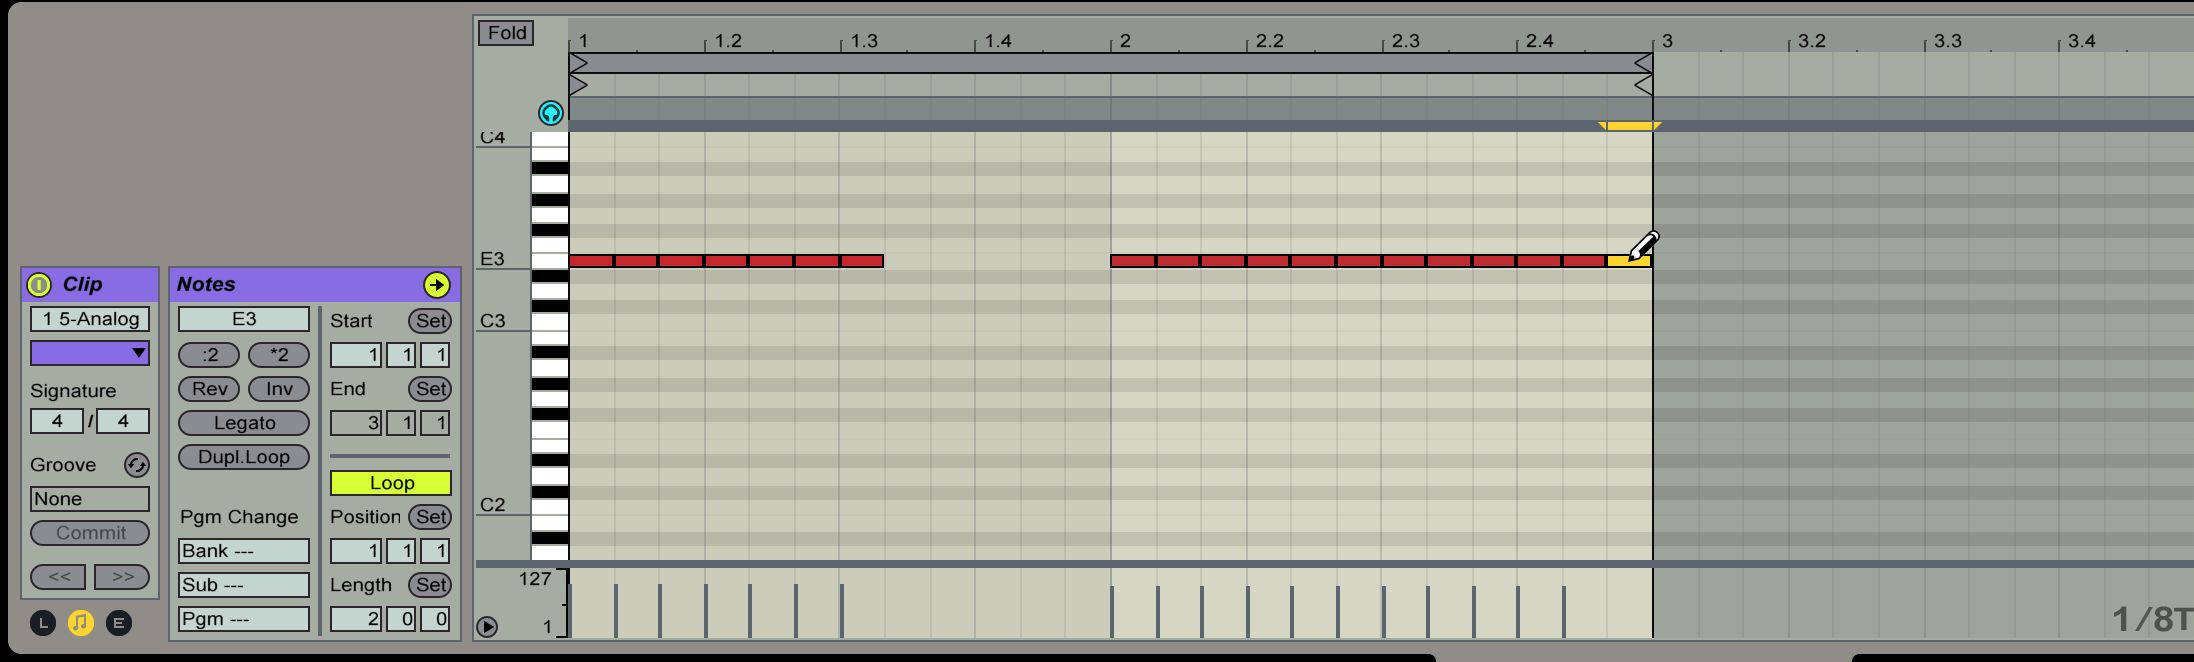
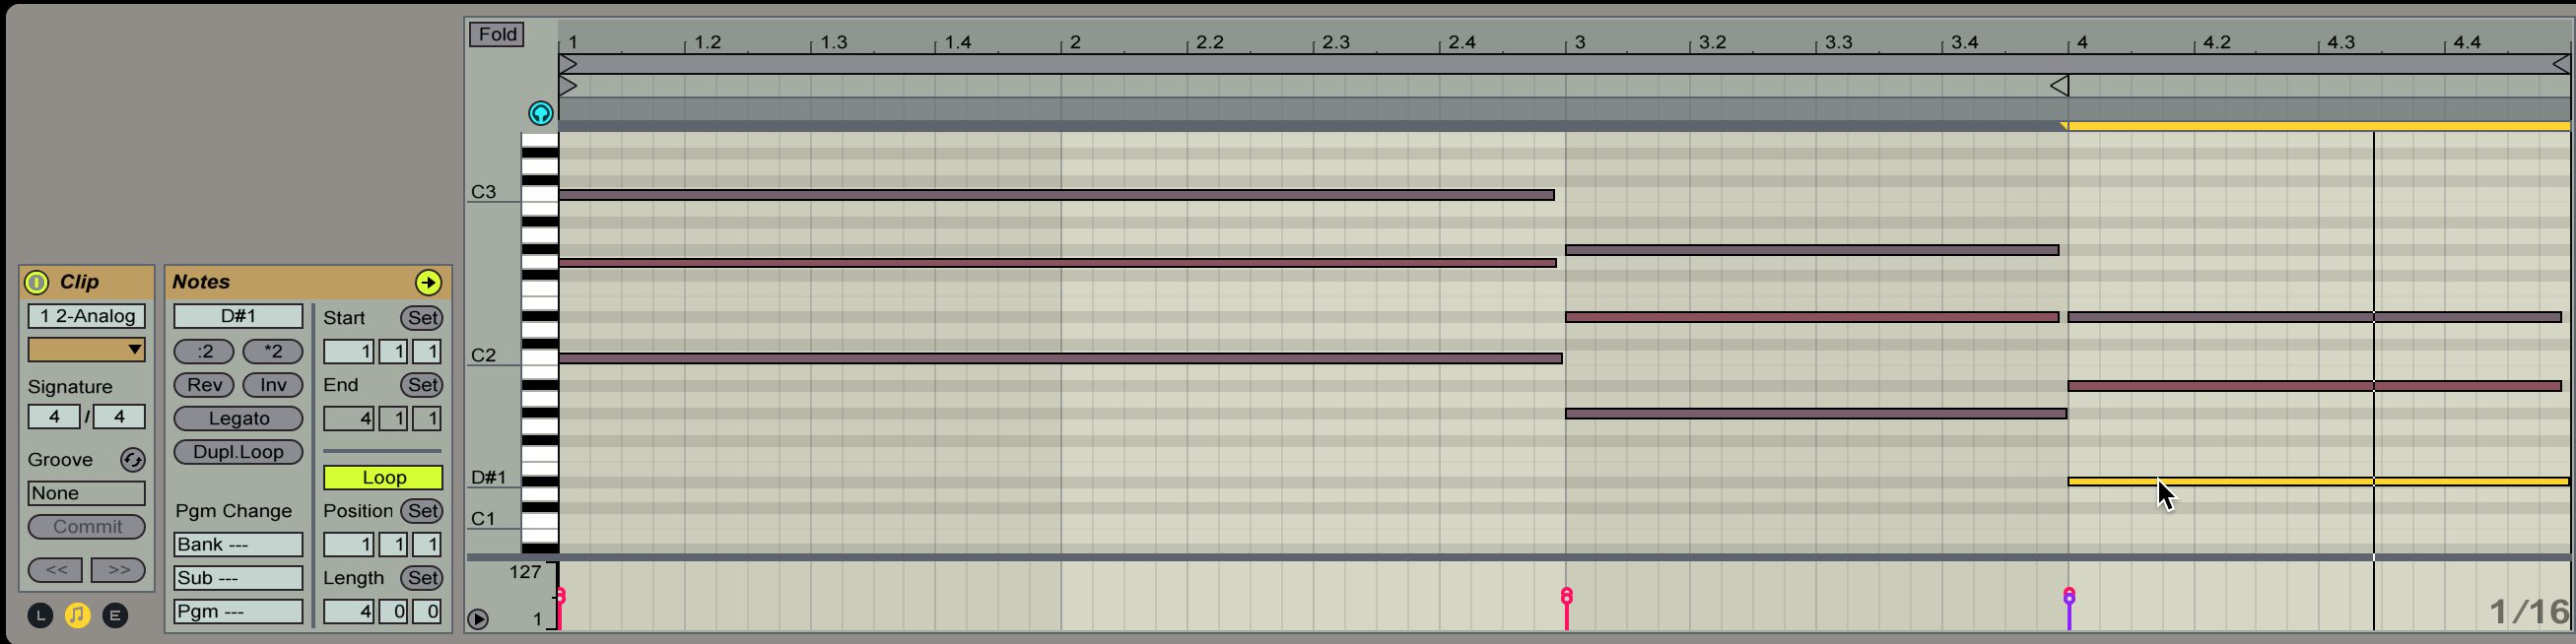
Now, I’ll just create a clip where the chirp almost plays across the whole measure, just leaving a few rests here and there with a 1/8T grid resolution. The original is kind of masked in terms of the actual pattern played with some echo. So, you may want to play around a little bit. Or you’re welcome to steal my pattern, if you like, from below.
Step 2. Bass…
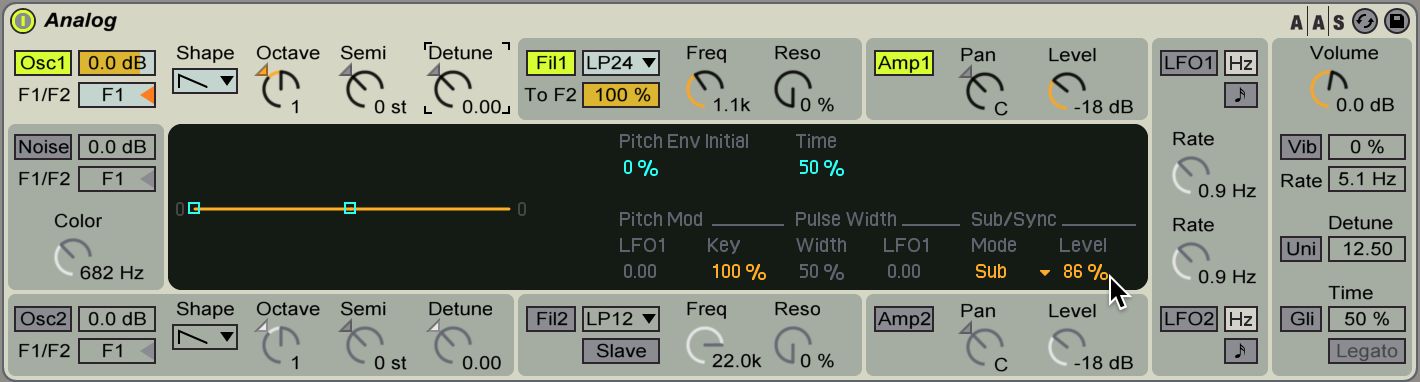
The bass is easy on this song, if it isn’t already very apparent. Still, the right tone makes a big difference. I’ll use Analog again and the same as last time, I’ll disable Oscillator 2. and reduce the Amplitude Envelope 1 down to 0 Sustain.
On Oscillator 1, I’ll increase the Sub/Sync Level in Sub mode all the way up to 86. As the original Depeche bass plays in octave, just raising this setting actually simulates the tone and effect of the bass quite well.
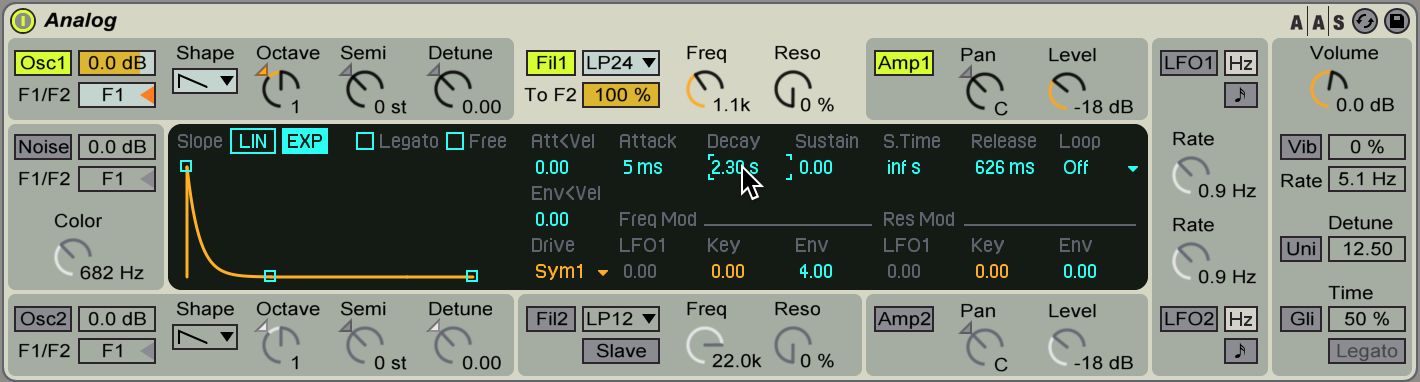
The only other minor tweak I’d make, just to make that bass as bouncy as the original would be to adjust Filter 1’s filter envelope so that the Decay is set at 2.30 ms. This creates a bigger, fuller curve in the basses pluck and makes it sound much thicker.
Step 3. Arp
Now that we’ve got the basics in, we need that Arp that comes in throughout the song and really fills out the chorus! On another Analog, I’ll decrease the Amp 1 Envelope to 94, and raise the release to 109. We just need something quick and plucky, nothing too fancy here.
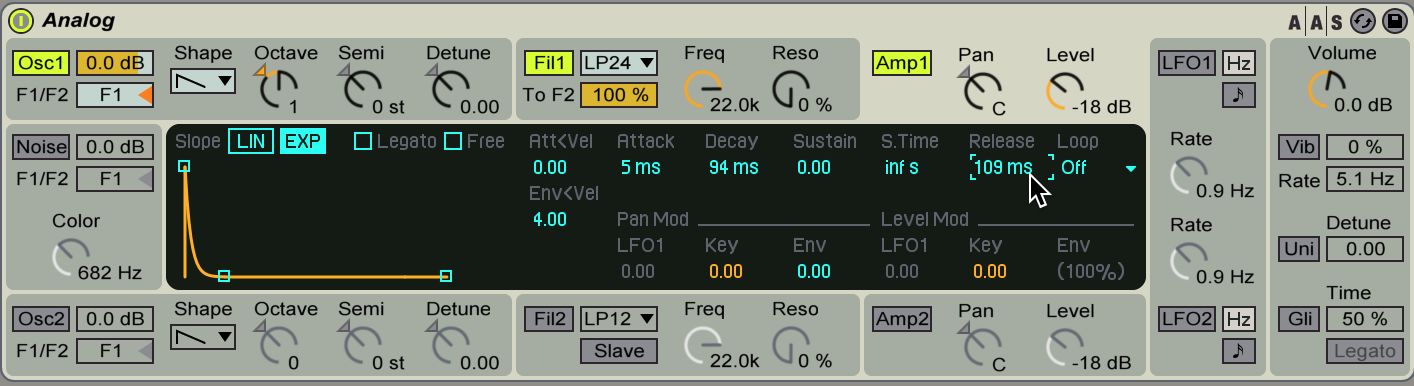
For the rate of the Arp, you’ll want to set it to 1/12, and set the Style to Play Order. This is the exact pattern of notes that plays through. But, it’s very close, once you plug in some chords in to a clip to play this sound.
Step 4. Drums
For drums, I just wound up going with the 909 kit that ships with Ableton Live, known as Kit-Core 909. The kick in this kit is a close match, and just needs to be played at half-time, like the original. And if you drop in the closed hi-hat hits at 2.2 and 2.3.4, you’ll add in that off beat that is going on with the hats throughout the song. Vary with the kick as needed.

Step 5. Effects!
Now we’ve got the bulk of the arrangement but we need some effects to fill in the gaps and blend things together just a little bit. On a Return track, with a Delay, I’ll set the delay time on Simple Delay to the Fourth beat division on the left channel. On the right channel, I’ll set the beat division to 6 to achieve a timing that works with the pattern of the arp and the Chirp from Step 2. You’ll also want to raise the Feedback pretty seriously, up to around 41%. This hides where the chirps end and begin slightly, making them much less choppy.
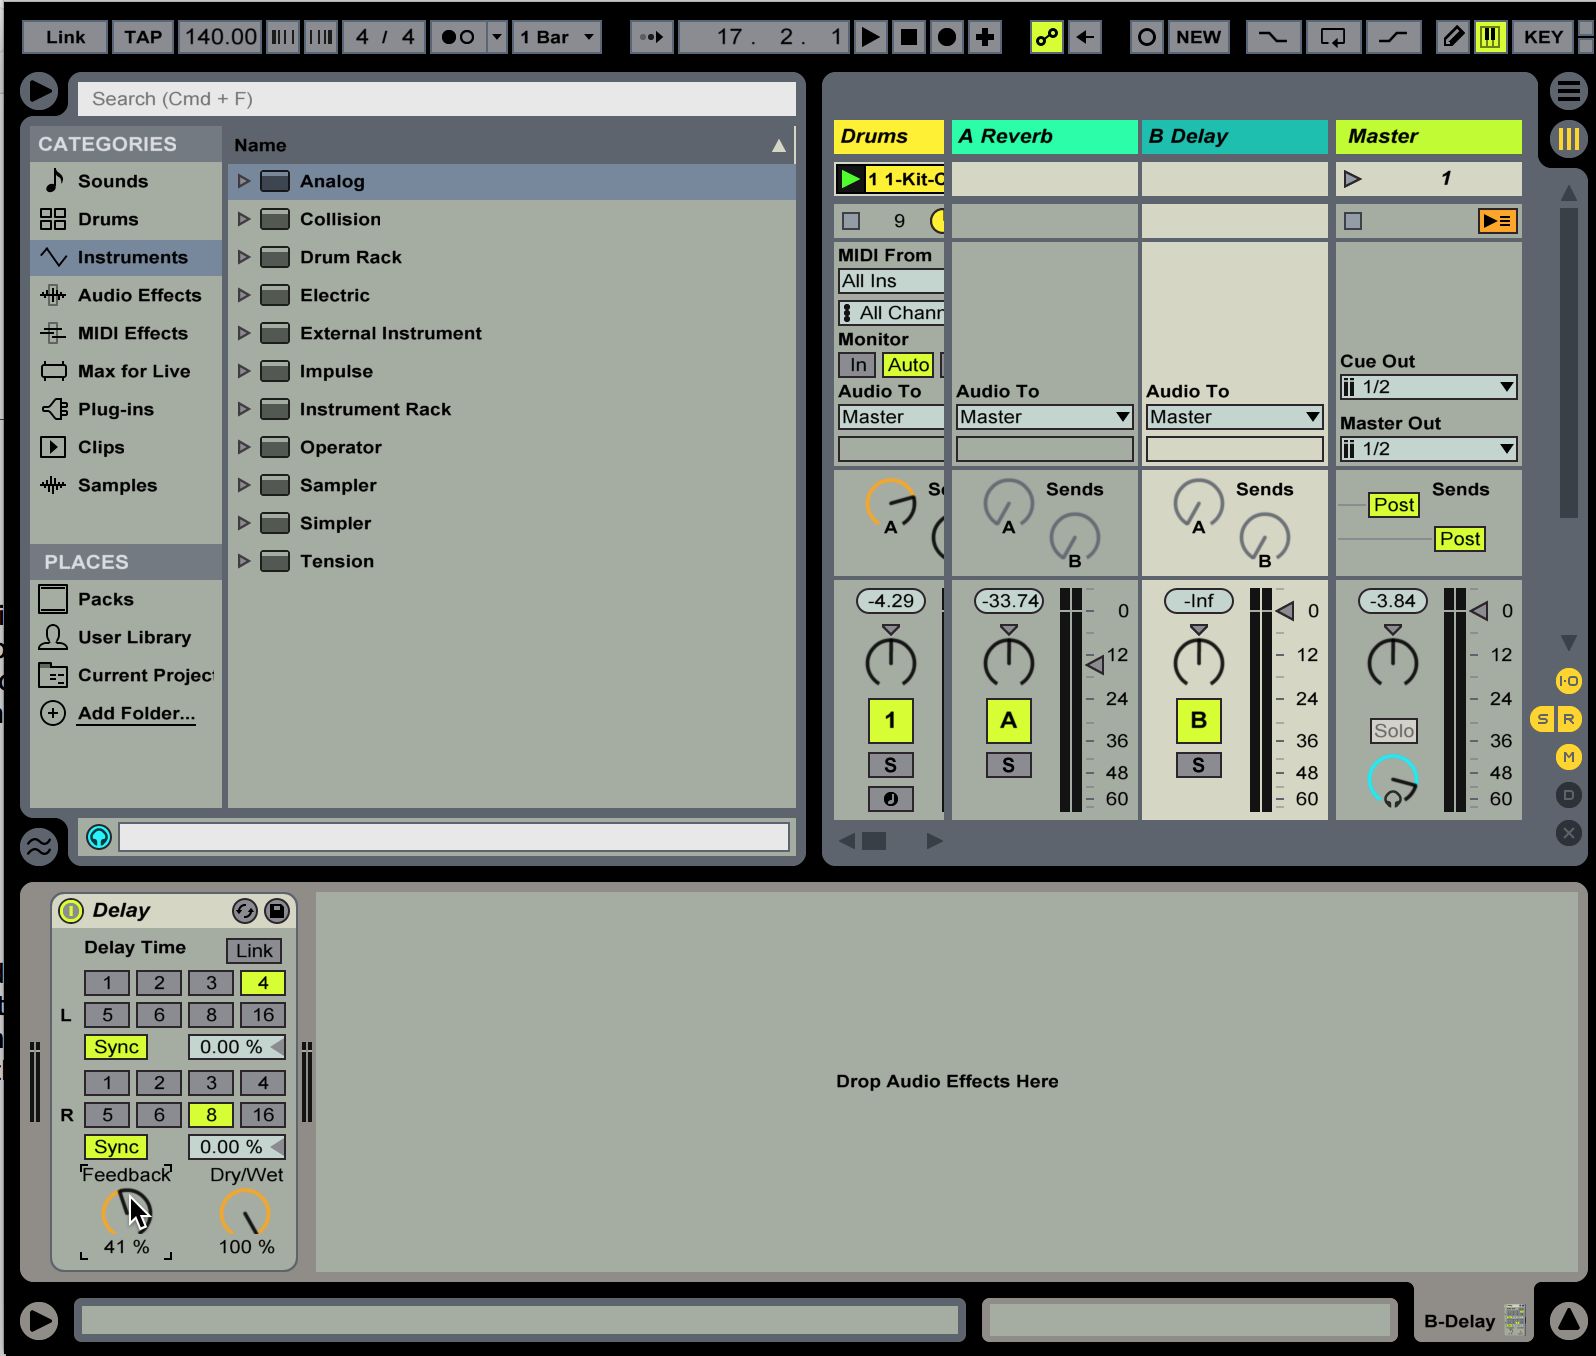
Now, I’ll just raise the Send amount from the Chirp, going to the Delay on my B return track. Make sure and send a healthy amount. But not enough that it takes over the mix!

Conclusion
There you go, the basic palette used by some of the best in the business! As you can see, the sounds aren’t necessarily difficult to recreate in Depeche Mode’s new track. A lot of the work actually resides in just getting the timing with the arp and the quantize right. Now we all just need to keep practicing our vocals to get to be as good as David Gahan! Who’s going to write a tutorial for that?

Discussion
Want to join the discussion?
Create an account or login to get started!