While you might know how to work with your Multi-timbral instruments in Cubase, mapping these out to multiple outputs in Cubase requires a bit of extra steps. I work with quite a few multi-timbral instruments in my projects from Kontakt, and Omnisphere to Vienna Ensemble Pro instruments. It took me a bit of time to figure out how to map these to different outputs in the Cubase Mixer. Let me demystify this for you so you can quickly set up your multi-output instruments.
MultiTimbral vs Multi-Output
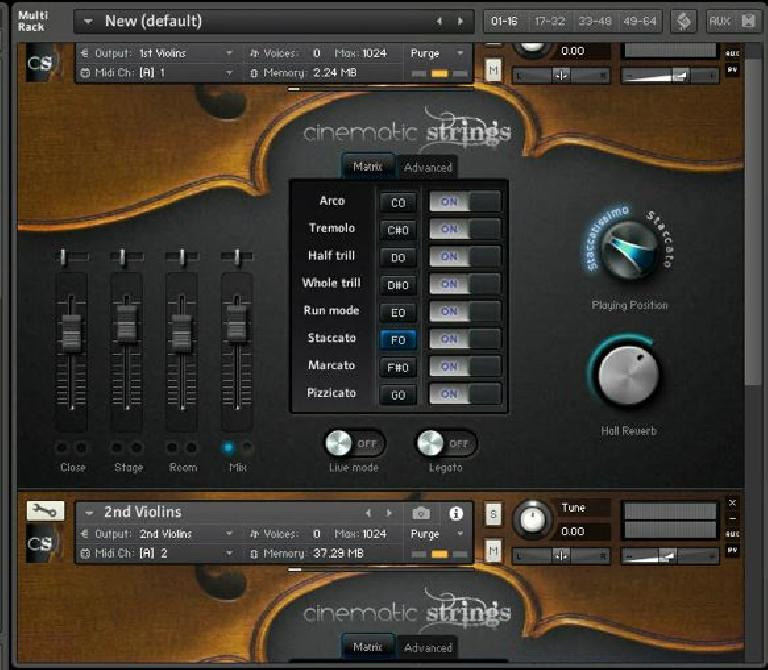
First, let’s clear up the difference between multi-timbral and multi-output instruments. A multi-timbral instrument is one that can receive up to 16 different MIDI channels. You can set up multiple instrument patches up in these instruments and assign each instrument to receive MIDI from a specific MIDI channel. For example, you could load up an instance of Kontakt and then in the Kontakt instrument you could load up violins, viola, cello, and double bass patches. Each of these can be assigned to receive MIDI from a specific channel. Then in Cubase you add an instrument track with Kontakt, and then use extra MIDI tracks assigned to different MIDI channels that trigger the different patches.
Now what if you want each of those instruments to go to a separate output? Because at the moment, when you play each of those instruments, they’re just gonna come through Kontakt’s stereo output. That’s where multi-output capability comes in handy. When you use a multi-out instance of the instrument, you can then choose how to route each instrument to a different output, and then in the mixer you have greater control over the volume and processing of the track. So now let’s see how to set it up!
Choosing the Multi Output Option
I’m going to use Kontakt as the example. If you’re using another multi-output instrument, you’ll need to check the instrument manual on how to route the outputs internally in that instrument. I’m going to open Cubase’s VST Rack (you can use the shortcut F11) and in here I’m going to add an instance of Kontakt’s 16 output instrument.
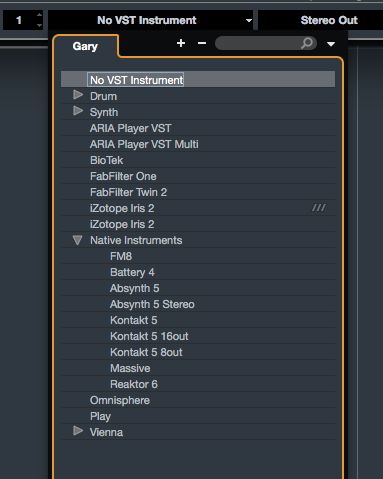
Now, I can add some extra instruments within Kontakt. By default, each time you add an extra instrument, it assigns it to the following MIDI channel, but they all coming through the same output. First go to the output section of each Kontakt patch and choose to ‘Create a separate Master Output channel’.
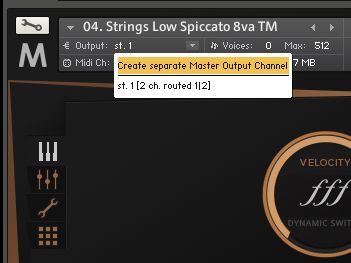
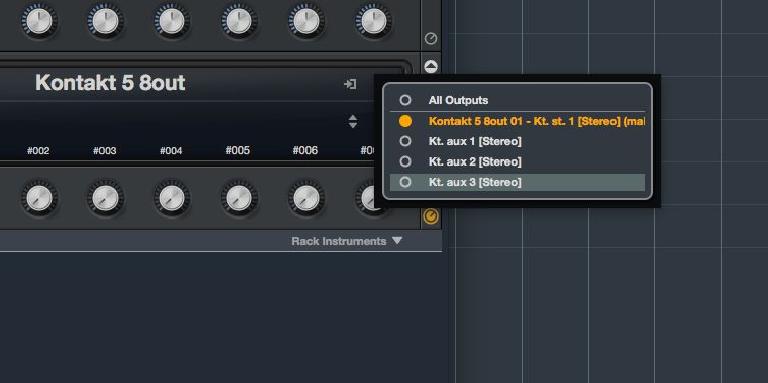
Now open up the Output tab. Here you’ll need to assign each instrument to an output. So for my second instrument in Kontakt, I’m going to click on the output button at the bottom of the output channel. This will bring up the output channel configuration window. Here I can choose an alternative output. You’ll see it has your 1–2 master stereo output and some additional auxiliary output channels. Choose the following 2 x aux channels (because this is going to be a stereo output it needs two outputs), and follow on and do the same for the rest of the instruments in your multi-timbral instrument.
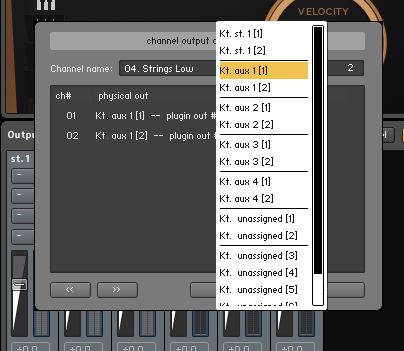
But now when I play on the other MIDI channels in my project that were assigned to the stereo output, I no longer hear anything. And that’s because I need to assign them to an output for Cubase’s Mixer to recognize it.
Routing the Outputs
This is the part that really got me stumped for a bit. This is what you have to do: On the VST Rack, on your instrument, click on the arrow that activates the outputs. This will pop up a window that shows you the currently activated outputs. It’ll probably only show you that your 1–2 stereo output is activated. Go in and activate the other outputs that you want to be able to hear.
Outputs in Mixer
Now when you open up the Mixer (the shortcut is F3), you will see that it shows you the outputs for your multi-output instrument. So you can go in and create a separate mix for your multi instruments. And when you jump to the different MIDI track, you’ll hear that they now have an output. How cool is that?
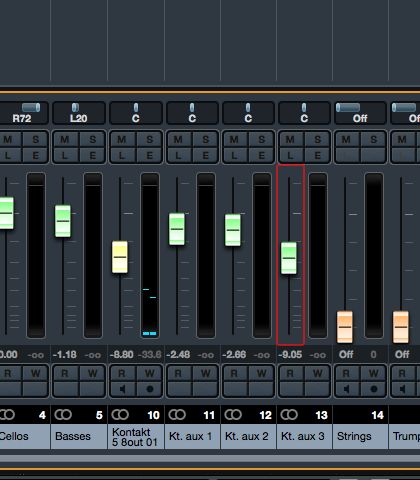
This also works well for drum instruments where you want to send each drum out to a different output and then you can add separate processing, like different EQ and compressor settings to each instrument within the drum patch instead of having to apply it globally across the drums.
Another Instrument Example
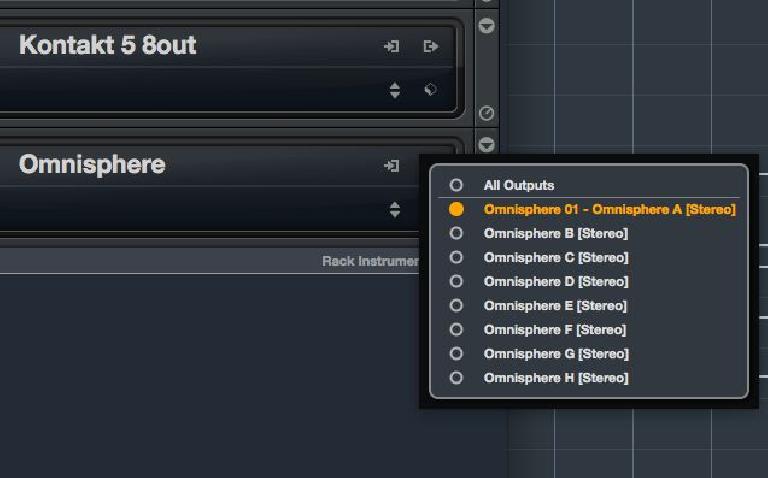
For the heck of it, let’s take a look at one more instrument. I’m going to demonstrate this with Omnisphere—another popular virtual instrument with multi-timbral and multi-output features. So I’m going to add an instance of Omnisphere to my Rack, and when I click on the Activate Outputs option, I see only Output A is active.
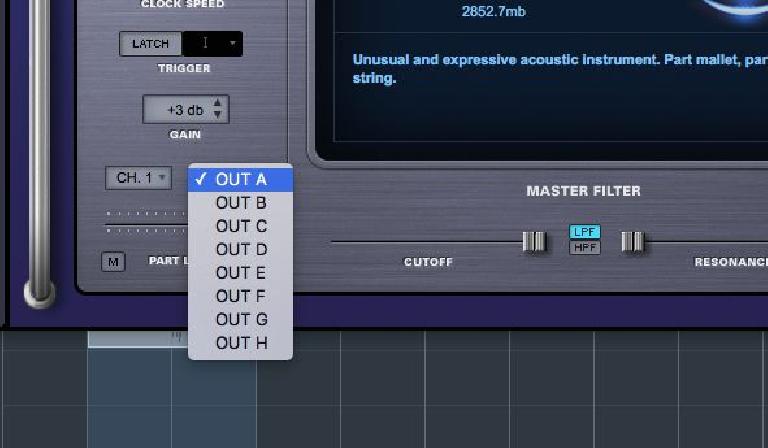
How it works with Omnisphere is that it has 8 stereo outputs labelled from A–H. And you’ll see at the top of the Omnisphere interface you choose 8 patches to add.
And when I select patch A, then when I navigate to the output I can see that it’s routed to output A.
So let me add some other patches into the instrument now, and I’m going to make sure that they each receive MIDI from a different MIDI channel. And I’m going to set each one to go to a different Stereo Output. In Cubase I’ve created the respective MIDI channels. Plus, I now need to go in and activate those other outputs.
And now when I jump across to my Mixer I can see the separate Omnisphere outputs.
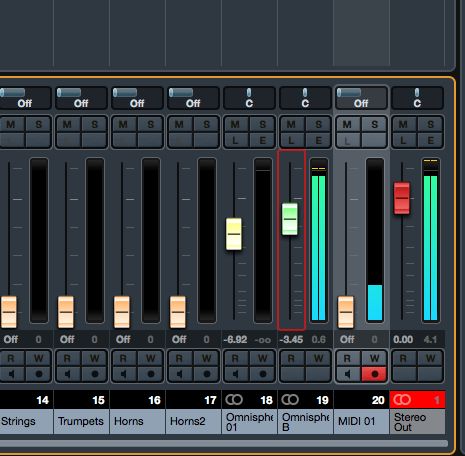
So that gives you an idea that the process in Cubase is the same each time for setting up the multi-ouputs, but you’re going to have to check you the outputs are routed in your virtual instruments.
Conclusion
That’s how to take your multi-timbral instruments, or instruments that are multi-output capable, and route their outputs to different channels in Cubase. This gives you way more flexibility when working with these instruments and you have more mixing and processing opportunities this way in your productions. So get in there and go multi-out crazy with your instruments.




 © 2024 Ask.Audio
A NonLinear Educating Company
Discussion
Want to join the discussion?
Create an account or login to get started!