
iZotope is well known for its great audio processing tools and plug-ins, but has started to also develop its own software instruments. It is perhaps not a great surprise, given the company's evident expertise in the DSP world, that its first dedicated synth would not be an emulation of something old but a new take on resynthesis. A synth that looks quite unlike anything else and has a different approach to that other well known resynthesizer, Camel Audio's Alchemy. You will see from a quick glance that Iris is based on Izotope's spectral analysis technology as found in the excellent RX, which is able to provide incredible levels of access not only to the waveform of a piece of digital audio but allows you to view, edit and manipulate it on a much more fundamental level. Izotope says it has a “new spin” on sound design and Iris calls itself a “visual instrument”. But are these claims justified?
The lowdown
Iris comes in RTAS, VST, VST3 and AU plug-in format for Mac and PC and also works in standalone mode. It needs Windows XP or better, and OS X 10.5.8 or later on an Intel Mac. Setting up is a breeze, with just a couple of audio assignments to make before you're up and running. A quick read of the Getting Started guide is recommended as this is a pretty unusual kind of synth. Iris works by analyzing audio samples, either from its library of 500 patches comprising 4GB of sound samples, or any sample dragged and dropped from your desktop.

Control the mapping of samples across your keyboard with the easy-to-use Key Mapping window.
At the top right of the synth are four slots. Here you can activate up to three layers of samples per patch plus one sub sound to beef things up a little. Click any of these to view the sample in that particular slot at full zoom, or click the All button to see them all at once. This has the advantage that you can still edit sounds in “All” view, which is very useful. Underneath each of the four slots you can activate a tie button that links the parameters of all slots that have this button activated. So changing a control on one would have the same effect on the others.

Layer up to three samples per patch plus a sub, and edit them all from a single screen.
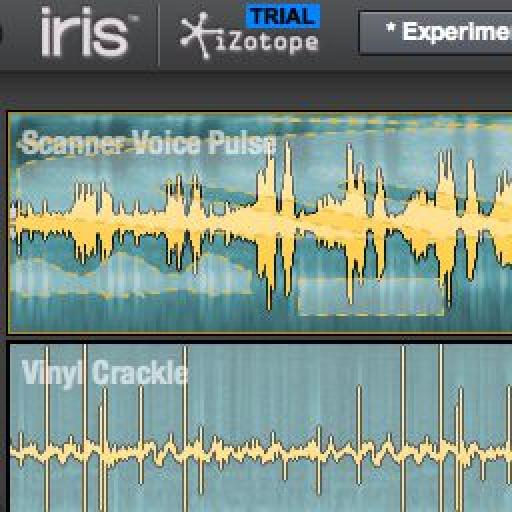
Your sample appears in the main window and you will see both waveform and spectrographic displays, the former in yellow and the latter in blue. You can use the Blend slider to choose how much of each one to view, since sometimes it will be more important to see one or the other, and sometimes both at once. Play a MIDI key and the sample will play back, pitching itself across the keys. There's intelligent root note detection but you can manually set the key ranges of any sample using the Mapping window, for extra flexibility.
So far this is just sample playback, but now things start to get interesting. On the left is a tool palette, and with these you can start to work with your sample. After the zooming tools, you will find a row of specialized selection tools. The first three are Time, Time Frequency and Frequency selection. Time lets you select areas of a sample running left to right, and frequency works from top to bottom. The Time-frequency selector allows a square selection anywhere in the window. Beneath these, a Lasso tool allows freeform selection of any shape in the window.

It might look like a crazy artwork, but this is how you select which parts of a sound to play back in Iris.
Music as art?
Why, then, would you want to select areas of the sample in this way? The answer is that the areas you select determine the way the sound is played back. If you've ever got hands-on with RX you will know that its special skill is allowing you to identify areas “within” a sound by drawing round them in the spectral display. From there they can be deleted or edited. Here it works in a similar way, but the parts you select are the ones that are played back. So if you want to just take one element of a sound's frequency you don't have to use EQ to try to isolate it, just find it and draw around it. You're not limited to simple selections either: create as many areas within a waveform as you like to hear them played back.
The Brush Selection and Eraser tools can be used to paint freeform through the selected areas to add or remove sounds, and the Magic Wand tool can select areas automatically. A series of Invert commands let you quickly reverse the current selection. Although this all looks a little complex at first it is very intuitive and doesn't take long to pick up. The whole thing is very experimental and encourages creativity: don't expect a conventional synth programming experience.
Each sample can have its loop start and end points set and crossfades can be inserted as well. The importance of this becomes more evident when you layer up samples of different lengths. As one continues to play, another has gone back and looped over again. Being able to set loop points makes it easy to get complete control over the rhythm and evolution of a sound. Each sample layer has comprehensive controls along the right, including tuning, gain and pan, amp, LFO and up to four send effects each with control sections : distortion, chorus, delay and reverb. These can be managed in a master Mix view if you like where you can also set four master effects, global LFO and control MIDI Learn. There are even macro and mod routing sections for greater control.

Manage the four slots in the mixer section to control envelope, LFO and effect settings plus master settings.
Final thoughts
Iris is quite astonishingly powerful in its resynthesis capabilities, and the sounds it can make are vivid, atmospheric, interesting and highly usable. It's a sound designer's tool, perfect for film work, experimental music and will likely be used in popular music genres too. Much of the time you're not quite sure what you're going to get by painting around the spectral display, but the experience is very involving. Sounds come together as you tweak, and it's as much about trying things to see what happens as having some sort of master plan. Of course, you can control things very precisely with the tools provided and also with the control and master sections as well as the excellent effects. But it's sometimes more fun to layer up some samples and get creative. Often, what shakes loose is something amazing you'd never have dreamed of.
Download the iZotope Iris trial here.

Discussion
Want to join the discussion?
Create an account or login to get started!