Over the years, Steinberg have continued to refine and enhance Cubase into an incredibly powerful and popular DAW program for both Mac and Windows platforms. These ‘.5’ updates usually offer an array of useful improvements. Now that I’ve spent quite a bit of time with this version, it’s clear that Steinberg have been focused both on streamlining the workflow, as well as adding unique sharing features.
New MIDI Features
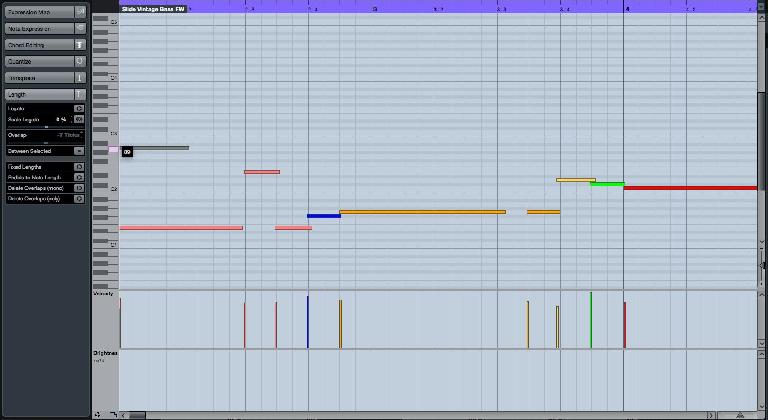
Because Cubase was developed at the birth of the MIDI era, it’s always had an extremely potent ability to add and manipulate performance data. The Key Editor has always provided a way to add data with your mouse, but the new Quick MIDI Note Entry makes that process much easier and more powerful. Using your Object Select tool (you no longer need to select the Draw tool to add note data), just double-click in the MIDI Event display to automatically create a note. But if you hold your mouse button down on the second click, you can drag across the screen to increase the length of the note you’re about to create. During this process, you can also drag your mouse up and down to define the velocity of the note prior to creation. Using modifier keys allow you to further manipulate the notes, and Quick MIDI Note Entry works in the Key, Drum, and In-Place editors.
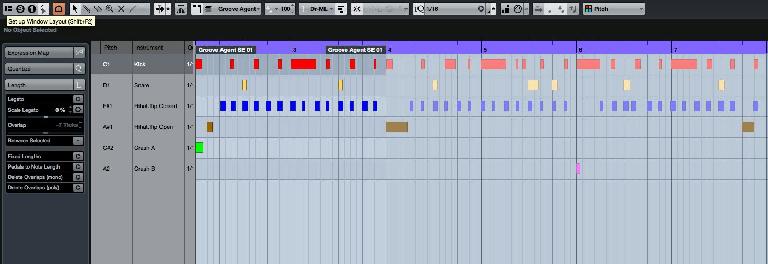
Speaking of the Drum Editor, you can now view and adjust the note lengths. This is great for newer virtual drum instruments and sample libraries that respond to MIDI note length. There’s also a new Drum Visibility Agent with which you can view or hide empty note lanes and drum sound assignments, as well as reverse the MIDI notes to show lower MIDI pitches at the bottom of the list rather than the top.
The Retrologue 2 virtual analog synth has a lot of new features including a new XOR oscillator type, as well as an additional oscillator for a total of three. Sub-oscillator and noise generator can still be added independently of the three main oscillators. There are 12 new filter types, 2 additional polyphonic LFOs, six more matrix slots, arpeggiator, and a total of six DSP effects. They also added a bunch of new presets, but it also retains the original Retrologue library.
The appearance of the chord symbols in the Chord Track can now be customized, and the Chord Pads have a new Sections play mode that allows the chord complexity to be defined by MIDI keystroke.
New Transport and Ruler Features
The Transport Panel buttons now have new bolder icons that make it easier to see what you’re clicking on, which is especially helpful on today’s modern high resolution displays. A really simple but welcome new feature is the ability to enter a tempo value without the nagging reminder that you have to disable the Tempo track first. Instead, projects without any predefined Tempo track data will be set to the new value, while projects with data will have the new value entered at the previous setting based on the cursor position.
There are also new punch-in/out recording points that are independent from the Left and Right Locator, and a redesigned Transport menu.
The Ruler has now been split into two equal zones: The upper zone is for moving and placing the Locators, and the lower zone is for click-zooming with the mouse. That makes positioning the Locators easier and more intuitive, and you can also click between them to enable/disable Cycle mode. Clicking and dragging the Locator range will move the entire range. (That is perhaps my favorite new feature.) You can also customize the Ruler colors.
Keeping Track of Tracks
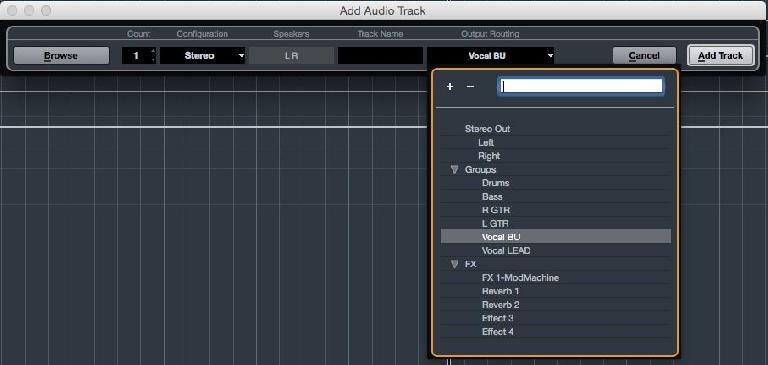
Now when you create Group, FX Channel, and VCA tracks, you have a choice of putting them inside or outside of a Folder track. This allows you to keep all the like tracks organized when you create them. Adding Audio and Instrument tracks now offer an Output Routing option, which allows you to route audio-based tracks to predefined Groups or hardware outputs. I like this feature so much that I’ll probably make my Groups first, then add the Audio and Instruments tracks.
Multiple FX Channel tracks can now be created simultaneously, rather than one-by-one. To create several FX Channel tracks with different plug-in selections, just use the ‘No Effect’ option, then assign the effects you want to the Insert slots of the new tracks.
While you could always drop-and-drag data from one project to another, now there’s a new Import Tracks from Project command, which lets you choose a source project, the tracks from which you want to import, and whether that data will be placed on new or current tracks. All Insert effects, EQ settings, or Strip settings will also be imported, which is a real time saver. You can import Audio, MIDI, Instrument, Markers, Chord, and Video tracks.
The MediaBay also has new iconography to navigate the media with a visual perspective. Plus, you can now drag media directly to the Track column, and that will create a new track upon which the media will be placed.
Editing, Windows Layouts, and Profiles
Every Event in the Event Display now has a Duplicate Event Hotspot. It appears as a small black square at the middle-right of the Event edge. Clicking it and dragging to the right will make one duplicate Event, while dragging longer distances will make multiple repeats. You could do this with modifier keys and your mouse in previous versions, but now all you need is the Object Select tool, sans modifiers.
In the Project window and MixConsole, you can now hover your mouse at the left, right, top, and bottom window edges to choose which items are visible. For example, hover at the right of the Project window and you can view or hide the MediaBay. In the MixConsole, the same process will allow you to show or hide the Control Room/Meter. Basically, you needn’t go all the way to the Window Layout to make those configurations.
The hover controls for Inserts, EQs, and Sends have been improved by being made easier to see. The Bypass, Editor, Select Insert, and plug-in name for Insert Slots are always visible in the Project Window, and appear when you hover over the Slot in the MixConsole. The Sends are similar, but show the Pre/Post Fader button and Destination settings. The Enable/Bypass button for the EQs are located right on the ID number, and the EQ Band Type(s) are always visible, too.
Figure 7. The Hover controls in the Inspector (left) and MixConsole (right).
The Profile Manager is a very welcome new feature. It allows you to modify various setting and the Key Commands, then save them as a Profile. You can then switch profiles on one computer upon which multiple users work, or save them to a flash drive to transfer your favorite settings to a different computer.
VST Transit
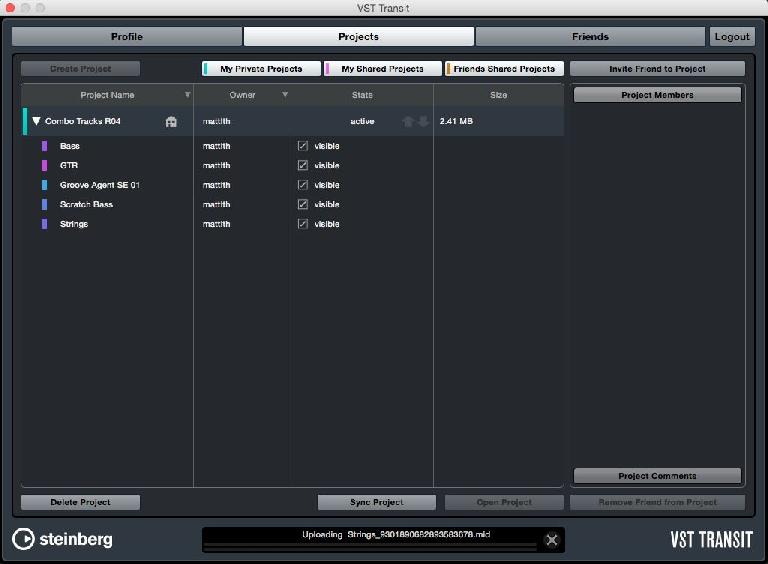
The world is a big place, and sometimes your favorite writing buddies are elsewhere on the planet. VST Transit makes it easy to collaborate with other Cubase users by storing and synchronizing shared projects in the cloud. Then multiple users can add their own tracks and recordings, and all those new components will be shared to each user’s computer. New tracks are conveniently added to a Folder track in the Cubase project, which helps to manage the media.
Audio, Instrument, and MIDI tracks can be shared, and it’s important to consider whether you and your writing friends are using the same 3rd-party plug-ins. If you’re not, you may want to stick with the wide variety of effects and instruments that come with Cubase so that your projects will sound the same to all members. Steinberg provides 500 MB of storage and 1 GB of cloud throughput-per-month for free, then you can purchase more space and traffic starting in early-2016.
Conclusions
There are several other small improvements you’ll find along the way, such as the Read button enabling automatically when adding automation data, and Toggle Time Base options added to the Project Logical Editor. Suffice it to say that switching back to Cubase Pro 8.0 makes me miss one—if not all—of the new features in 8.5. All the additions are very intuitive and can be learned quickly. Plus, VST Transit makes it really easy to collaborate with other Cubase users, regardless of geographical distance. I feel like current and new users alike will be able to produce music and audio projects faster than ever before, and the upgrade pricing is very affordable.
Price: Full version - $549.00 (Mac or Windows), Upgrade from Cubase 8 Pro- $49.99
Pros: Many operational enhancements, VST Transit and free data storage makes project sharing easy, recording workflow is faster than ever.
Cons: The upgrade—while moderately priced—isn’t free.


 © 2024 Ask.Audio
A NonLinear Educating Company
Discussion
Want to join the discussion?
Create an account or login to get started!