
One of the best ways to really understand a synthesizer and its capabilities is to reverse engineer some of its built-in patches. In this article I am going to do exactly that and the patch I have chosen is one of my favorites, called Wavedance.
The best way to go about understanding the 'anatomy' of a patch is to divide its parameters into five broad categories.
- The Timbre – source of the sound, what waveforms are being used.
- Voicing – polyphony or voice layering with any detuning applied to fatten up a sound.
- The Amp Envelope – how the amplitude evolves over time.
- Modulation – any modulation of filters or synth specific parameters with the help of LFOs, envelopes or any other modulation sources the synth has.
- Effects – this could range from simple delays to overdrive, distortion and the likes.
Before getting into reverse engineering this patch, I would suggest playing with the patch and trying to roughly identify the elements of the five categories mentioned above. You will notice that tapping and dragging horizontally on the Animoog keyboard enables you to play smooth legato lines with a slight pitch glide effect. Tapping and dragging vertically on a key sends poly pressure data and in this patch, it modulates the sound through the various waveforms via the X/Y pad.
Step 1 - Timbres & the X/Y PAD
Head over to the TIMBRES tab and you will notice some really complex waveforms being used in this patch. You can preview some of them by tapping on 'preview' for any of the 8 slots. I don't think there is a very specific combination of timbres that make this patch work, but what is key is that all the timbres are non-static waveforms and no two adjacent waveforms are the same. Let's change all the 8 waveforms to 'StaticSaw'. On doing so you will notice that the timbre is not really changing much when tapping and dragging on a key vertically. At least not like before.
You still see the little orbs dancing around the X/Y PAD but it's not affecting the sound anymore. This is because all the 8 waveforms are exactly the same so irrespective of where the orb is, the sound is going to be the same.

The TIMBRE's Tab
Step 2 - Orbit & Path
Set the TIMBRES back to the original settings or just load the Wavedance patch again.
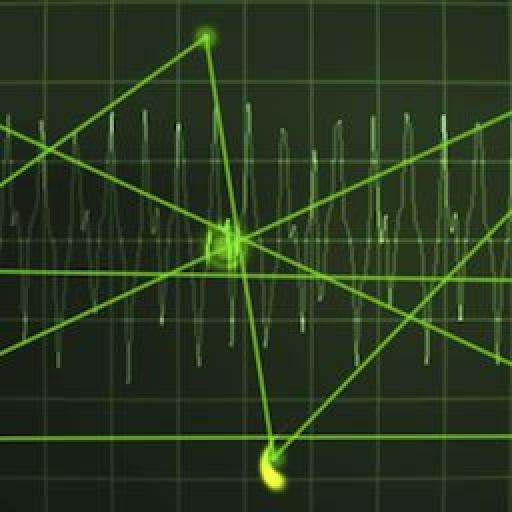
When you tap and hold a key an orb appears and dances around the X/Y PAD until you let go of the key. This modulation of the orb is controlled by two sections, the ORBIT & PATH.
The orbit modulates the orb through the two axes (X & Y). The rate of modulation can be controlled by the RATE knob. This patch just has Y AMOUNT modulation so when you turn up the RATE knob you will see the orb modulate back and forth with a horizontal motion. Push up the X AMOUNT to see how that too can affect the modulation. Let's set the RATE and both X & Y AMOUNT to 0 to disable this modulation.
You have probably noticed by now that in addition to X & Y modulation the orb is following a path laid down by the green lines on the X/Y PAD. The speed at which the orb goes through this path can be controlled by the RATE knob in the PATH section. You can create your own path by tapping the EDIT button and tapping at various locations on the X/Y PAD. You can clear existing paths by tapping the CLEAR button.
Let's hit the CLEAR button and set the RATE to 0 so there is no orb movement.
Also go back to the TIMBRES tab and change all the 8 slots back to StaticSaw.

The ORBIT & PATH sections
Step 3 - Pitch Modulation
Now even though the sound is quite simplified, there still seems to be some modulation present especially while tapping and dragging on a key vertically. It is more evident when the finger is near the top edge of the key. The reason for this is that poly-pressure data is assigned to control the LFO modulating the pitch.
Head over to the ENV/MOD tab and tap on MOD 3. Here you will see the LFO as a SOURCE, being assigned to modulate the pitch-1-semitone under the DESTINATION tab.
In the middle tab, poly-pressure is assigned to CONTROL the modulation. So if poly-pressure value is low, the LFO won't really modulate the pitch and if poly-pressure value is high the pitch modulation will be a lot more pronounced. The depth of this modulation can be controlled by the AMOUNT knob just below the CONTROL assignment drop down. If the AMOUNT is set to 0, poly-pressure values won't affect the modulation. The modulation will happen irrespective of where you tap on the keyboard.
Try changing the RATE and SHAPE of the LFO to see how it affects the sound. Make sure the AMOUNT knob is a non 0 value or else you won't hear the effect.
OK, let's disable this modulation to clean up the sound further. You can just set the AMOUNT knob to 0 for both SOURCE and CONTROL and that will disable it.

MOD/ENV tab
Step 4 - Filter and Filter Modulation
Now the sound is a lot simpler with almost no modulation but the filter is still engaged. As you can see in the image, the filter is set to LP, which stands for Low Pass. The cutoff FREQUENCY knob is set about halfway through so a lot of the high frequencies are being removed. Turn the knob all the way to 10 and you will hear the unfiltered sound.
Set the FREQUENCY knob back to its previous position, then tap and drag vertically on a key. You will notice there is still some slight modulation happening. Tap on 'MOD 1' and you will see that 'poly-pressure' is controlling the 'filter-frequency'. The amount is set only slightly over 0 so turn up the amount to really hear it. Now tapping and dragging vertically on a key sounds as if the FREQUENCY knob is being modulated. Let's set the amount to 0 to disable it.

The FILTER section
The DRIVE parameter in the FILTER section is slightly above the 5 mark. This parameter just boosts the signal before it reaches the filter stage and Animoog's manual says a setting at 5 would be its default position.
The ENV knob controls how much the FILTER envelope controls the filter. As you can see on the left side in Pic3, there are three envelopes. The middle one being the filter envelope. You can double tap on the envelope to open it in a larger window. To really hear the envelope affect the filter, push up the ENV knob in the filter section all the way up and turn down the 'FREQUENCY' knob all the way down. You can tap and drag on the screen to alter the shape of the envelope. Giving it a longer attack would make the filter modulation more obvious. Double tap again to go back to the previous view.

The FILTER ENVELOPE
OK, let's set the ENV knob to 0 (double tap on the knob) to make sure the filter envelope is not affecting the sound at all and let's push the FREQUENCY knob all the way to 10 in the LP mode.
Step 5 - Voicing
In the THICK section you will see UNISON set to 4 voices. Unison is quite a common feature on analog synthesizers which helps fatten up the sound by layering additional voices for each keyed note. The voices are then slightly detuned and panned either side of the stereo image. You can control the detuning amount with the DETUNE knob. As you can see in this patch the DETUNE knob is only slightly above 0. Play with this knob to really hear the detuning effect. The range of the knob is a full octave.
OK, let's set the UNISON to OFF. The DETUNE doesn't work when UNISON is set to OFF.

The THICK section
Step 6 - Delay
The patch sounds quite clean now except for the delay. Animoog's delay is quite simple with just 3 knobs, TIME, FEEDBACK and MIX. There is also a sync button which sets the TIME to musical subdivisions instead of Hertz. If you have ever used a delay plugin, these parameters will seem quite self-explanatory. You will notice that the delay is a ping-pong delay where each repeat is hard panned to either side of the stereo field.
OK, let's disable the delay by setting the MIX knob to 0.

The DELAY section
Step 7 - Amplitude Envelope
Lastly, let's look at the amp envelope. Double tap on the AMP envelope section to make the view large. As you will see, the 4 stage amp envelope (Attack, Decay, Sustain & Release) has been shaped so that when a key is pressed the amplitude of the sound rises up to its highest value and then gradually drops down to the sustain level. When the note is released the sound slowly fades out due to the long release.
OK, let's remove the attack, set the sustain to its highest value and remove the release. So the resulting envelope shape is more rectangular.

The AMPLITUDE ENVELOPE
Step 8 - Glide
One final thing that is still affecting the sound is the GLIDE knob at the bottom right corner of Animoog. When you tap and drag on the keyboard horizontally, you will hear the sound glide between one pitch to another. With the GLIDE parameter set to 0, the notes will not glide anymore and you will hear a more stepped movement between the notes. Turn up the GLIDE parameter to really hear how it works.
OK, Let's set the GLIDE parameter to 0 se we get a plain, stepped movement.

The Animoog Keyboard
So now we have a very simple patch with just the raw StaticSaw sound.
Try following the steps in reverse order to recreate the original sound. Eventually you may not end up with the original sound but might discover something completely new. That's the path to discovery and synth patch design.

Discussion
Want to join the discussion?
Create an account or login to get started!