
Venture far enough in to the dark waters of electronic music production and eventually, you won’t just be writing music, you’ll be remixing it. And when this occasion finally presents itself through either conversations of trades between other musicians or an arranged deal between a record label, you might receive or be creating something called stems for your DAW. In this tutorial, let’s talk about what those stems are, and how to easily remix with stems in Ableton Live.
What’s a Stem?
When you need to share a mix easily and for purpose of remix, a most easy and effective way to do this is to render each track within a DAW session as a recorded audio file. Each rendered track is usually referred to as a stem. The render of each track must begin at measure 1, and end either where the song actually ends or when the instrument or voice finally ends within the length of the song.
By rendering each track as an audio file starting at measure 1, you can hand your stems that make up your song over to your favorite remix artist. Once you give them the stems' original tempo, your remix artist friend can drop your stems into a new DAW session, each stem on a different track, starting at measure 1, set the DAW tempo to the prescribed setting, and they are ready to go.
Now, the creation of these stems has been covered extensively here. But what do you do with stems when you’re ready to remix?
Step 1. Drop Those Files In, for the Moment…
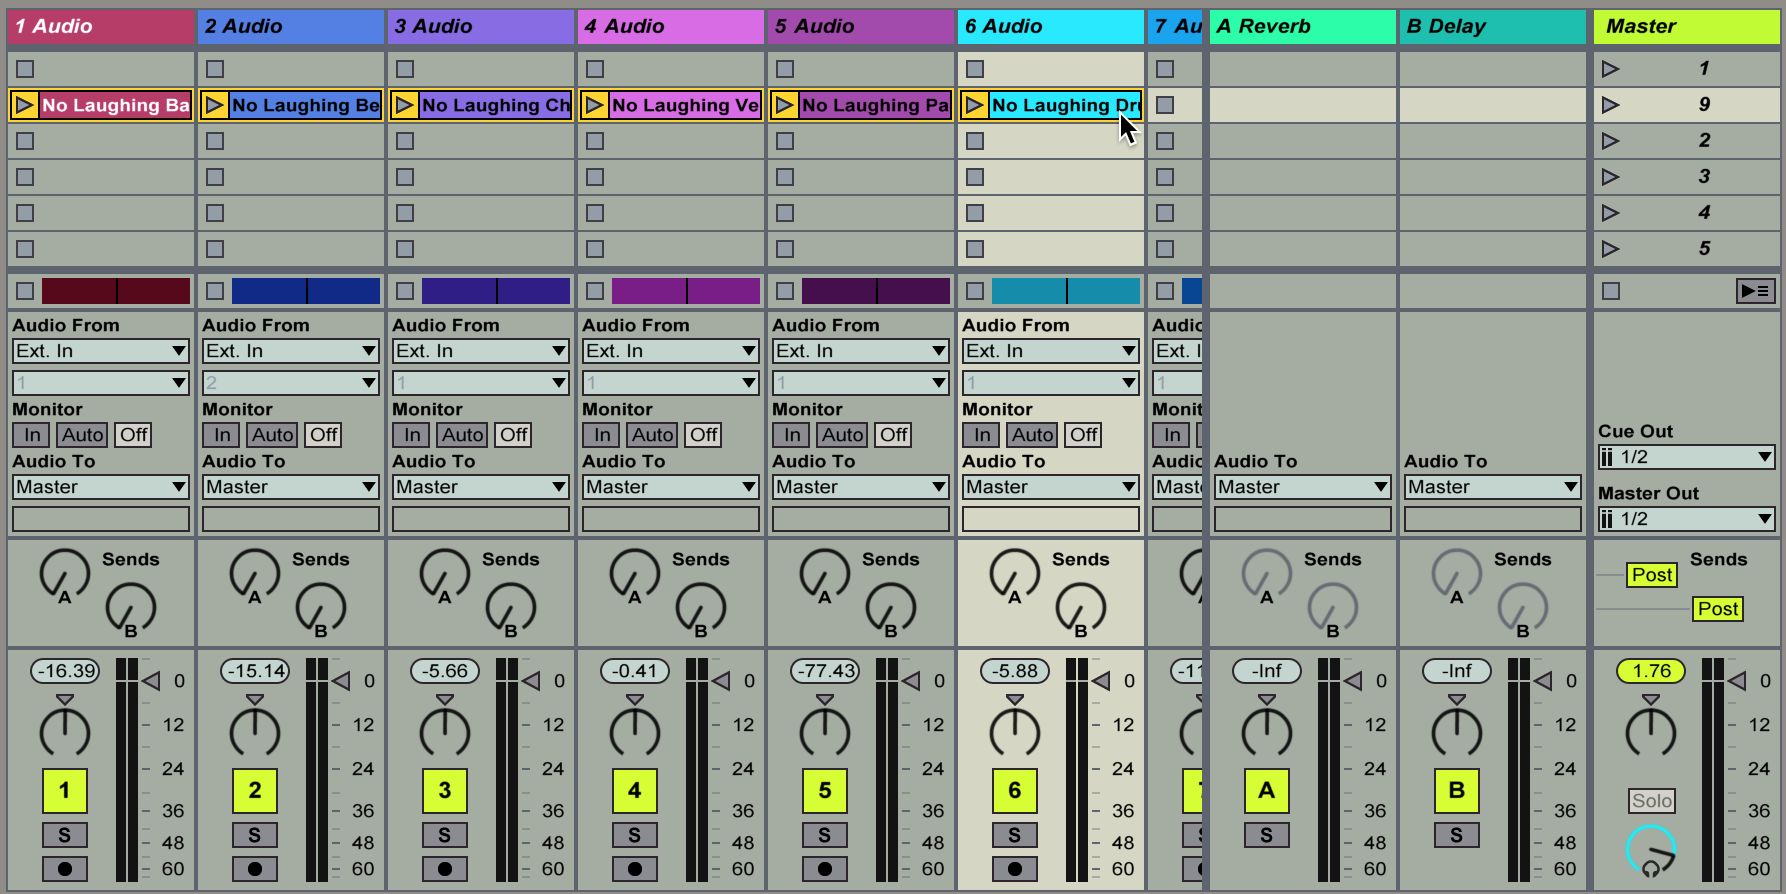
When I first receive my stems for remixing purposes, as mentioned above, I always start first by dragging each stem in to an audio track within the Arrangement window of Ableton Live. Because the stems I received were made in Ableton and the creator was nice enough to leave me the .asd files, Ableton automatically adjusts its host clock to the tempo of the stems.

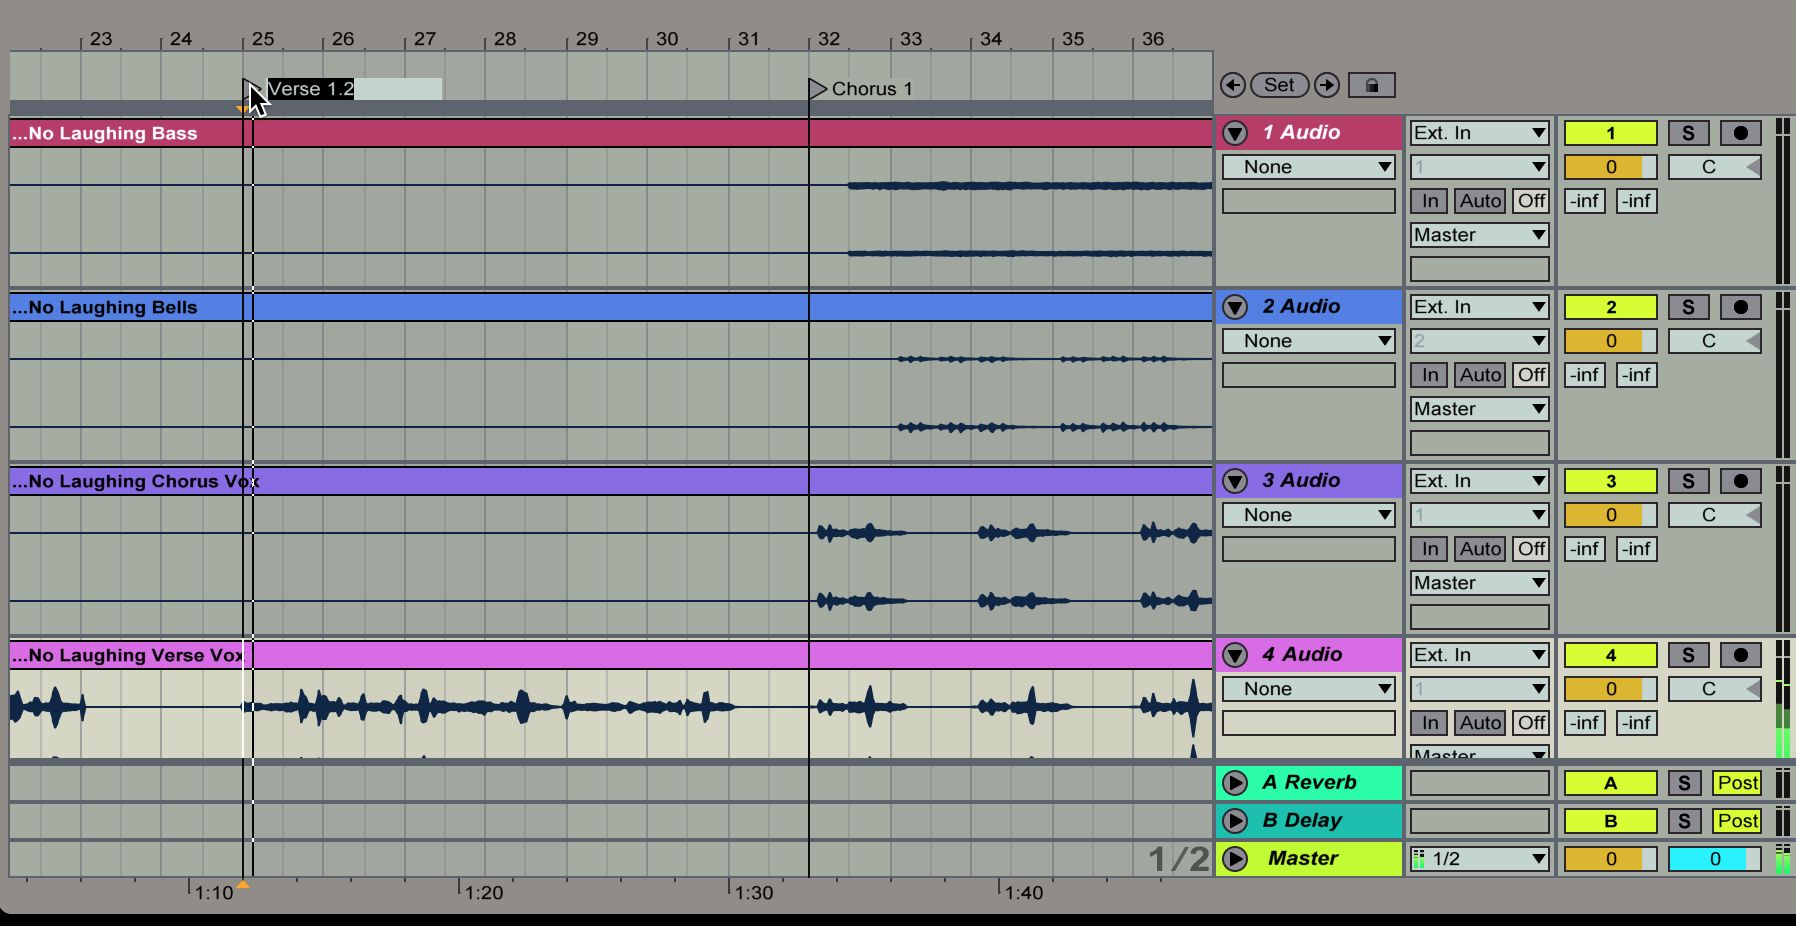
Having all the stems in the arrangement view allows me to see visually what’s going on within the waveforms of each track at once and gives me some ideas as to where to start sectioning out major parts of the arrangement like the Chorus, Bridge, Verse and so on. I’ll mark these sections by dropping in Locators. I’ll do this by positioning the cursor in the arrangement view, and pressing the Set button in the upper-right hand corner of Ableton. I can label each Locator as I go along by selecting a Locator, and using the Command+R shortcut.

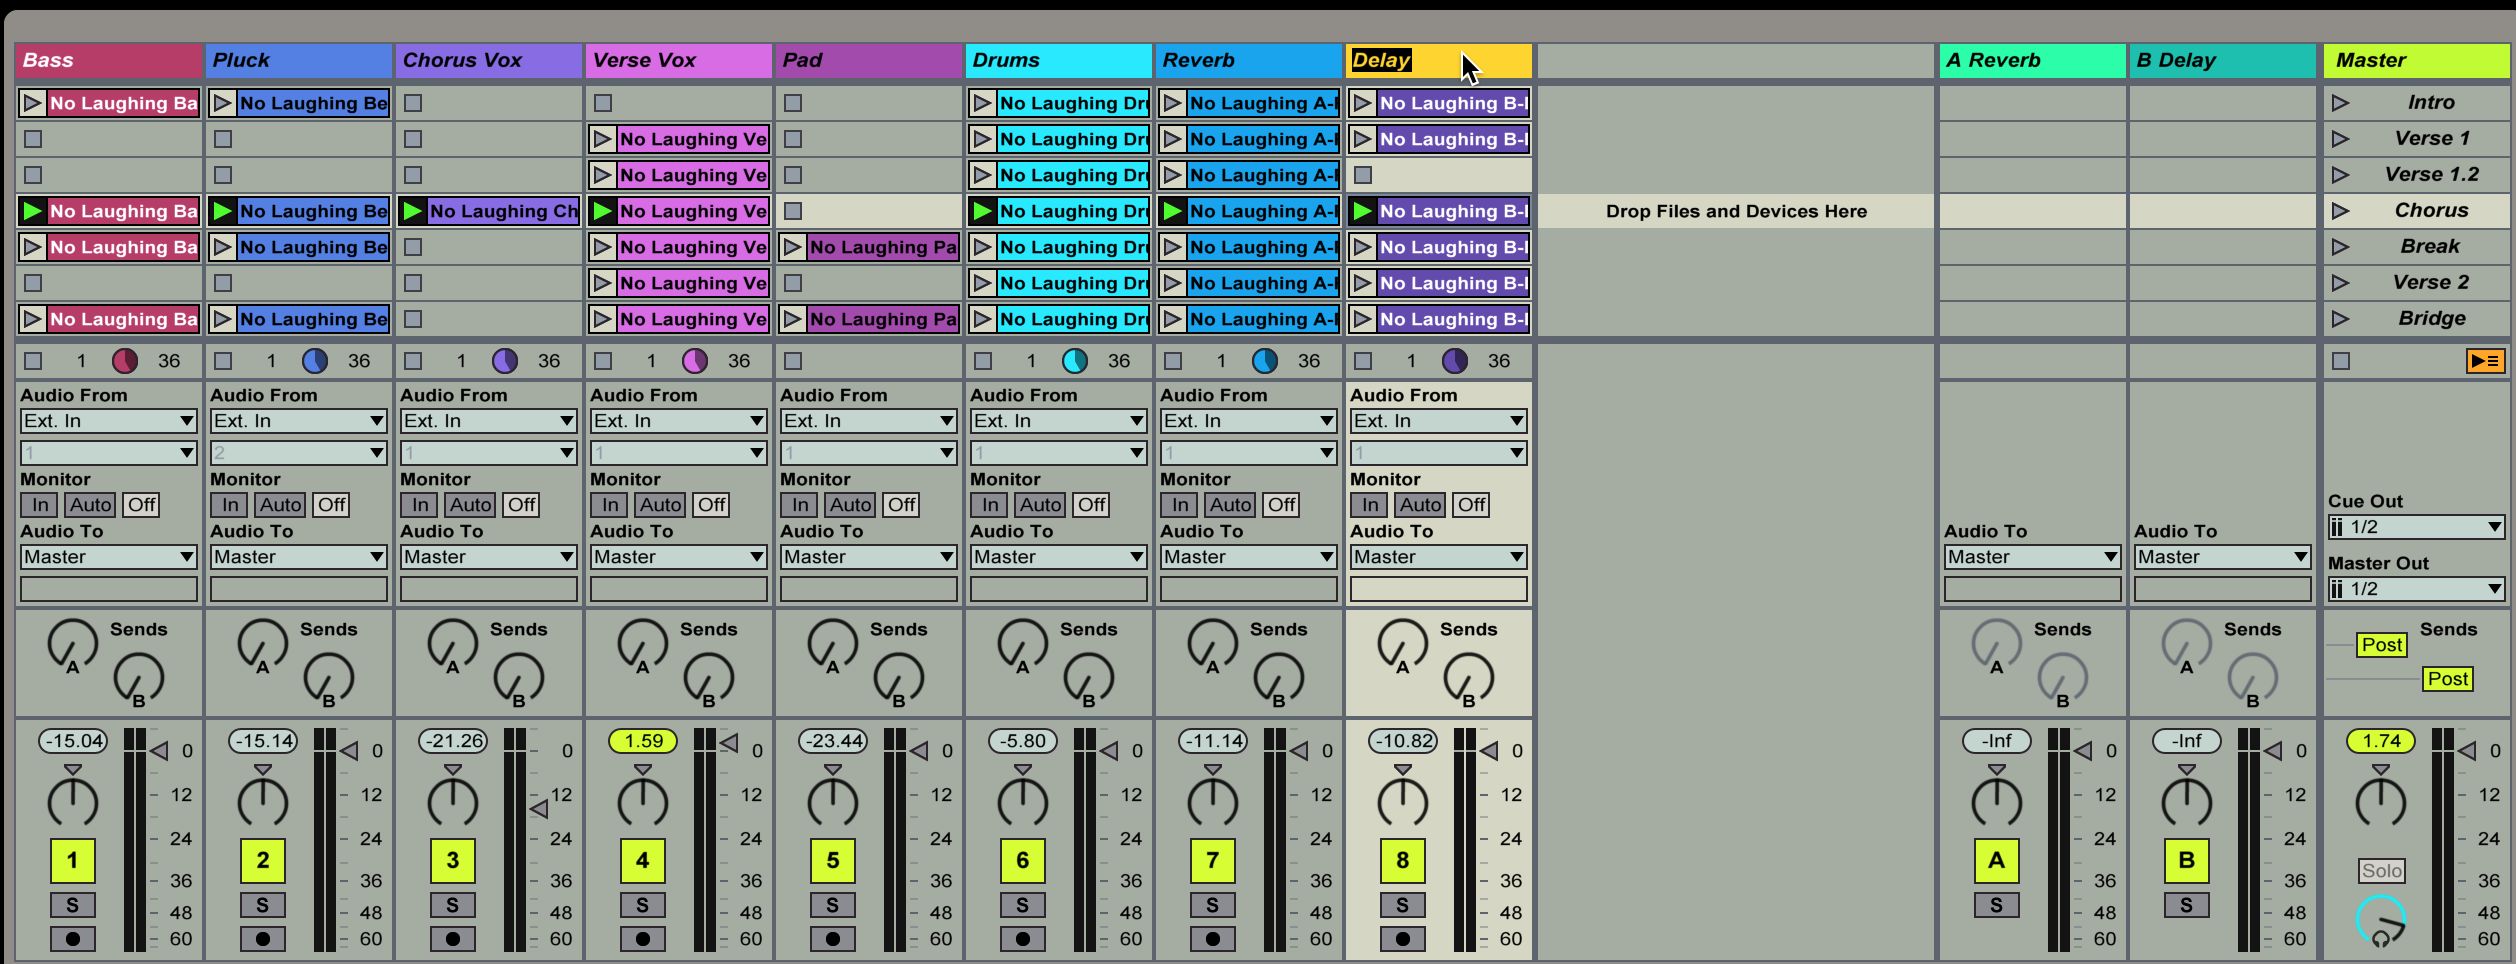
Once I get each section labeled, it’s time to start moving things casually over to the Session View from the Arrangement view with a very handy feature in the Create Menu. By dragging and selecting any section within the Arrangement Grid within the Arrangement View, I can select Consolidate Time to New Scene. This immediately causes Ableton to render new versions of all active clips that play within this duration of the arrangement.
For example: I’ll select the area of the arrangement where the first chorus plays, from start to finish. Where, if looped, this section would play back seamlessly. Then select Consolidate Time to New Scene, and now I have a new scene in the arrangement window that happens to be a perfect looped copy of this section of my arrangement. Thanks Ableton!

Step 2. Creating A Palette to Paint With…
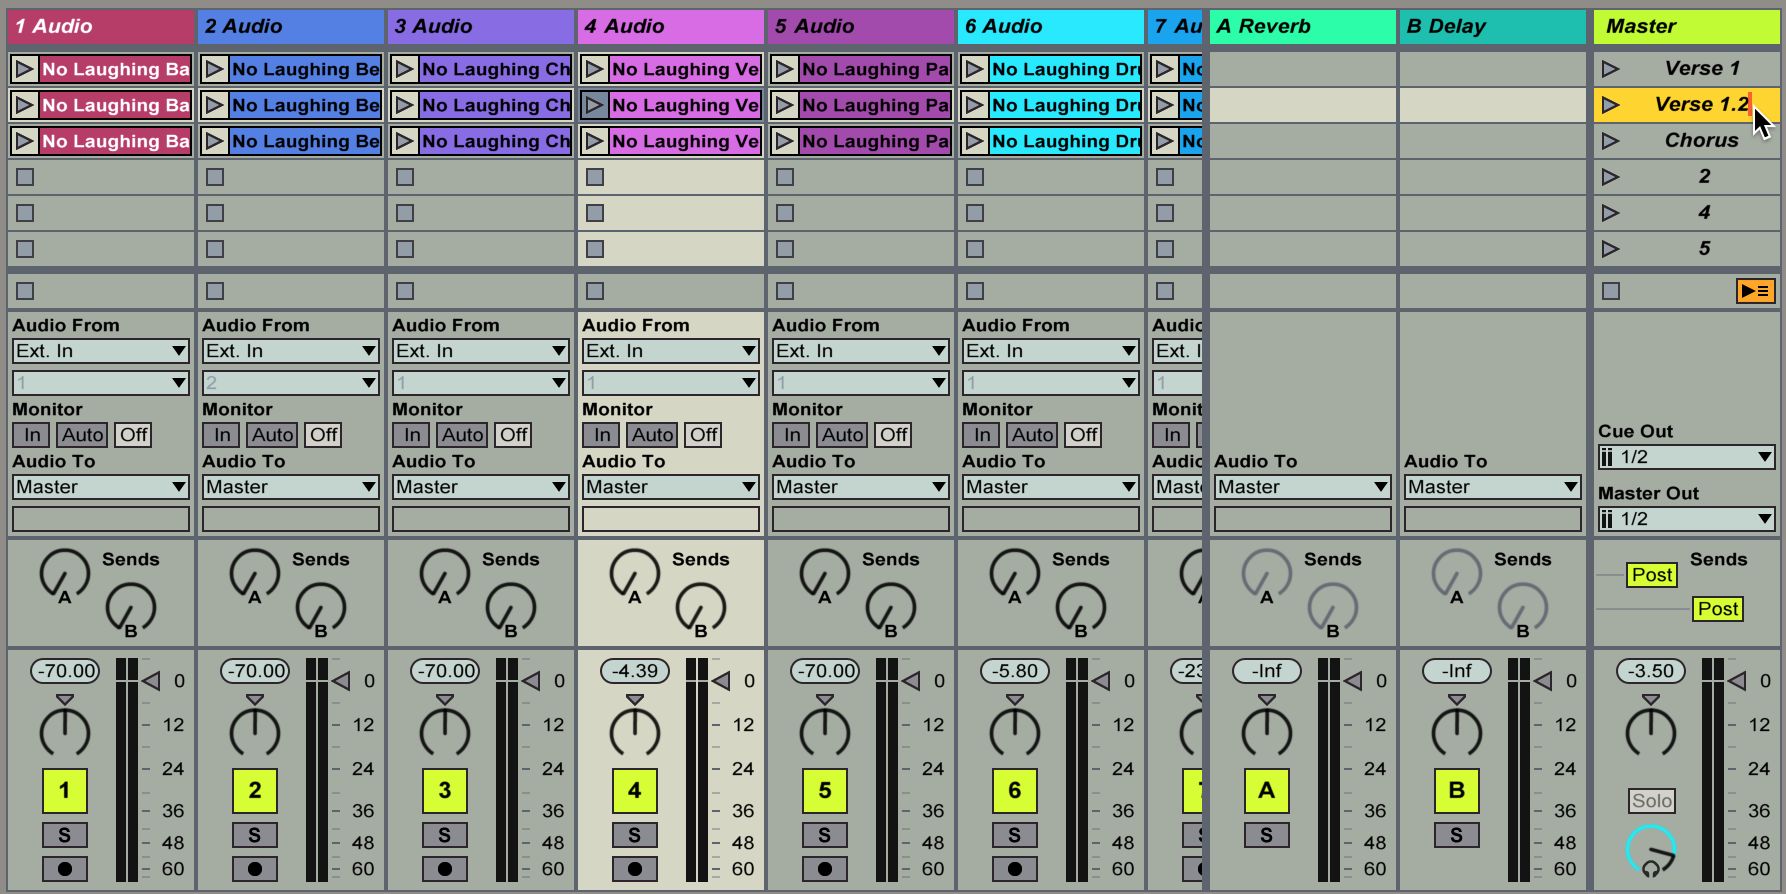
Now, in the Session view, I’ll label this new scene as Chorus 1 and return to the Arrangement view to capture another section of the song. In the case of Verse 1, my current remix has a very long first verse, I discover as I continue to listen. Rather than create a massive loop of what could technically be two full verses, it makes more sense to divide them up. I’ll drop in an additional Locator, and label it as Verse 1.2, to indicate where the division is, and where the Scene Capture will take place.
Once the areas are marked separately within the verse, I’ll go ahead and use Consolidate Time to New Scene to make Scenes in the Session view for each part of the first verse, technically giving me two verses. Remember: this is a remix! I can use a section of a song differently than it is in the original, introduce parts in at different times and even stutter sections by repeatedly pressing the scene launch button.
While I am converting all of my song sections over to scenes, I usually will root through these newly created scenes and make sure some of the new loops aren’t just audio loops of dead silence, or partial clips from other sections of the song. No point in wasting resources playing back a bunch of nothing!
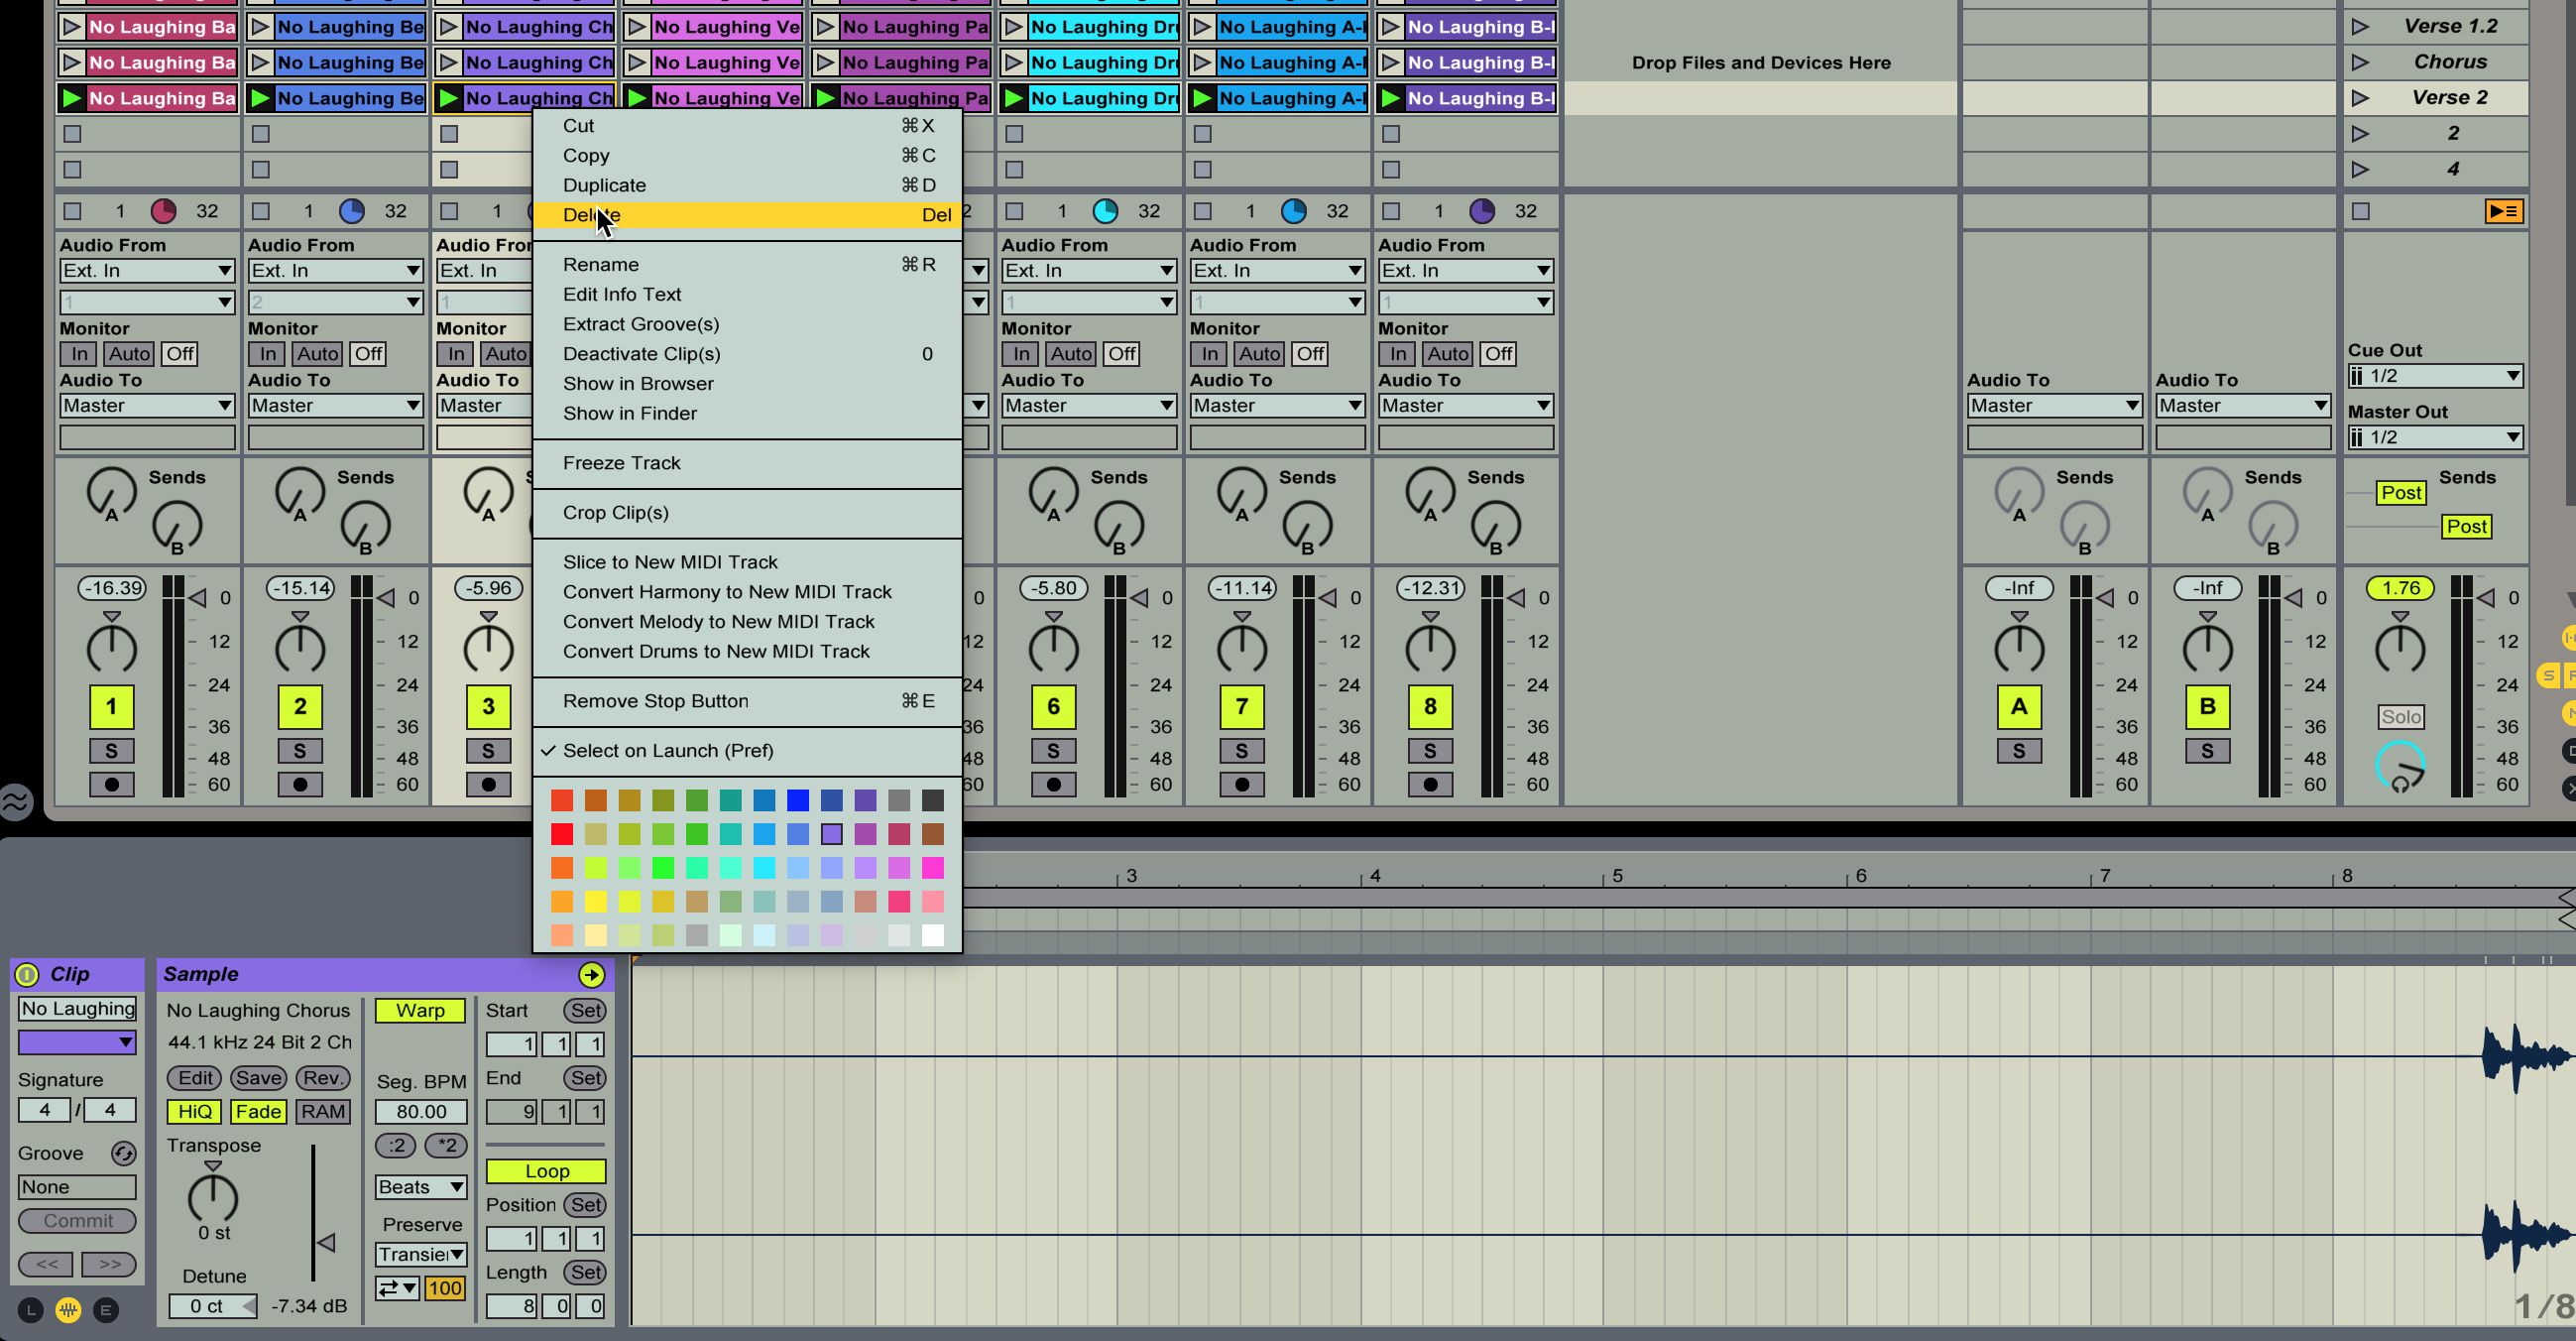
Before I finish creating all of my scenes for remixing from my stems, I’ll label my tracks! Nobody likes doing it but it really will help you stay on top of your mix as you begin adding more instruments, effects, return tracks and so on.
Step 3. Record a Remix…
Once you’ve created scenes for all of the main parts of the original song, it’s not only very easy. But, it’s extremely fun to start knocking out a new, fun and easy remix arrangement. In the Session view of Ableton, I’ll press the Stop All Clips button so that none of the clips or scenes will begin playing once I hit the record and play buttons!
Then, I’ll save my session! I’ve gone through a lot of work to get everything mapped out and this session as it currently is would make a great starting place, a template should I decide I want to come back and start my remix fresh later. If I don’t save, I’m going to have to go back and do all this again if things go south somewhere along the line. When I record the scenes into the arrangement that I made in the Session view, I’m going to need to record over the original arrangement. All of my locators will be invalid anyway. Might as well save this info just in case. Then start recording a new, remixed arrangement!

Conclusion
From here, and whenever I’m ready, I’ve mapped out my scenes well enough that I can record a new remix arrangement with ease. I can cue any part of the song at will. Plus, because it’s all audio, I can start pulling out some synths when I’m ready, add more effects and make that remix even bigger than the original artist had it. I do need to reiterate that you will want to save everything once you’ve got the labels and scenes created. It’s always nice to have a trail of breadcrumbs, especially if you’re under a deadline with an exciting new remix!

Discussion
Want to join the discussion?
Create an account or login to get started!