
If you're familiar with electronic music at all, especially within the last several years, you'll probably have picked up on the fact that a lot of this music begins with simple tones.
For example: An artist will either sustain a note, or play a simple melody in 1/2 notes, or 1/4 notes as they begin a song, or just to introduce a frequency. From there, through modulation, the artist will take a simple tone, and then turn this tone in to a very complex arrangement through modulation.
This is most commonly heard with the simple side-chaining of a kick drum and a low oscillator tone. When the kick drum hits, it causes the bass to drop out. This makes it sound like the bass is pulsing in and out.
Other artists in the Dubstep genre will use LFO modulation to create what sounds like extremely complex synth parts. In actuality they are just playing 1/4 or 1/2 notes as well. And really, what's not to like about this style of doing things? You simply lay out your ideas, and then go back and customize later making them groovier and more interesting.
Well, Reason has a device I'd like to tell you about now that makes this approach much, much easier... and the end result is something that is more than astounding. The Alligator, the focus of this tutorial, takes simple tones, and spits out 3-part arrangements that leave many of us scratching our heads.
In this article, I'd like to guide you through making a very simple melody, and then creating a very complex part from simplicity, using the Alligator.
Step 1 - Make a Melody
In Reason, I'm actually going to draw in a 2-measure melody using a pencil, with a grid value of 1/4 notes.

I'm generating my sound with a simple Subtractor patch, shown below. Feel free to copy the melody above and the patch. The tempo is 80 bpm.

As you can hear, the melody is more suited as a bass part, so I'm going to approach it as one as I engineer it. The biggest thing to know is that we need movement, something that's more… interesting
Step 2 - Create an Alligator
Alright, now that I have something to put in to feed the alligator, let's pull out the little lizard and get it fed! I'll right-click and create an Alligator:

I have my preferences set up to create devices with initialized settings. If your preferences are set up to create devices with presets already installed, don't worry, just right-click on the Alligator and select Initialize Patch:

With the default Alligator settings, you'll notice that there is already a pretty cool 16th-note groove going on for our bass... And some people would be perfectly happy with this. But, not us! Have a listen anyway, though.
Step 3 - Modify your Alligator
Now, it's time to tame that little lizard!
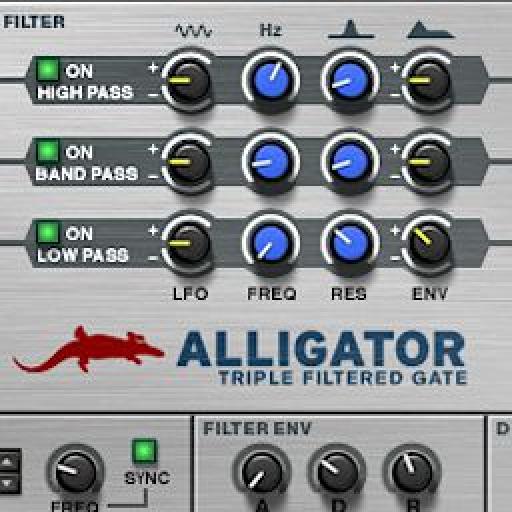
One thing to consider is that when you create an Alligator, it's running your signal through three different gates. Each gate has a filter, though each filter is different: Gate 1 is a High Pass filter, Gate 2 is a Band Pass Filter, Gate 3 is a Low Pass filter.
Since we are creating a bass part with the Alligator, it's pretty important that we put more emphasis on the Low Pass Filter, because this is where the bass sits.
We'll start off by pulling back on the Volumes of the Band Pass and High Pass filtered Gates. This frees up more room for our Low Pass.

Next, let's pan the High Pass, and the Band Pass left and right, while leaving our Low Pass in the middle. This keeps our low frequencies in the center, where they belong in modern music.

Now, let's tighten things up by modifying the Amp Env settings. This increases the speed at which the gates open and close, making the signal coming out much, much tighter. Try these settings:

Let's set up a pattern now, by switching over to Pattern 4. This one is much more groovy than the starting pattern 0.

Okay, let's pay some attention to the low frequency now. We'll lower the Filter Freq and raise the Resonance on the Low Pass gate, and add in some filter envelope. This will make our bass much lower, and punchy. Make your High Pass, and Band Pass follow these settings too.

Okay, things are grooving now, but a little effect would be just what the doctor ordered. Let's add in some delay for the High Pass and Band Pass. Simply copy the settings below.
Note: we're avoiding adding any delay on the Low Pass, this is just so that we don't muddy up our mix by having a low bass duplicated en masse all over our bottom end. Mud is bad! However, notice that I did add some Drive to my Low Pass Gate. This does an excellent job of creating separation between the other higher parts.

Step 4 - Listen to the Alligator
Okay, we have finished our Alligator patch, let's give it a listen now...

Notice the way the Low Pass Filtered gate pushes from underneath, and sort of bounces, while the other two gates glide above the top. This is actually quite incredible because we really have created three parts from one Subtractor line. The parts are EQed with the filters, and they even have effect.
From here, it's important to note that the 3 gates in the Alligator can be routed out to separate channels within your mix for additional destruction.
If you need more info on how to set up separate outs, and even more crazy possibilities with the Alligator, check out the Alligator tutorial here.

Discussion
Want to join the discussion?
Create an account or login to get started!