
I was going to start off by saying, “If you're old school, you may have a few hardware MIDI devices lying...” However, I've noticed more and more, the younger generation seems to be using retro devices like old Roland, Sequential Circuits, Clavia, and more. With this in mind, I'll move forward with my article in confidence knowing that there will be a few people out there that will want to read this if they decide to try Reaper out.
I also have some confidence that this article will be most appreciated due to the amount of research that I had to do just to complete it. There aren't many tutorials out there that cover this! Below, you'll find a carefully laid out instruction on how to use your MIDI synthesizer within Reaper so that you can not only sequence MIDI, but also monitor the audio at the same time.
Apparently, most people are just using plug-ins these days. But us old school, hipster types have needs too! Our Moogs, Korgs and Rolands need some love, right?
For this tutorial, I used a Roland XP-50, which I know is not one of the highly sought after hardware synths. In fact, it's one of those that grandmothers tend to try to get rid of on Ebay. But, I'll have you know I did 4 albums on this thing. And, yes, people have heard of the albums.
01 - Setting Up your MIDI Track with External MIDI Device
Okay, before we can begin, if you are setting up a MIDI track for your external MIDI device (a keyboard, or sound module that generates it's own sound) there are a few steps to this.
First, press Command+T to create a new track. There is no MIDI track/Audio track in Reaper. Though, you can choose an instrument track, which we'll get to later.
Once you've created a new track, click on the audio meter within the track. This will bring up a menu.
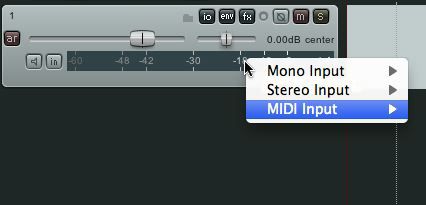
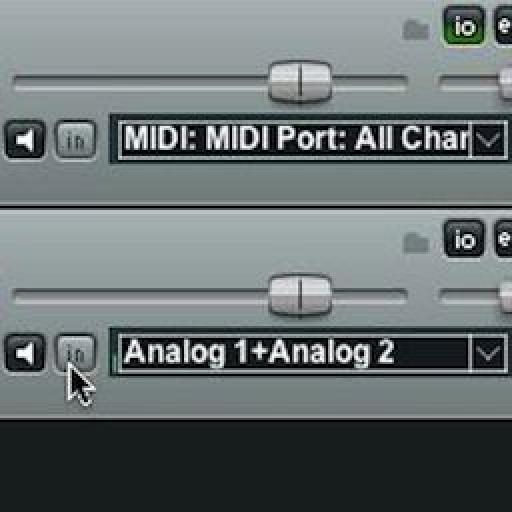
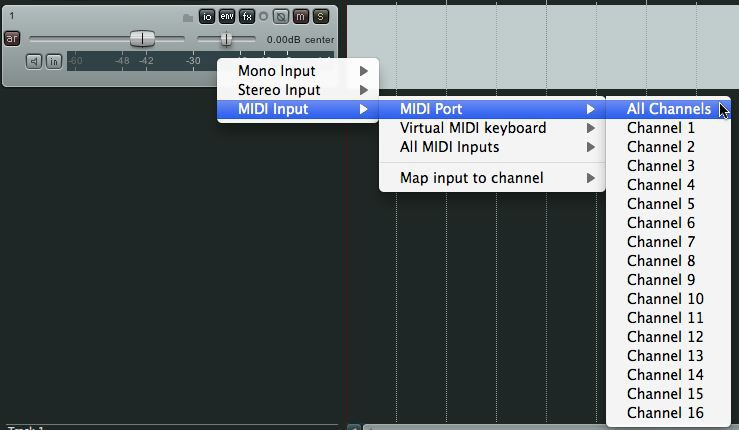
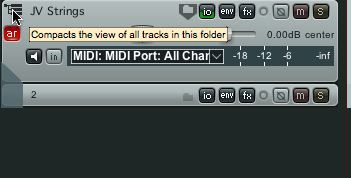
In this menu, choose MIDI Input > MIDI Port > All Channels. This will mean that any MIDI you send from your controller will pipe to all MIDI tracks going in to your hardware MIDI Device.
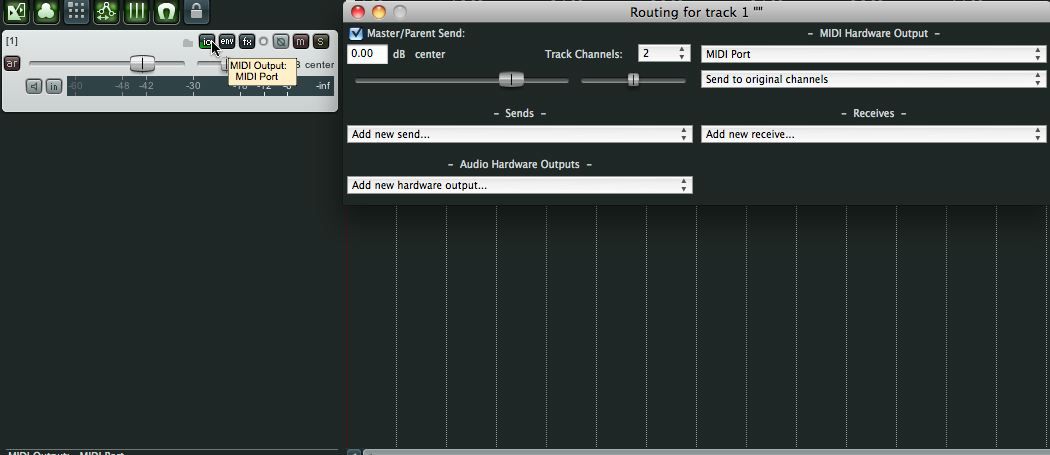
Next press the I/O button, and set your MIDI Hardware Output to the MIDI Interface you set up in the last tutorial.
Finally, press the red Record ARM button and the speaker button, which is the Record Monitor function. See the figure below.
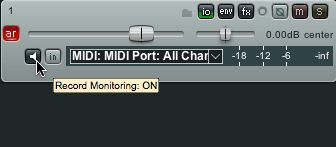
Now, when you press a key on your MIDI controller, you should see a signal appearing as red lines. This just lets you know that Reaper is receiving MIDI. But, wait, I can't hear anything! Carry on to the next section.
02 - Monitoring Audio from an External MIDI device, while Recording
Now, at this step of the game, it's important to remember that MIDI only sends instructions to your hardware MIDI device. You need an audio track to monitor the actual audio signal coming from your hardware MIDI device.
So, we'll actually need to set up an Audio track for this external hardware device as well so that we can actually hear it.
Again, press Command+T, this will create another track within Reaper. Remember, Reaper does not have set Audio tracks and MIDI tracks like other DAWs.
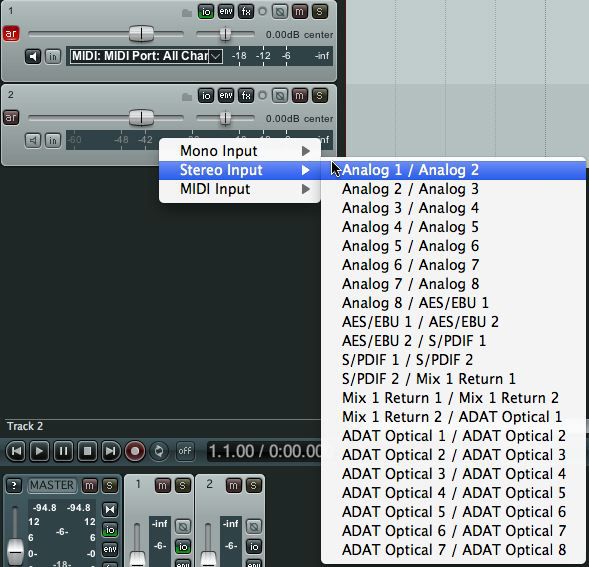
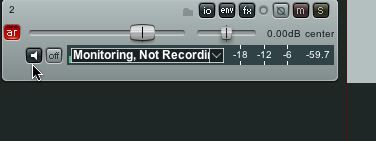
Once the track appears, you'll need to set up your audio input for this track. Again, click on the audio meter within the track like this:
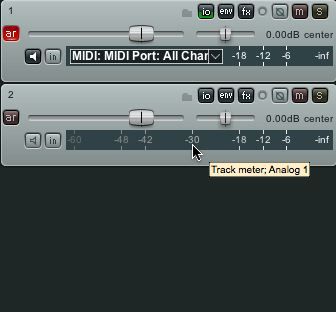
A menu will pop up at this point. Choose the input on your audio interface that your MIDI device is connected to. Audio, this time, not MIDI!
Okay, this is where Reaper gets a little weird and unconventional to what you may be used to if you used Logic Pro, or Cubase, etc. You need to first Arm the audio track by pushing the small, red AR button that is your audio input track.
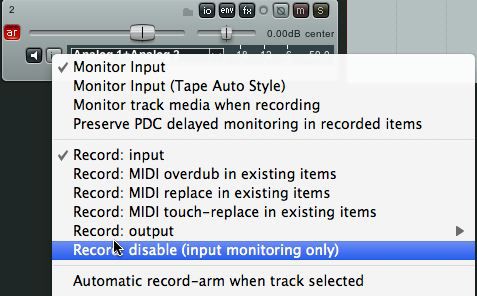
But wait! If I arm the track, won't I be recording audio, as well as MIDI when I record? This threw me off at first, but if you click on the in button, shown below...
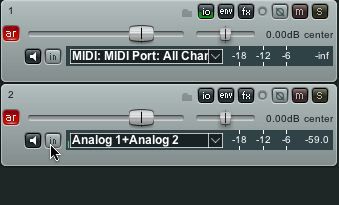
... And then choose 'Record Disable (Input Monitor Only)' then you can hear your MIDI without having to record audio at the same time as your MIDI. Also, make sure you push the monitor button after you do this, it should be white, not green....
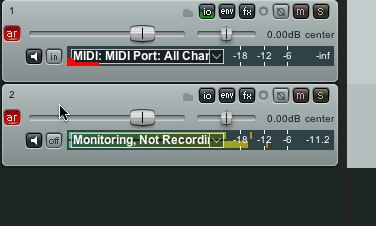
Now, if both tracks are armed, and monitoring, you should be getting signal.
This seems like a lot to go through just to set up a hardware MIDI device, but once you get it down, it goes pretty fast. Also, there are track templates that you can set up, which we'll get in to in a future tutorial.
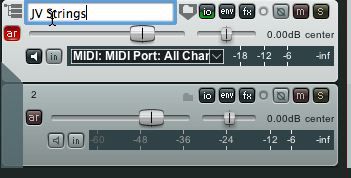
One thing that I found very handy to do was to use the folder function on my MIDI track and it's corresponding audio track for monitoring. If you press the folder button, right next to the 'io' button, you'll make this track a folder track, and it will automatically group the track below in with this track.
This helps keep the MIDI track, and it's monitor track together. From here, if you click in the blank space next to the folder button, you can label your track. I would highly recommend getting in the habit of doing this. Not just for this DAW, but for all DAWs. This means you will spend less time looking around, and people that you collaborate with won't be lost and asking you a lot of questions!
Finally, if you press the small routing button 'Compact button' in the corner of your new folder track, you will condense the tracks down, giving you much more work space!
Okay, hopefully you've received the help that I couldn't find when writing this article! Reaper is a lot of fun, it's reliable and very cool. It appears to need a little more polish in the MIDI monitoring area for us old school synth types, but it makes up for it where it counts! In the next tutorial, we'll get in to virtual instruments!

Discussion
Want to join the discussion?
Create an account or login to get started!