

When musical inspiration strikes are you prepared? So, you've got a musical idea and you want to put that idea in Logic the last thing you want is to lose that potential hit track while setting up your workspace and create the number of tracks etc you need! There's no need to start from scratch each time you launch Logic when you can start straight your own template that can help you to transfer your ideas from your head onto your Mac quicker and with minimal fuss?
In this Quick Tip, we're going to explore how to customise your project and then create your own templates in Logic 8 and 9. Not only that, but we'll explore how you can easily organize your templates into custom collections. Read on to find out more!
Step 1 - Starting Up
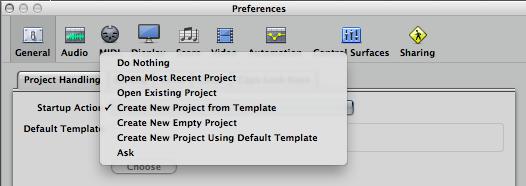
Ever wonder why your most recently opened project is opened every time you launch Logic? Knowing what action Logic takes upon launching is fundamental to getting started quickly and efficiently. You can customise this in Logic Pro > Preferences > General [Project Handling]
From the Startup Action drop-down menu you can tell Logic to do a number of actions, from doing nothing to create new project from template. The later will allow you to choose an existing template (or empty project) from the New Templates window.
Step 2 - Collections & Templates
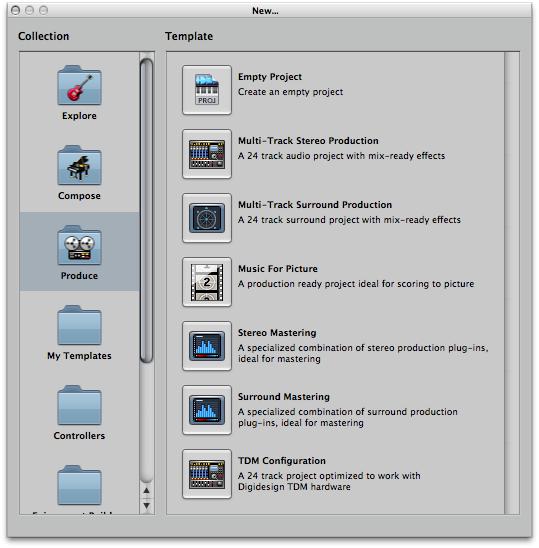
You may be very familiar with the New Template window in Logic already... On the left column are Collections (basically folders) which contain project templates. A template is essentially a project. If you have ever chosen to create an "Empty Project", you'll be asked to create tracks to populate your Arrange area, and from there it's necessary to load instruments, effects, channel strip settings, set up the editors, etc from scratch.
However, there are other available templates which can make life easier by doing all that work for you. Of course, Apple have included a number of templates which are useful and great guides.... They are designed to be great starting points for a variety of needs. e.g. If you wanted to start composing a Hip-Hop track then choosing Compose > Hip Hop may be a great place to begin. Likewise, if you're creating music for picture then check out Produce > Music for Picture. But by no means should you treat these templates as the be-all-and-end-all. They are only suggested guides. The fun really starts when you decide you want to create your own template...
Step 3 - Starting from Scratch
Although I'd highly recommend opening and looking at all the pre-included templates on offer, we'll start by creating our own from scratch.
In any of the 3 included collections (Explore, Compose and Produce) you will see Empty Project at the top of the list. Choose it to create a vanilla project.
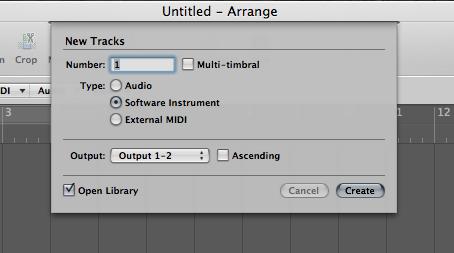
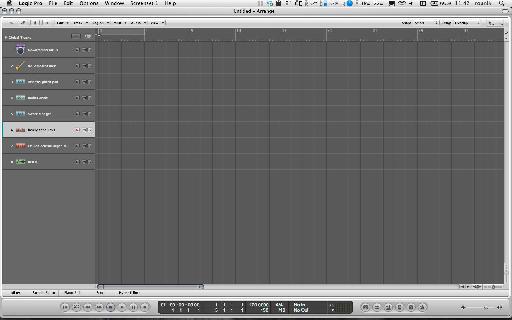
You'll immediately be presented with the New Tracks dialogue. For this Quick Tip, I want to create a project I'll use for Ambient/Electronic production. So I'm going to create 8 Software Instrument tracks to begin with.
Step 4 - Channel Strip Settings
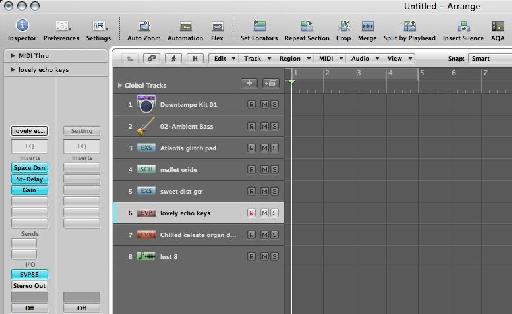
I have some favorite starting point sounds when composing. Adding these to a template will make it much easier to jump straight in to creating and recording ideas. So for each Software Instrument track I'm going to load up a channel strip setting from the library... Often a couple of different Ultrabeat/EXS24 drumkits, some synths, pads, world instruments... It's also useful to set up multi-instruments and complex environments and save them as templates.
Step 5 - Customizing your Workspace
This step really depends on the purpose for your project template. Any changes you make to the workspace and editing windows will be reflected in your project template... So, I'm going to hide the top Toolbar View > Hide Toolbar to give me more screen real estate. Next, I won't need the Library, so I'll close that. For this main Arrange area I'm not interested in the Inspector, so I'll hide that using the key command I. Finally, I'll use the zoom sliders to zoom in vertically and zoom out horizontally. So, I get something without any unnecessary distractions like this!
Step 6 - Screensets
Screensets are a great way to save commonly used screen layouts and call them up using the numeric keys on your keyboard (or from the Screenset menu).
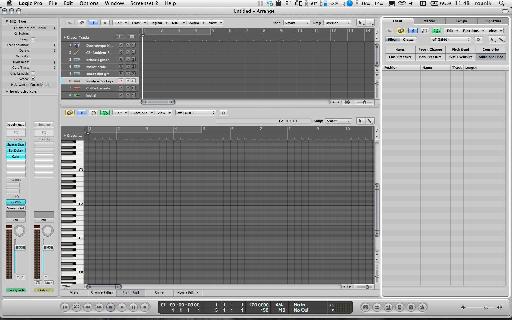
Press 2 on your keyboard. I'm going to make Screenset 2 into my Editing area. For this area I'm going to:
- Hide the Toolbar
- Zoom out vertically in the Arrange area
- Open the Piano Roll and zoom to taste
- Open the Event List
It'll look something like this:
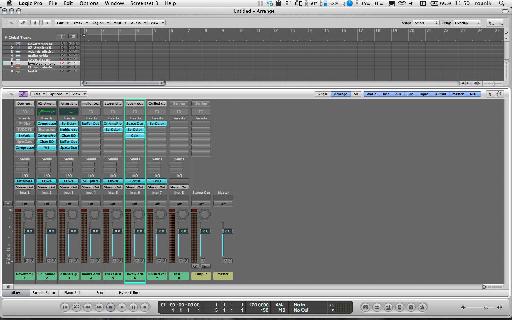
Next, I'm going to create a 3rd screenset for Mixing by pressing 3 on my keyboard:
- Hide the Toolbar (again, this is just my preference)
- Hide the Inspector
- Open the Mixer
- Zoom out vertically in the Arrange area
Now switching between these screensets is as easy as pressing 1, 2, 3 on your keyboard. No, really, it literally is!
Note: You can lock screensets from the Screenset menu to prevent any changes to your layout on that screenset from being permanent. The screenset will always revert back to it's layout when you locked it. You can unlock it from the save menu.
Step 7 - Saving your Template
After you've happily finished customising your template it's time to save it so you can access it from the New Templates window.
Choose File > Save as Template
Here you can create a folder(s) for your templates. I'd highly advise this as any folder you create here will appear as a Collection in the Templates window and it's a great way to organize your templates into categories.
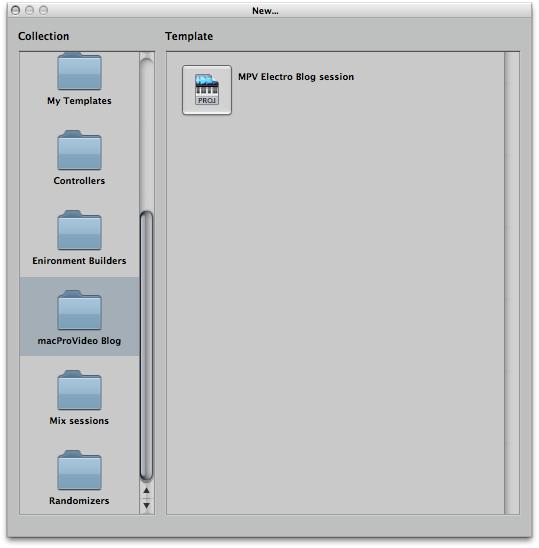
I've created a folder called macProVideo Blog. This will appear as a collection. My template will be called MPV Electro Blog session.
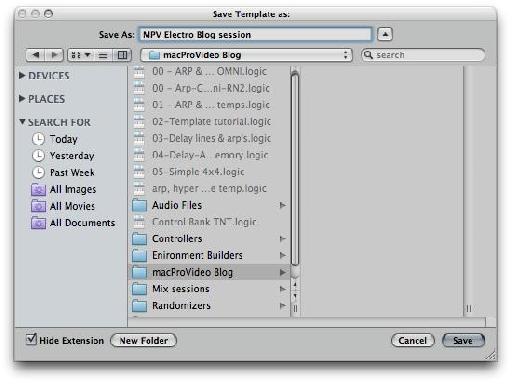
Click Save once you're done.
If you want to find or manually organize your customized template files in the Finder, navigate to:
~/Library/Application Support/Logic/Project Templates
.
Step 8 - Opening your Template
It's time to close your template project. Logic will ask if you want to save it (as a project). Since you've already saved it as a template this is not necessary.
Choose File > New and you will find your Collection and template in the New Templates window.
Using this technique you can create an array of great starting points for all your Logic project needs. Once you've created some templates if you wish to share them with the rest of the Logic community visit our Logic forums here. Thanks!
Want to learn more? Check out our Logic tutorials.

Discussion
Want to join the discussion?
Create an account or login to get started!