
Whether you are creating a noise bed, an atmospheric back drop, a fill, a breakdown or a build, the humble noise based sweep can come in extremely handy. It's a staple of the synthesis world and it's something you should know how to build with your eyes shut.
In this tutorial I'll show you how to build a solid noise based effects patch using Ableton's 'Analog' synth. Of course you should be able to repeat this technique using any other similar virtual analog synth.
Step 1 - Choosing the Oscillators
When programming synth patches from scratch choosing the oscillator types is right up at the top of the list of things to do. As we are creating a noise based effect you can probably guess what type of oscillator I plan to use here... That's right noise!
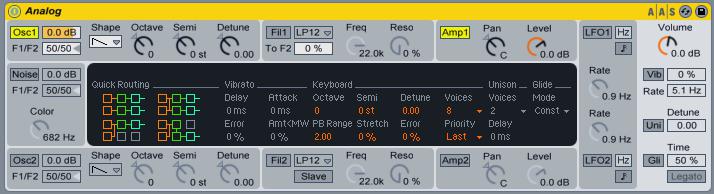
Analog in it's initialized state
Analog actually has a dedicated noise based oscillator, so there is no need to change modes or dip into any menus here. It's simply a case of turning off the standard oscillators and turning on the noise based one. Simple.
I have tuned the frequency all the way up, this gives us what is known as white noise. This just means it contains all the frequencies in the spectrum and is probably the most useful to work with as a basis for this sort of patch.
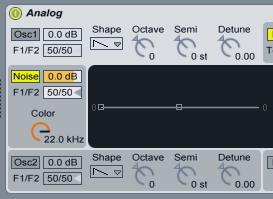
Using Analog's noise generator
Step 2 - Setting up the Filter
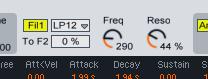
Setting up Analog's filter section
Next we need to concentrate on our filter settings. I have used a low pass model with a decent amount of resonance. This setting will allow us to sweep through the entire frequency range and the resonance should add just the right amount of character.
You can dial the filter down for the second as we will set up an envelope to control it in the next step.
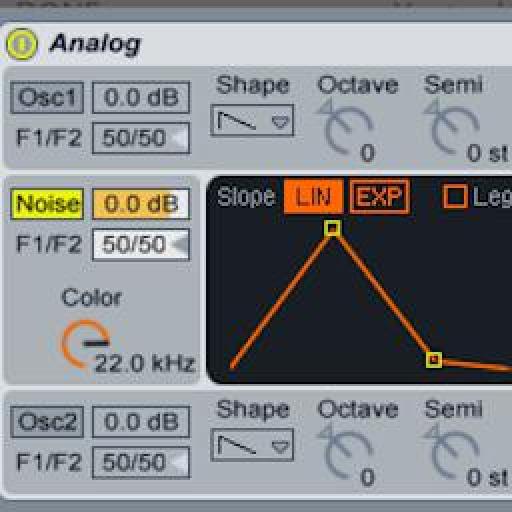
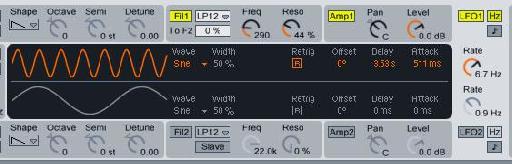
Step 3 - Onto the Envelopes

Analog's innovative envelopes
Analog actually has an independent envelope for each section and this is cleverly displayed in the central window whenever you select the filter, amplifier or oscillator. Very cool.
I have set a linear based envelope to move the filter cut off up and then down, creating a nice simple sweep through pretty much the whole range. The amplifier was then set with a similar envelope plus plenty of release to let the sound fade out naturally.
Step 4 - LFOs and Final Touches
You now have the basis for a simple sweep but it you want to take things a little further you could add some LFO modulation to spice things up a touch. I decided I would use an LFO to modulate the pan very slightly but you could alter the filter or even the resonance.
Introducing a light 'wobble' with the LFO
This is just the start of what could become an entire library of sounds. So save this and continue to play with it, you can then have a different noise based effect for every project you work on.

The final patch
Here's what the final patch sounds like:
Interested in learning more about Ableton Live with an electronica twist? Check out this tutorial below:


Discussion
Want to join the discussion?
Create an account or login to get started!