
The functionality of AudioSuite plug-ins has received some welcome attention in the latest version of Pro Tools. The user now has the ability to create 'handles' which exist outside the boundaries of the Edit selection, allowing you to trim the processed clip beyond those boundaries.
Before and After
In lower versions of Pro Tools, when you rendered a clip (or region as it was known) that was its 'size'. The rendered file was exactly the same duration as the selection, so if you decided that the effect would sound good on a bit more of the track your only option was to render a fresh selection.
In Pro Tools 10 you can decide to apply AudioSuite processing to anything from 0 to 60 seconds beyond the clip boundaries, or choose the whole file. This then allows you to change your mind about how much of the track should be affected by the chosen process, after the processing has taken place.
How to Specify Handle Length
In Pro Tools 10, AudioSuite plug-ins have gained a couple of extra options next to the 'Render' button on the plug-in window.
- The Handle Length field - here you can enter any value from 0 to 60 seconds.
- The Whole File option - select this to process the entire file
It is important to remember that whatever you select here, you will initially only be able to see and hear the rendered material for the duration of the current selection, until you Trim the processed clip.

Handle Options.
Trimming a Rendered Clip
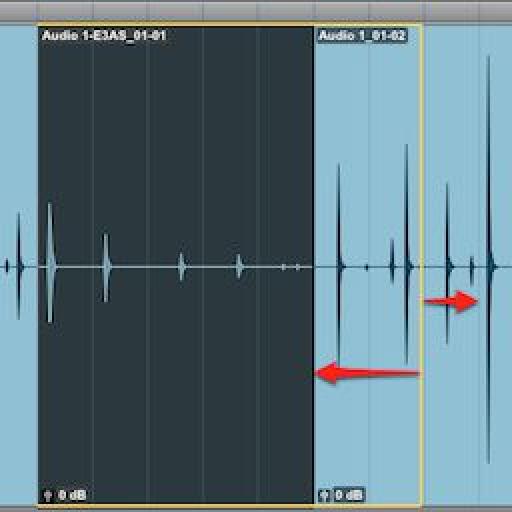
Once a clip has been rendered you can trim the clip boundaries with the Trimmer tool (or the Smart tool as Trimmer) up to the limit you defined in the plug-in window. The newly extended rendered clip will replace the un-rendered material at that position.

Trimming a rendered clip.
Setting Preferences
You can set the default Handle length in the Processing tab of the Preferences window (Setup > Preferences)

AudioSuite preferences.
Clip Gain
In most cases whatever clip gain has been applied to the whole clip will be rendered to the new clip (which is based on your Edit selection) and the Clip gain will be reset to 0 dB. This is carried out in the following order:
- Render Clip gain
- Apply AudioSuite processing

Clip gain before applying processing.

Clip gain after applying processing .
If however you have chosen either of the following options then the Clip gain will not be rendered and will be preserved with the clip:
- File mode set to 'Overwrite File' (Rendering Mode set to 'Clip by Clip')
- File mode set to 'Create Individual Files' (Rendering Mode set to 'Clip by Clip')

Clip gain before applying processing.
")
Clip gain after applying processing (Rendering Mode set to 'Clip by Clip').
Want to learn more about Pro Tools 10 from an Avid Learning Partner? Check out these Pro Tools 10 tutorial-videos.

Discussion
Want to join the discussion?
Create an account or login to get started!