

A while back I was wrestling with trying to correct phase for my microphone set up. The microphones all had a different distance between one mic to another. This would not have been such a big deal with only two mics, but I have 5 microphones in use. That tends to "complicate" things, just a little bit. The end result is, if you have more then one mic and they are not in exactly the same position, you're most likely going to experience some phase distortion. The farther apart your microphones, the more time lag and thus more phase distortion.
Bring on Logic's Sample Delay
Rounik Sethi, Lead Editor for MacProVideo.com suggested using the sample delay to move the forward microphones back. Indeed, I did just that. The goal is simple. Use the Sample delay to move the waveform that starts first, back to the waveform that starts last. See Figure 1.
Since I had 5 microphones, I adjusted 4 of the 5 microphones using the Sample Delay on each channel strip, leaving the microphone furthest from the source with no delay of course. Each microphone tested was also checked using Logic's gain plug-in and selecting invert phase to watch the results of my sample settings as they were adjusted. I monitored the Multimeter on my main output. I watched the dbs and with the multi meter, I was able to also see the frequency/db meter in real time. I would then simply adjust the sample delay up or down until I obtained maximum signal reduction with the inverted phase. That maximum reduction is only going to occur when the two signals are in fact at their "Zenith" or most perfect alignment and should cancel each other out.
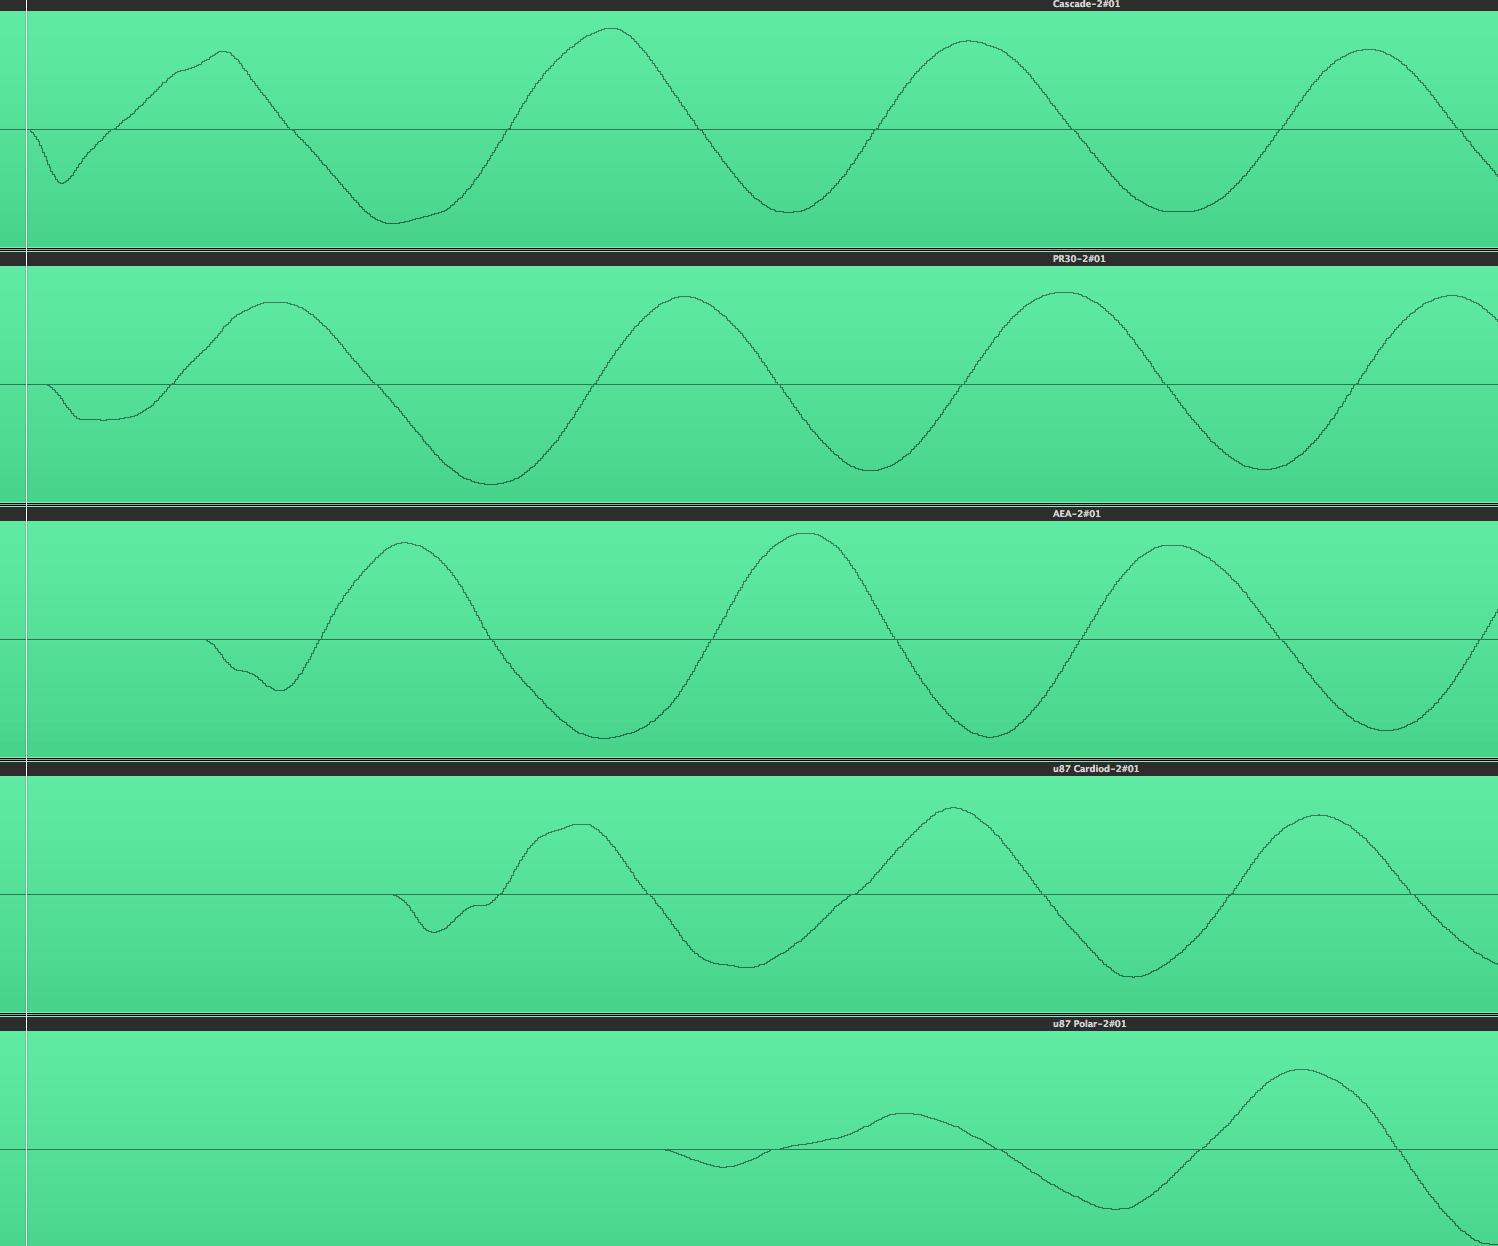
Figure 1 - Signal brought into Logic from 5 different microphone spaced apart at varying distances. Starting at the top, the closest mic, to the bottom, the furthest mic positioned from the speaker cabinet.
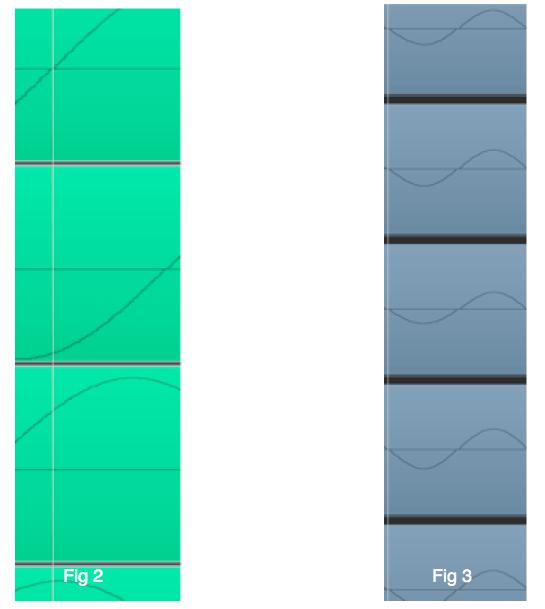
Figure 2 - Play head placed precisely at the beginning of the first waveform, you can see the obvious phase distortion occurring from the successive waveforms. Figure 3 - After adjusting the Sample Delay on each track except the farthest microphone, the 4 tracks are moved and with the play head set precisely to the start of the top waveform, the successive wave forms are now in perfect alignment.
Now because they are two different microphones and because phase works not just in a forward and reverse way, it can drop the signal -30 dbs if you consider they are real world and not virtual world perfect. The variables that exist prevent 100% total phase cancellation unless more physical work and actual three dimensional phase cancellation is able to be done, three dimensionally. For this purpose, the sample delay was working 90% so it was suffice. You may have better results depending on your set up, but the principles are the same and you may achieve no sound which would result in 100% total phase cancellation.
Check out Singing Canary Productions Recording Guitars, Chapter two, section 8, Time Adjuster, for a look at what I have just described. but with a two mic system and using Pro Tools instead of logic, they still use the sample delay to create the same effect. Also check out Singing Canary Productions, The Art of Audio Recording, Chapter 6, section 29. Both tutorials are very good and perfect for anyone looking to up their game on Microphone use and adjustments.
Latency and Normalization Tricks
To get the best results, you should do two things, make and correct your system wide latency by adjusting it for your system's IO roundtrip latency. For more info, I strongly suggest Logic 207, Logic's Latency Toolbox by Tom Rice. Second, check to see if you can adjust the microphone level up or down on one of the two microphone channel strips to see if that helps the situation. The goal is to optimize and obtain maximum phase cancelation. If your levels need adjusting, open up the sample editor, select the recorded test signal and use the normalize function until it is maximum. Do this for all tracks and they should all be equally set to 0.0 db. Now you know the signal is equal and they should no longer need any level adjustment. This will help your efforts considerably.
(Ed - Bear in mind: Normalizing audio in the Sample Editor will destructively change the levels of the original audio file. You can use Logic's 'Bounce Tracks in Place' feature and tick 'Normalize' to quickly create new audio files while leaving the original recordings unaltered).
In the end, you can use this technique for each mic gauged against the one furthest from the recording source, which in my case was a speaker cabinet.
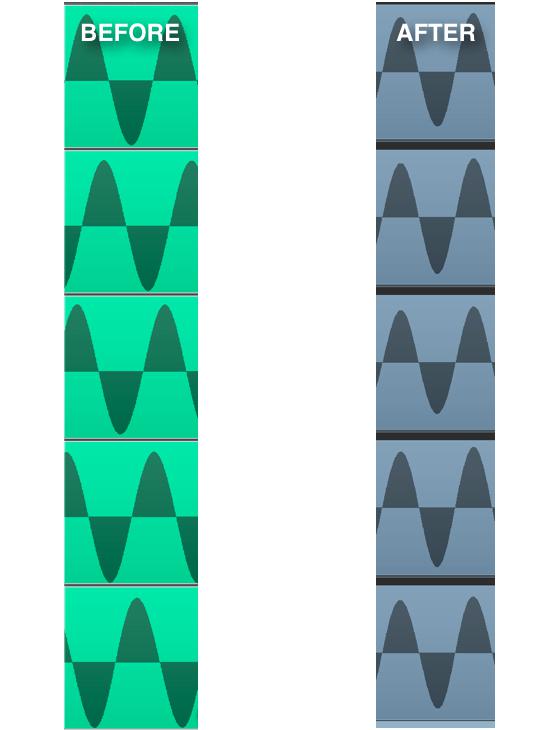
Figure 4 - Before and after screen shots of the wave forms zoomed out. There is a clear advantage of minding your microphone phase and using the Sample delay is an excellent way to get through a challenge of this type. 'Before' is the actual phase of the mic signals coming into the DAW. 'After' is after setting up the sample delay and bouncing out each mic track to the DAW as a recorded track.
As an additional check, I did try this same technique by checking each mic against the other based on the delay settings I settled on for the first test. That did yield some good results in that each mic was showing optimization from one to the other. In other words, they were in phase in any combination which is exactly what you want.
There is undoubtedly an alternative method if you can twist your mind enough but for just using the sample delay feature built into logic, that is a fast and very effective method for making a multi microphone rig work together.
The Future?
I would hope that a future version of Logic comes up with a feature that is called Mic phase correction which allows for a similar and more extensive phase correction that could be instantiated directly on the channel strip for the particular microphone. Considering the algorithms used, it could also take into account the total number of microphones, one to the other and using a pre determined test signal, maybe a frequency sweep and at a set level, the software would maintain the ability to correct the phase differences and keep your sound imaging as accurate as possible. But in the meantime check out these excellent recording resources.
Here is a shot of the microphones group and the sample delays inserted on each channel. The one mic without the sample delay plug in was the furthest from the speaker cabinet.
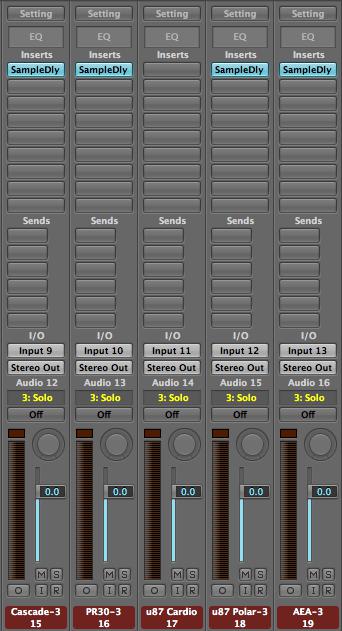
Figure 5a - The Channel Strips each set up with a sample delay except the farthest mic from the source.
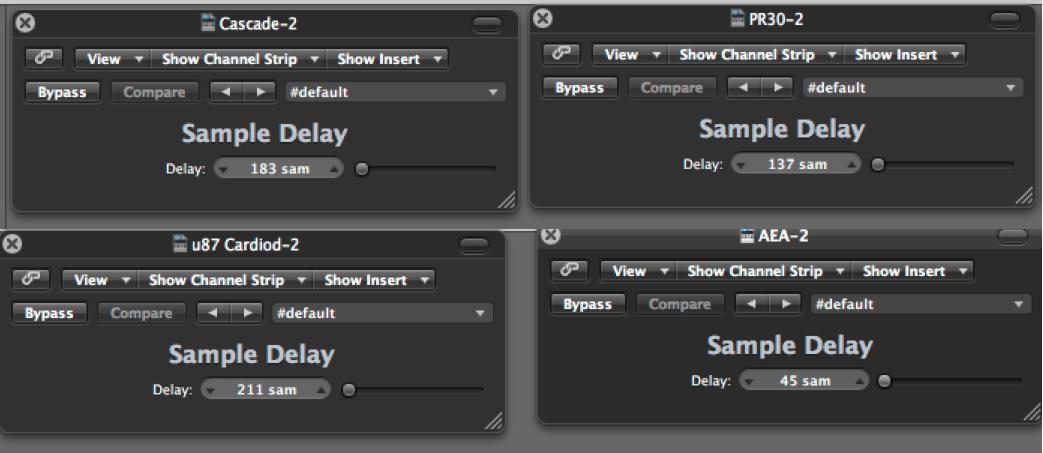
Figure 5 B - the individual delay settings for the 4 different mic placements.
Until next time! Enjoy recording and zapping that latency issue for good.
Discussion
Want to join the discussion?
Create an account or login to get started!